DETAILED INVENTORY TRANSFER MANUAL

KPrimeSoft Support
Last Update 2 years ago
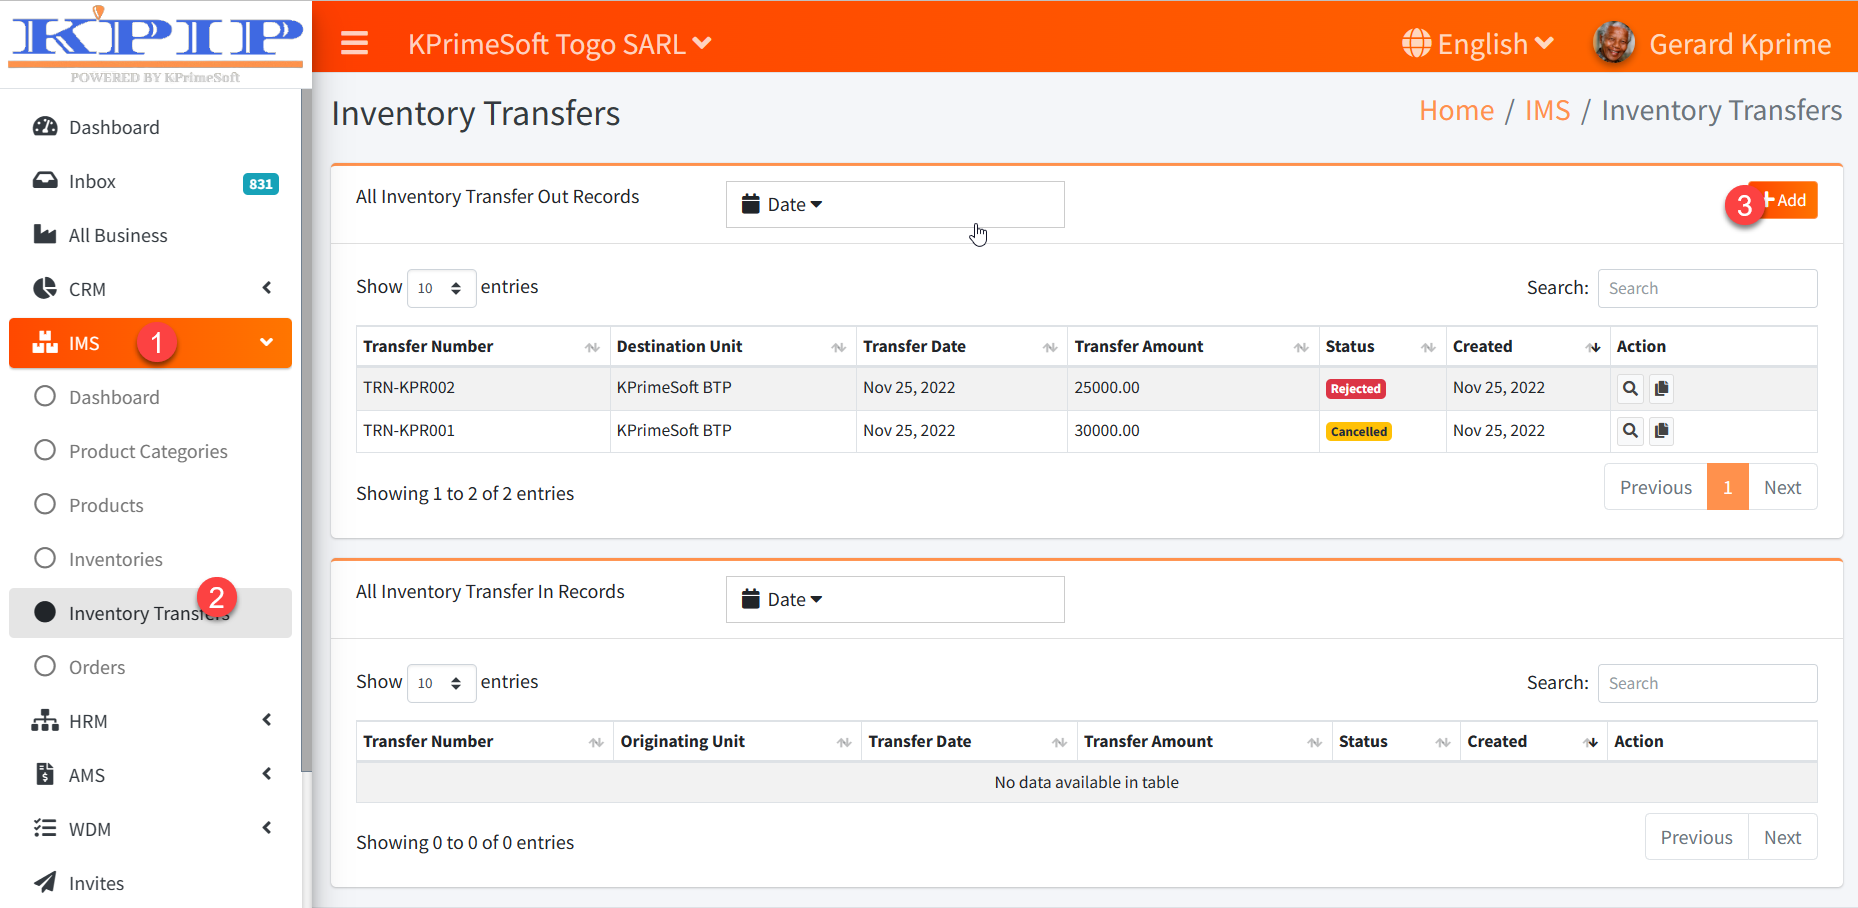
Inventory transfer allows you to send a portion of a product's stock from store A to store B. To do this, go to IMS > Inventory transfers. See the screenshots.

- Choose receiving store (B)
- Choose transfer date
- Choose the product to transfer
- Select the origin of the product (Production/Sales)
- Enter Transfer Quantity
- Enter the actual price of the product
- Enter the transfer price of the product
The product transfer is created.
The status of the created transfers is represented by the Status part of the summary table.
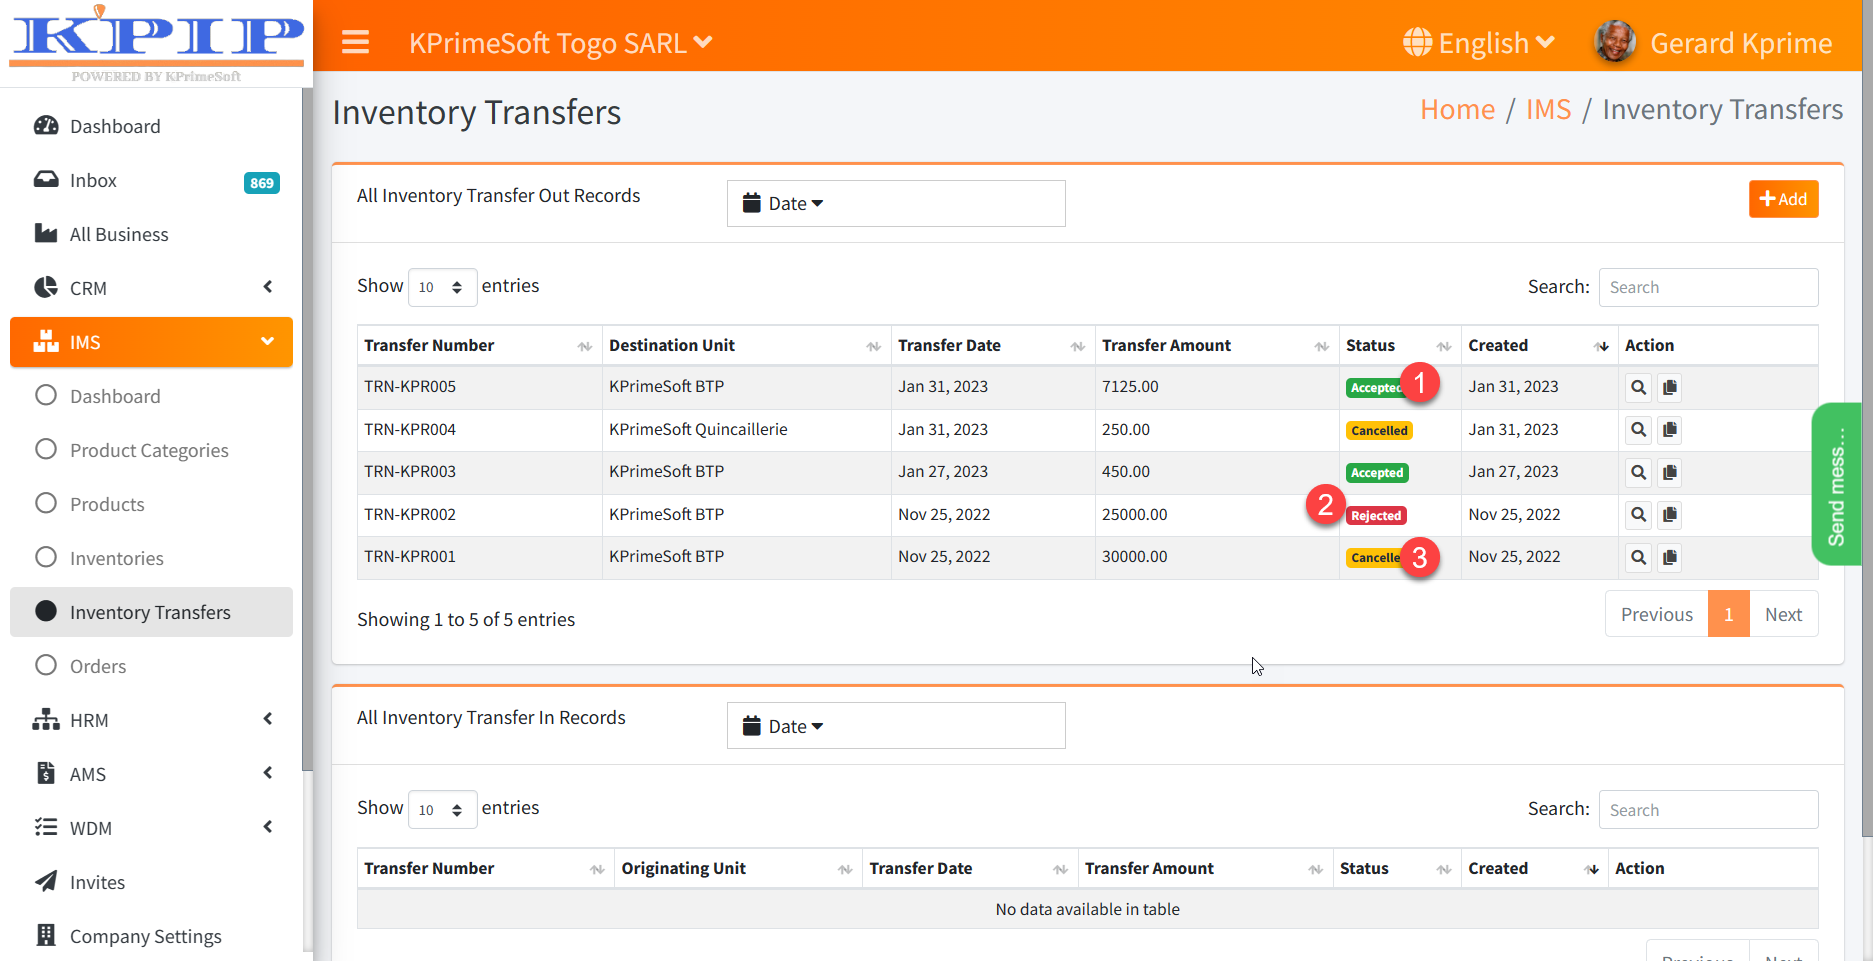
- Accepted if store B confirmed the transfer by accepting the transfer request.
- Rejected if warehouse B has refused the transfer
- Cancelled if the shipment of the order is cancelled on the side of the store that created the transfer request.
N.B.: It is necessary that warehouse B accepts the transfer before the transfer can take place.
Go to IMS > Inventory Transfer in the Action section, approve the transfer. See the screenshoots.
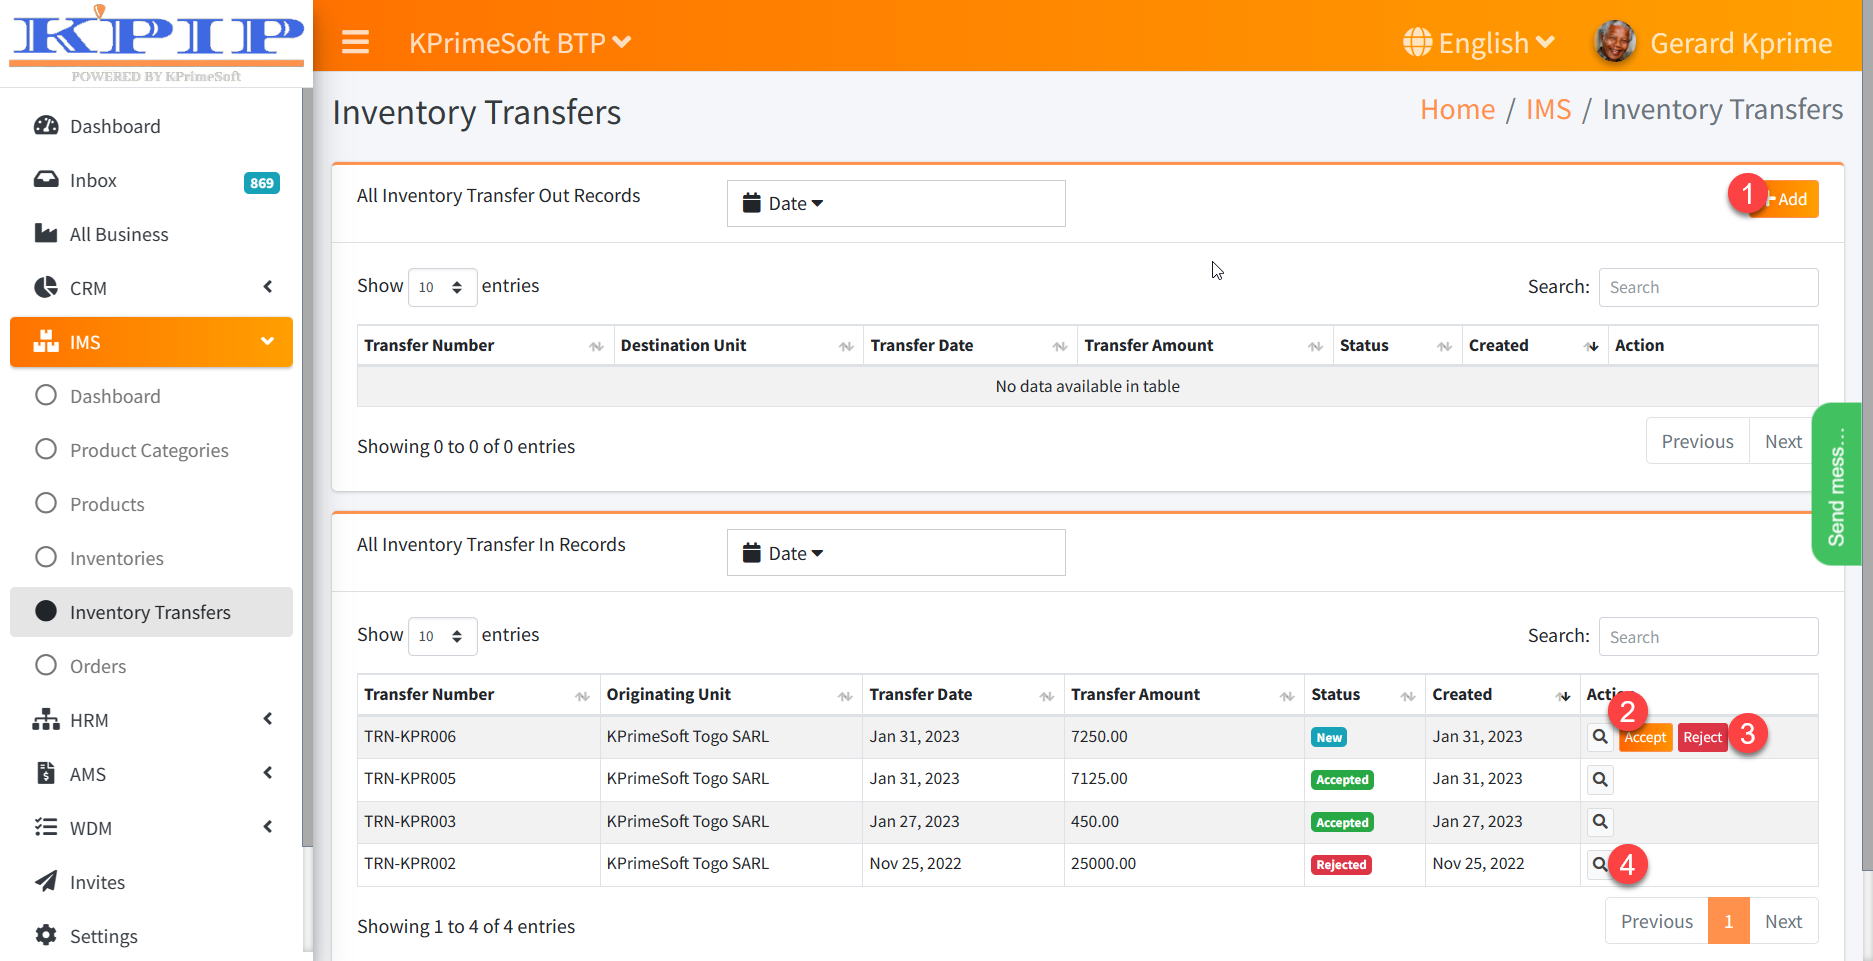
In store B, we also have the possibility to create a transfer request. The requests sent to the store are pending rejection or acceptance in the table below.
- Add to create a transfer requirement
- Accept to accept the transfer requirement
- Reject to reject the transfer request
- View the request
So to accept the request, click the Accept button and then fill out the Send form.

- Choose the inventory type.
- Select the transaction type.
- Click 'Accept' to confirm.
- Adjust the transfer price as desired.
