HRM User manual
All about HRM

KPrimeSoft Support
Last Update 3 anni fa
INTRODUCTION
The HRM module encompasses several functionalities, each with distinct objectives. These functionalities include: Dashboard, Divisions, Departments, Jobs, Employees, Expense Requests, Expense Decisions, Notifications, Attendance Sheet, Groups, Leave Requests, and Leave Decisions.
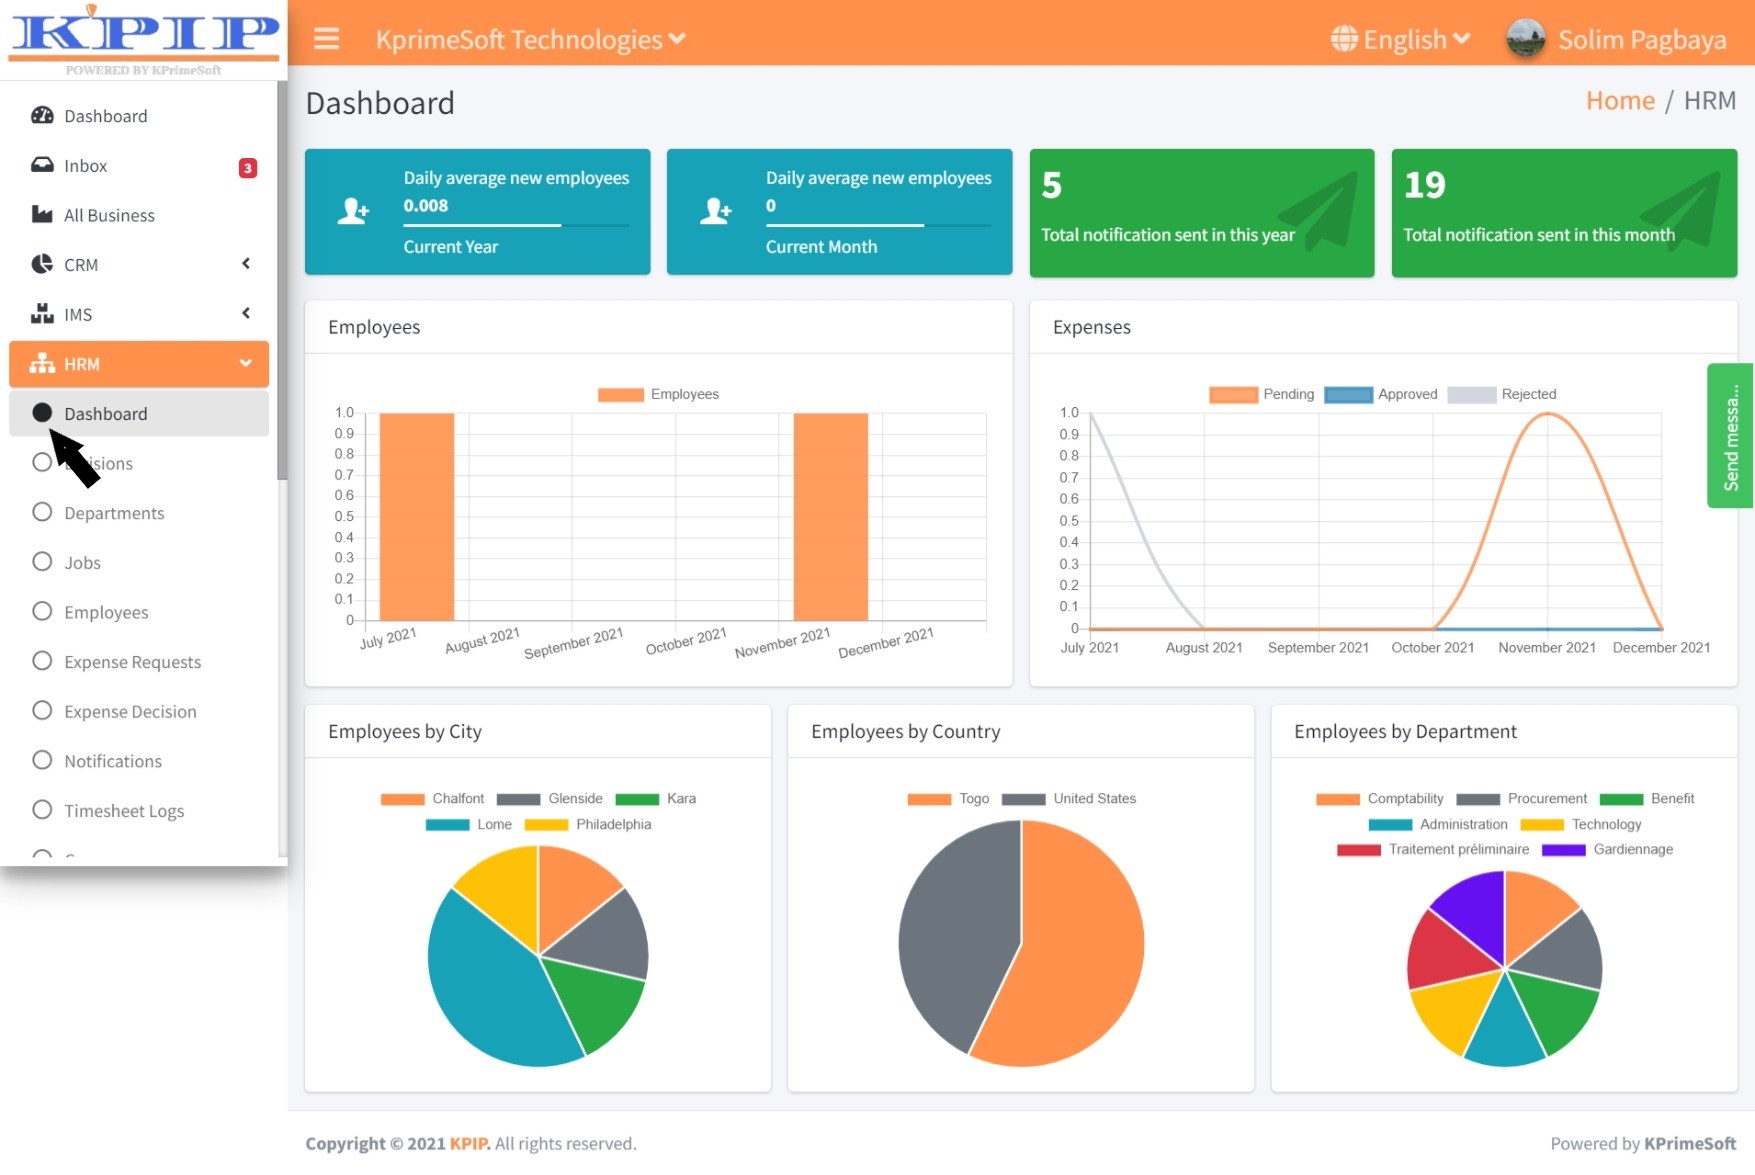
I - DASHBOARD
This section offers a comprehensive overview, including the count of newly registered employees per month, segmented by city, country, and department. Additionally, various graphs display the status of expenses—whether they are pending, approved, or rejected.
II - ORGANISATION
1. DIVISIONS
This feature enables you to add divisions of your company, if they exist.
Upon clicking the "Division" feature, you will be directed to a new page displaying all the divisions that have already been created. In the "Actions" section, you will have the option to edit or delete a division.
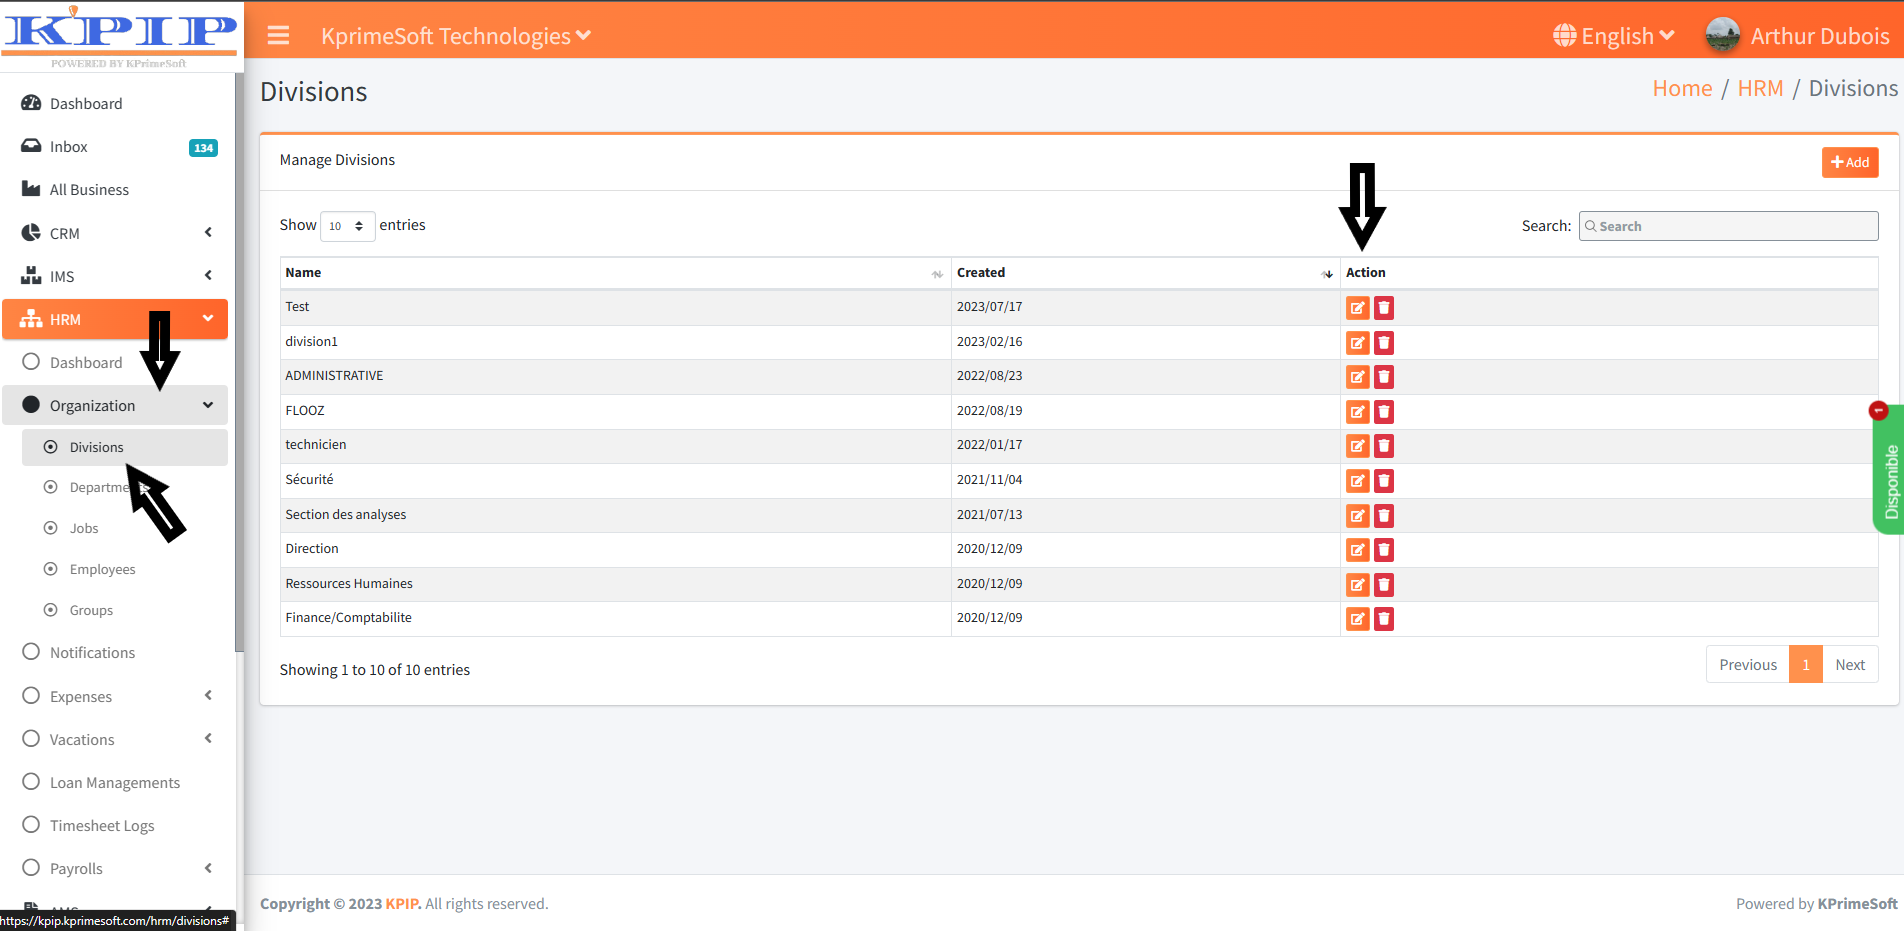
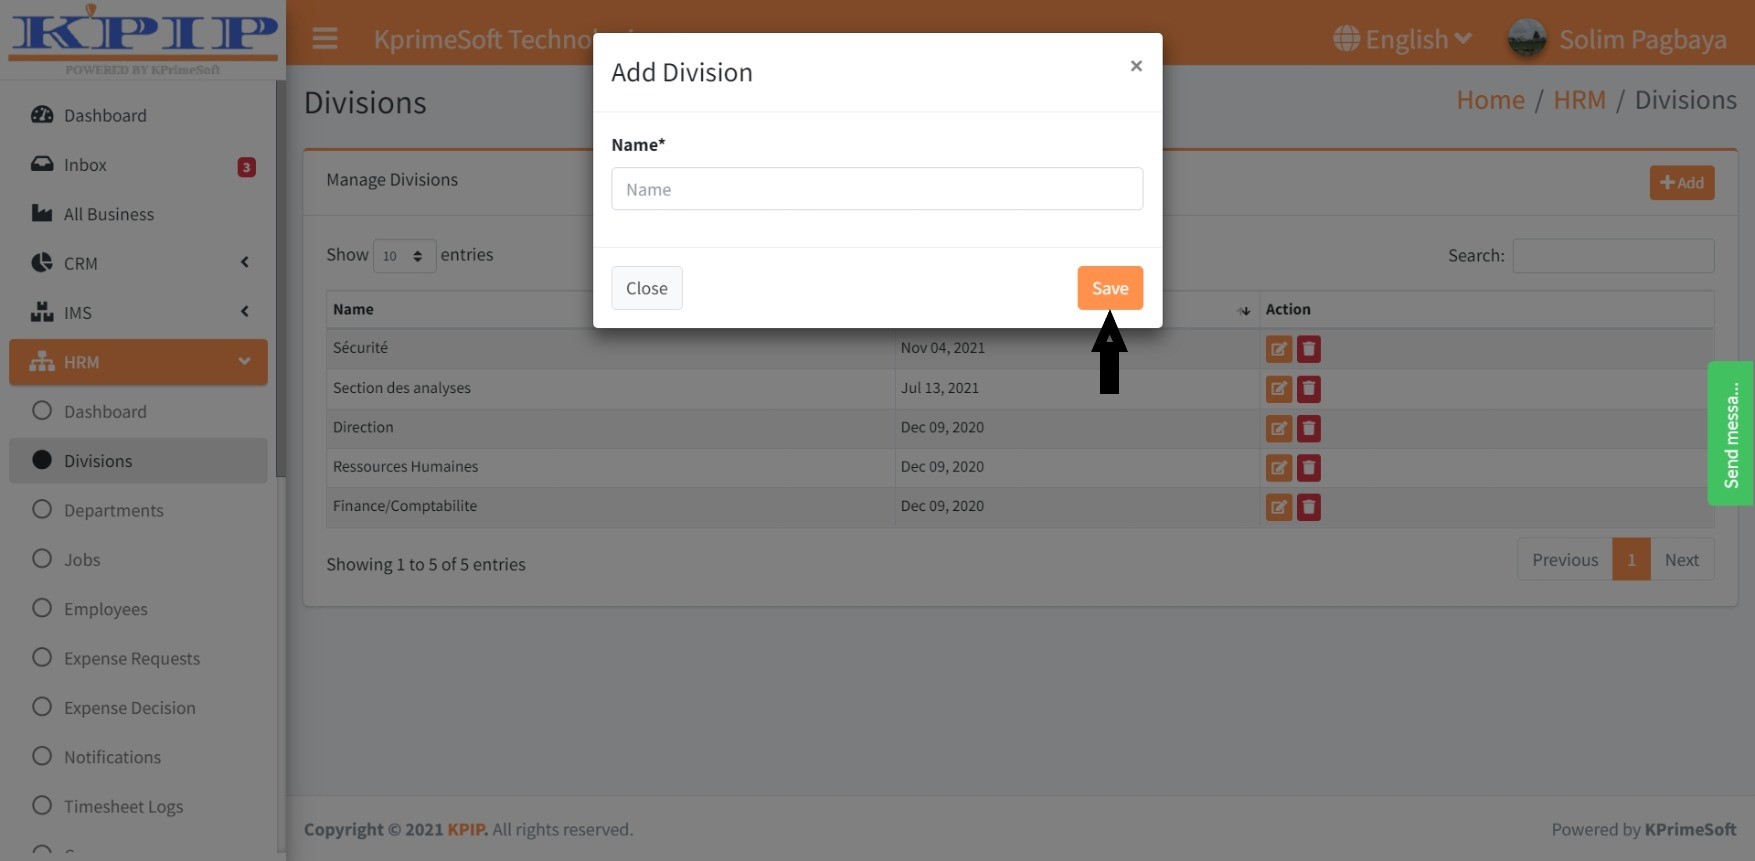
To add a division, click the "Add" button. On the subsequent page, enter the name of the division you wish to add, and then click the "Save" button to save your changes.
The "Show Entries" option enables you to specify the number of divisions you wish to be displayed per page.
The "Search" option permits you to swiftly search for a division by entering its name.
2. DEPARTMENTS
This functionality enables you to add company departments if they already exist.
Upon selecting the "Departments" feature, all existing departments will be displayed on a new page. In the "Actions" section, you can choose to edit or delete a department.
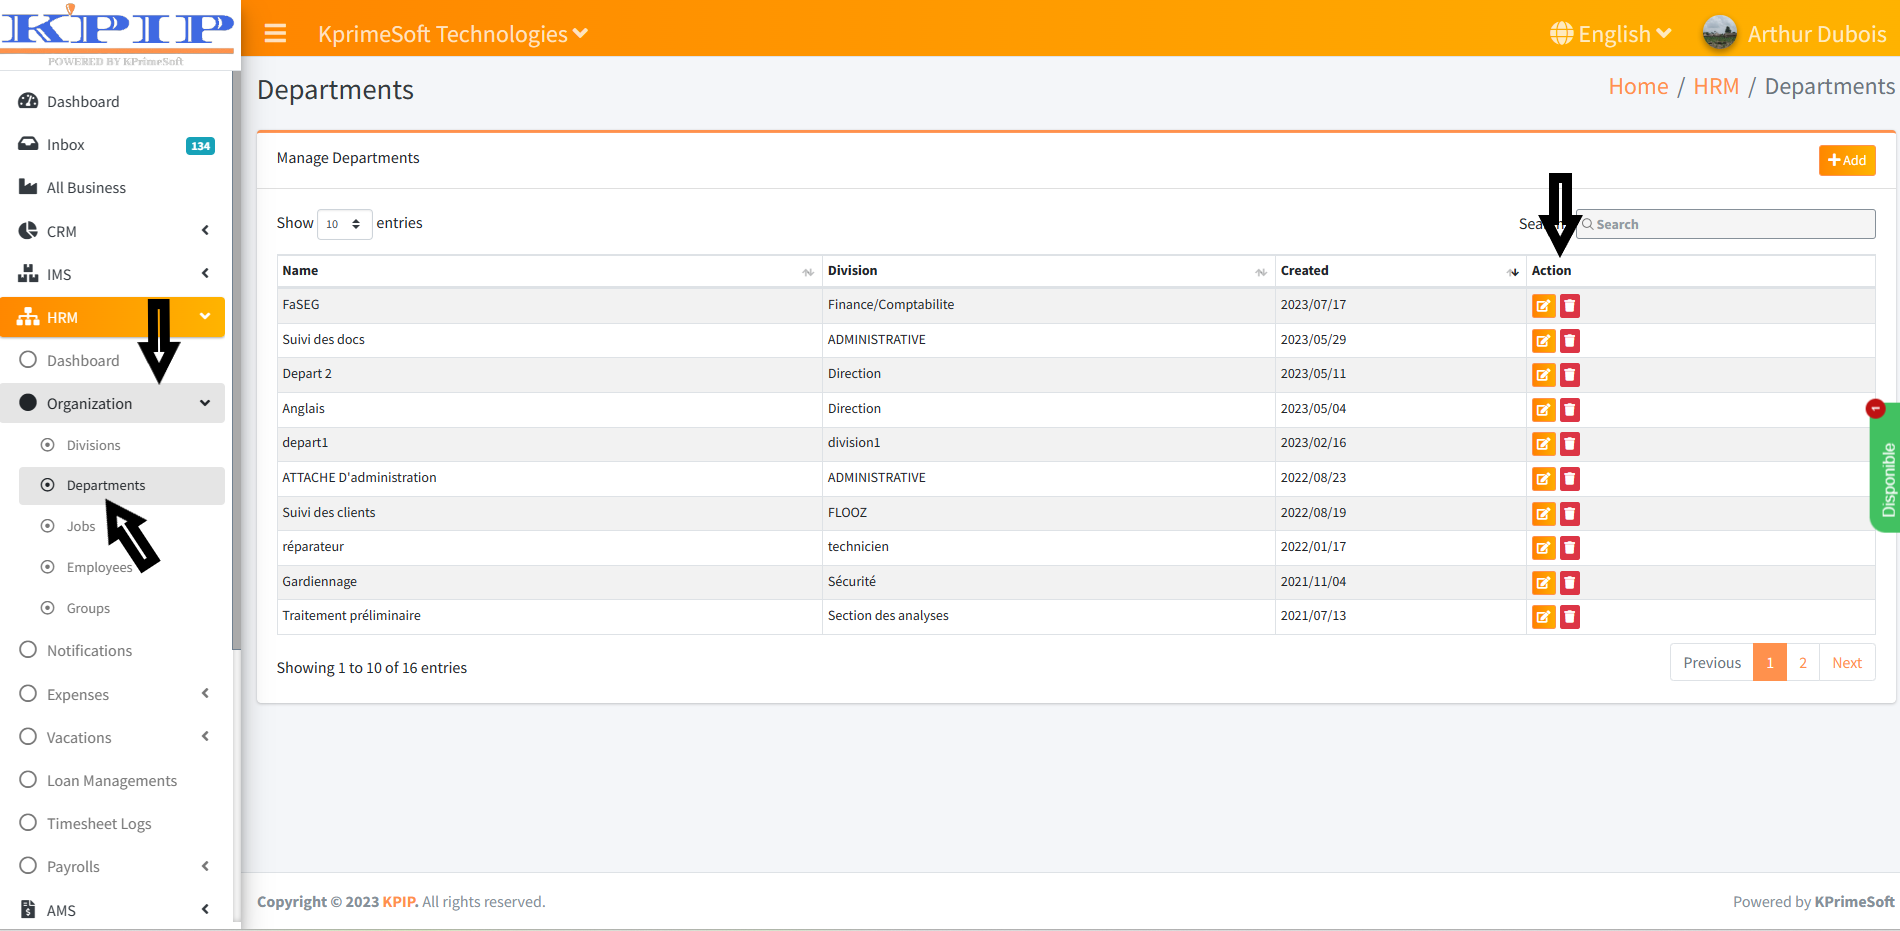
To add a department, click the "Add" button. On the subsequent page, enter the name of the department you wish to add. Next, choose the division to which this department belongs, and finally, click the "Save" button to preserve the changes.

The "Show Entries" option enables you to specify the number of departments you want to display per page.
The "Search" option allows you to swiftly look for a department by entering its name.
3. JOBS
This feature enables you to add jobs for your company.
Upon clicking the "Jobs" feature, you will be directed to a new page displaying all the jobs that have already been created. In the "Actions" section, you have the option to either edit or delete a job.
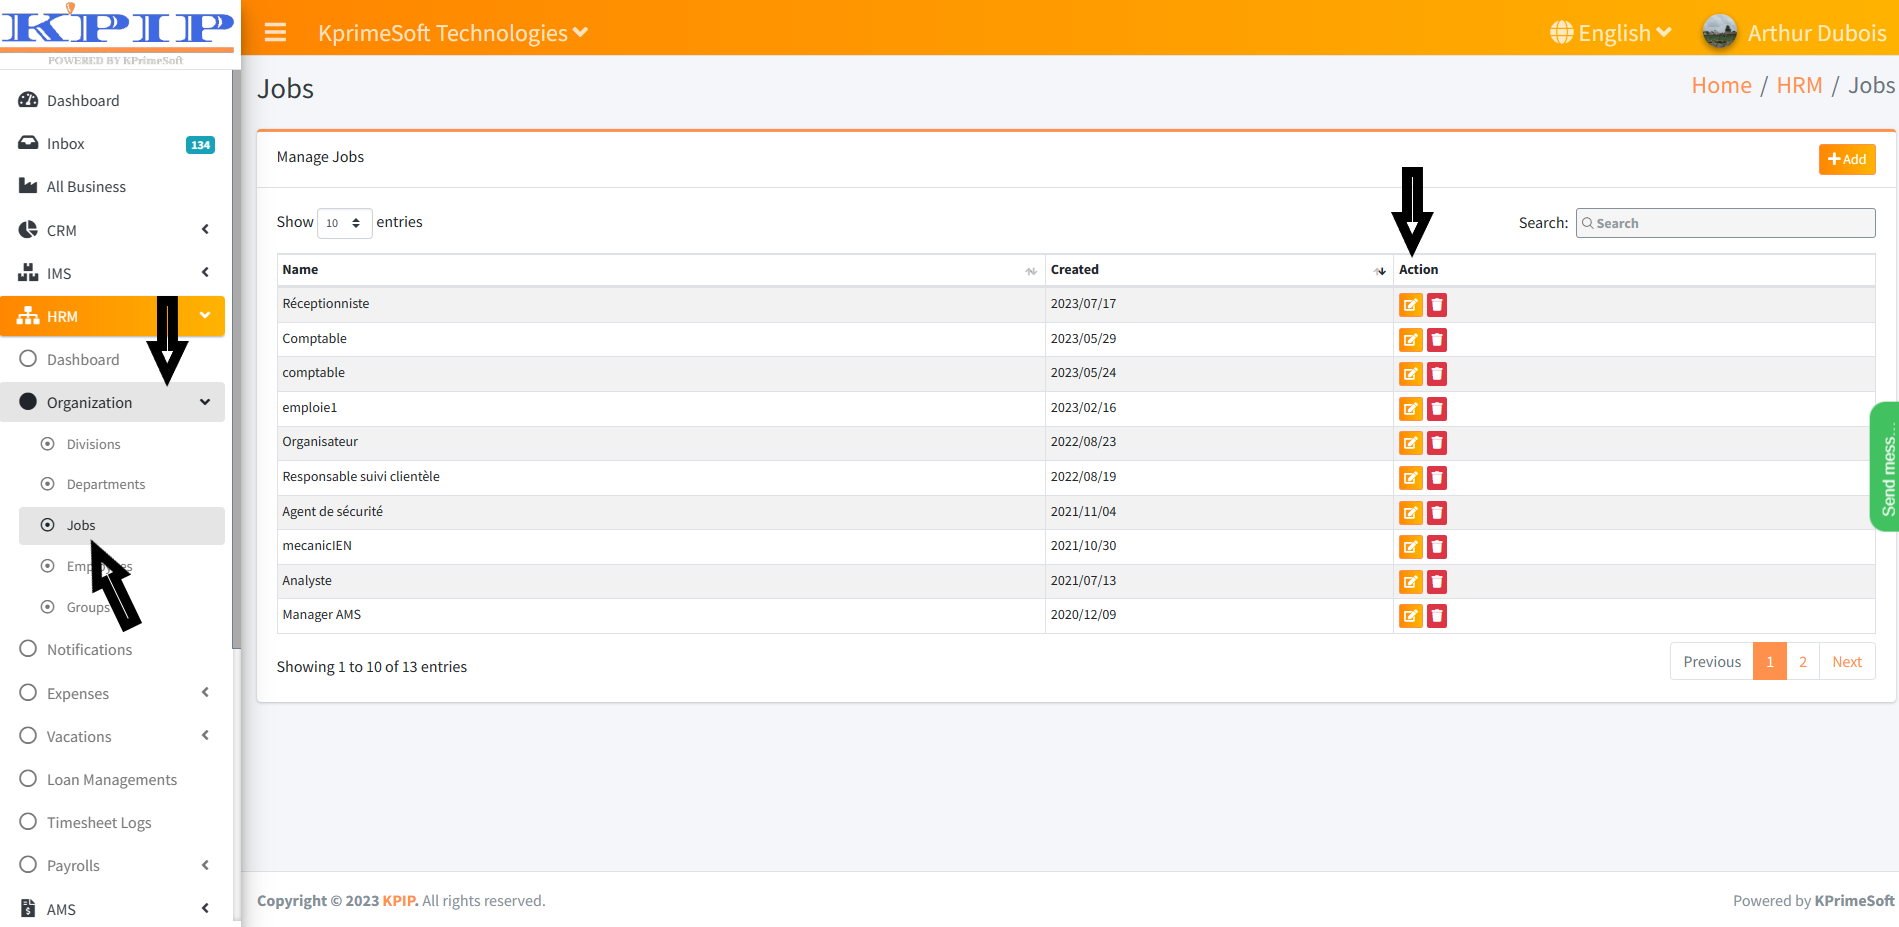
To add a job, click the "Add" button. On the subsequent page, input the desired job name, and then proceed to click the "Save" button to finalize.
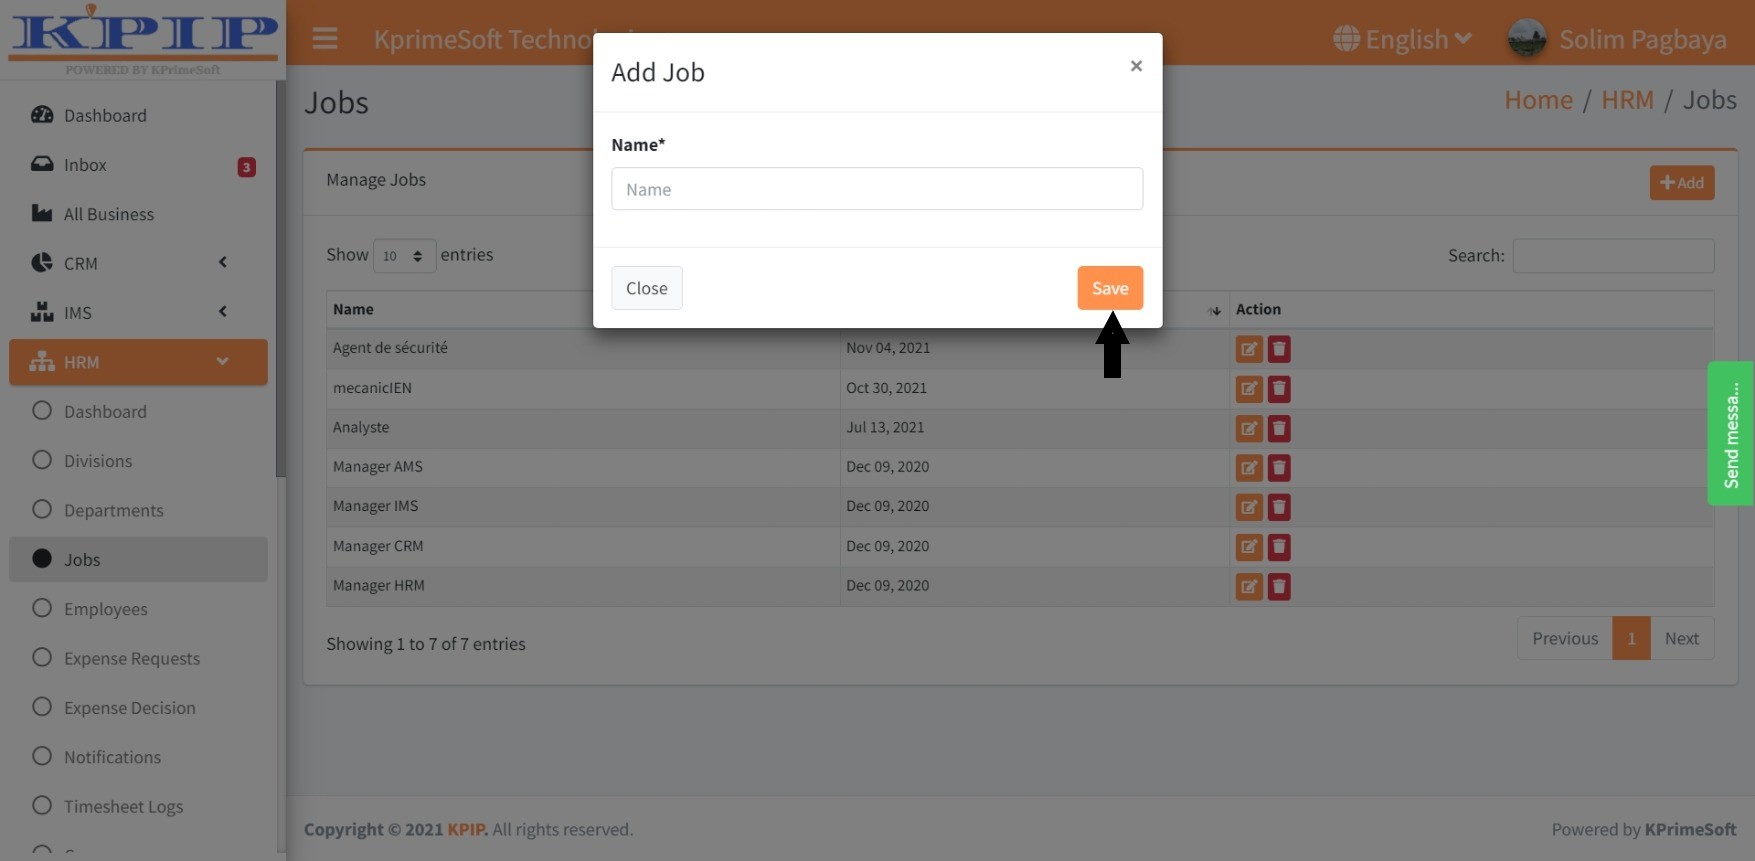
The "Show Entries" option enables you to specify the number of jobs you would like to be displayed per page.
The "Search" option allows you to swiftly find a job by entering the job's name.
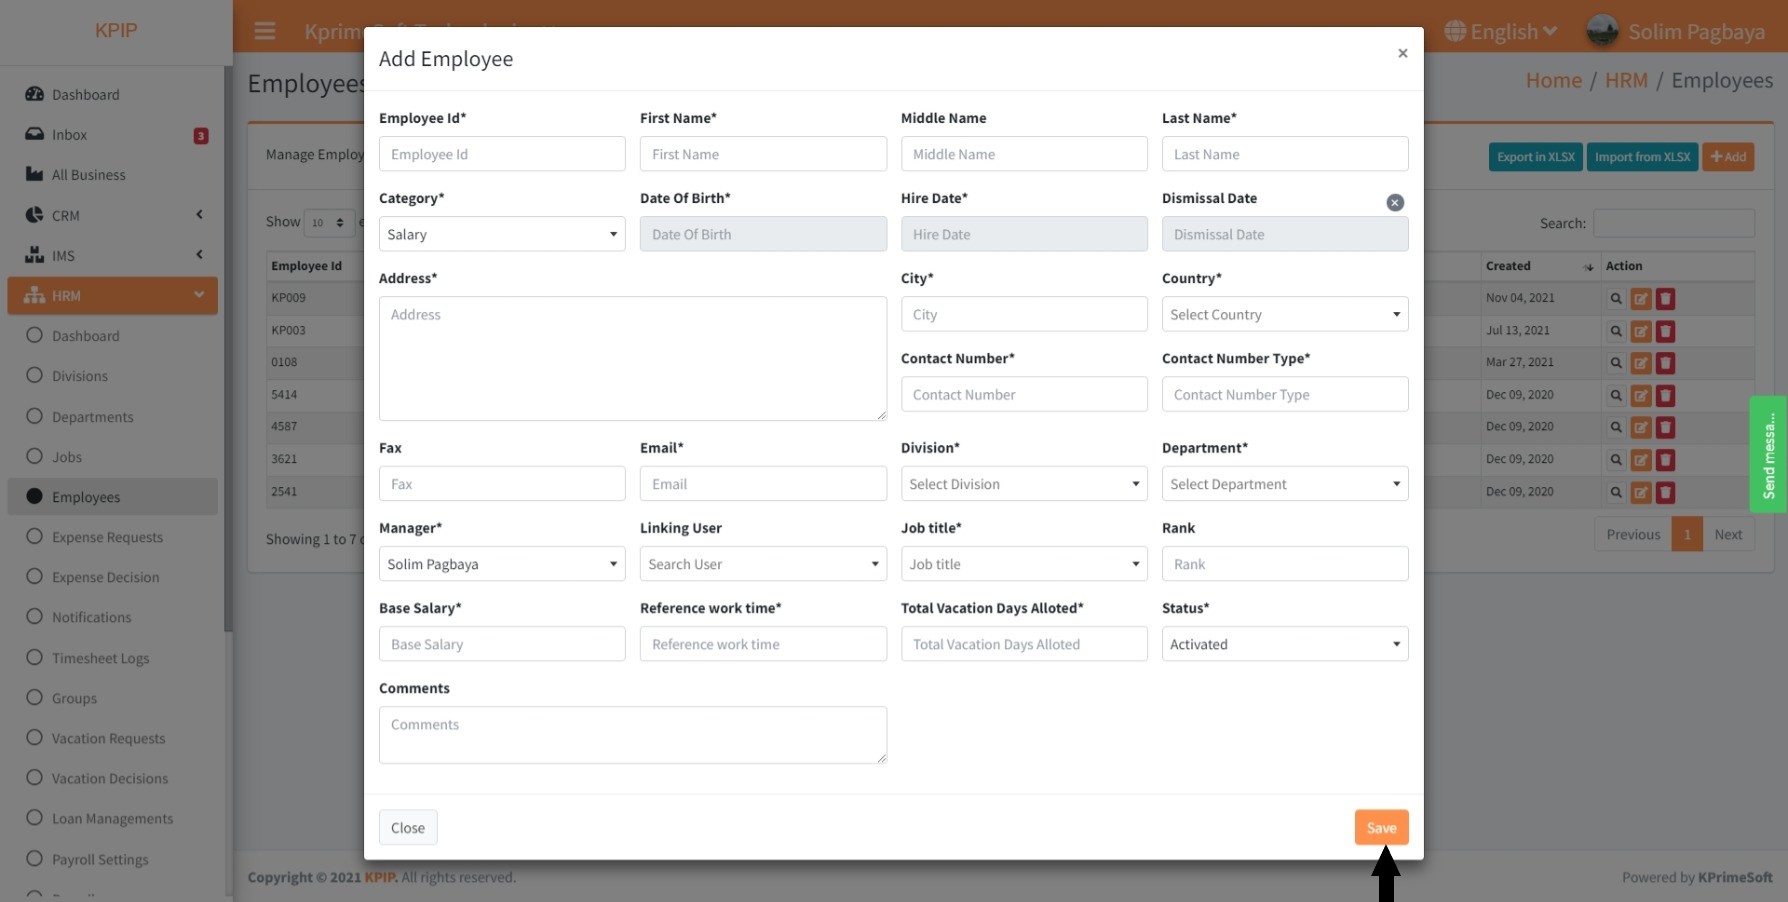
4. EMPLOYEES
This feature enables you to include employees from your company.
Upon clicking the "Employees" feature, a table will appear on a new page displaying information about all employees. In the "Action" section, you will have the option to view employee details, edit their information, or remove an employee.

The "Show Entries" option enables you to specify the number of employees you want to have displayed per page.
The "Date Hired" option enables you to filter employees on your page based on the time interval when they were hired.
The "Search" option lets you swiftly find an employee by entering their name.
The "Active" option indicates which employees are currently active; clicking on it will reveal both active and inactive employees.
The "Export to EXCEL" feature permits you to export your employee records from the HRM module to the Excel software on your computer.
The "Import from XLSX" feature enables you to import your employee records from the Excel software on your computer into the HRM module.
To add a new employee, click on the "Add" button. On the subsequent page, fill out the addition form, and then click the "Save" button to store the information.
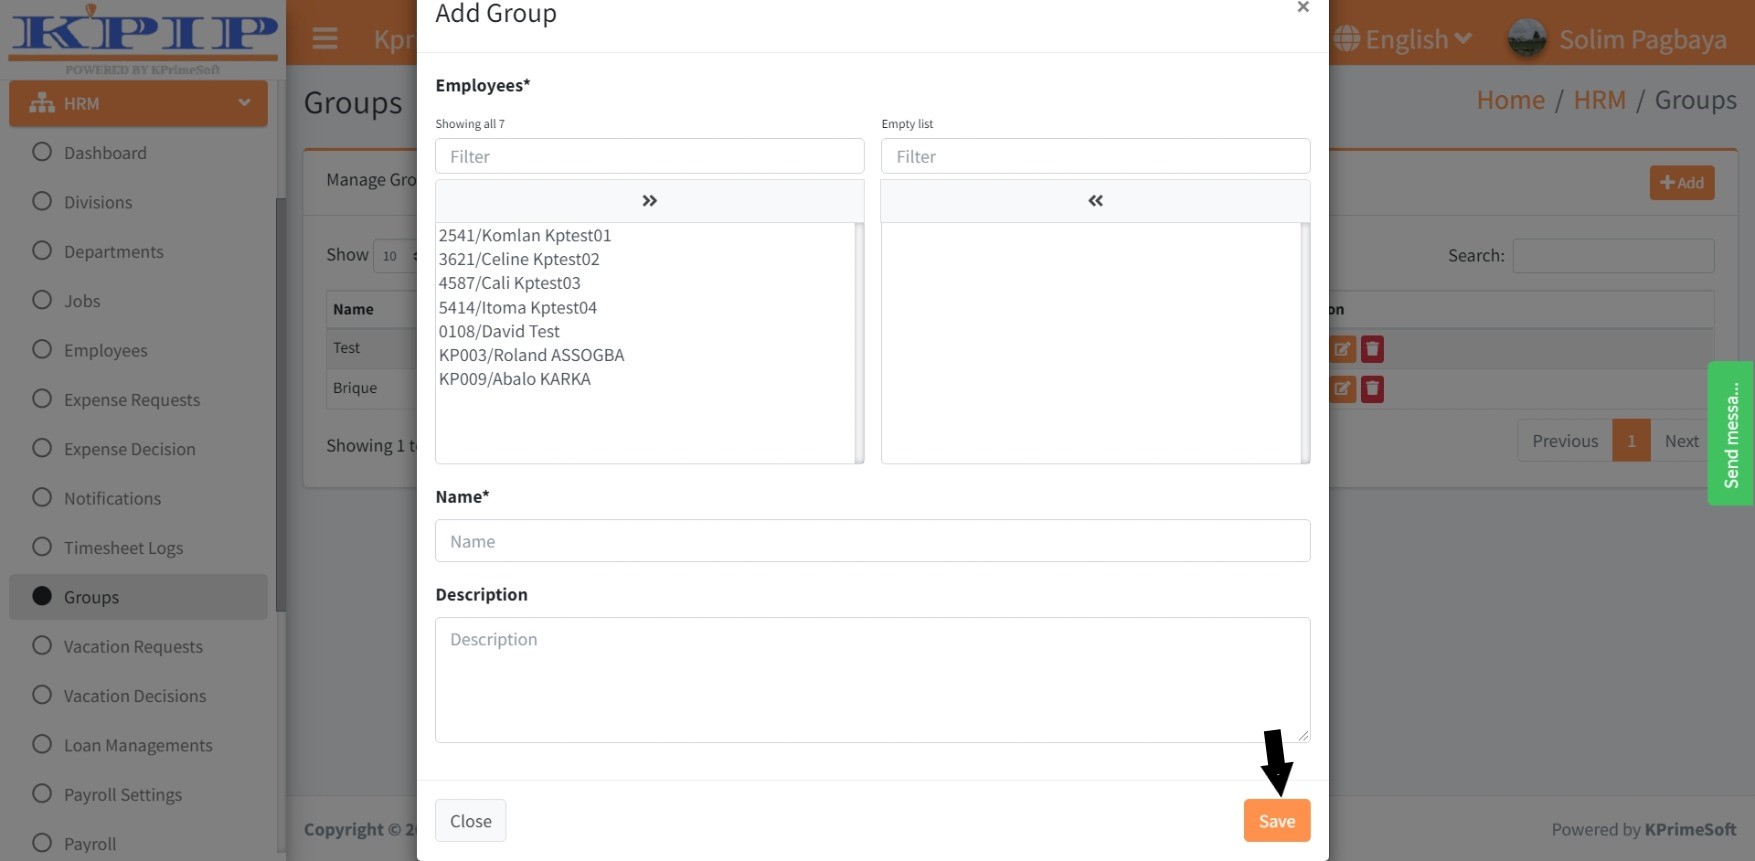
5. GROUPS
This feature enables you to create groups that streamline the process of sending mass notifications.
Upon clicking the "Groups" feature, a table will emerge on a new page, displaying information regarding the various groups you have established. Within the "Action" section, you can either view, edit, or delete the details of a group.
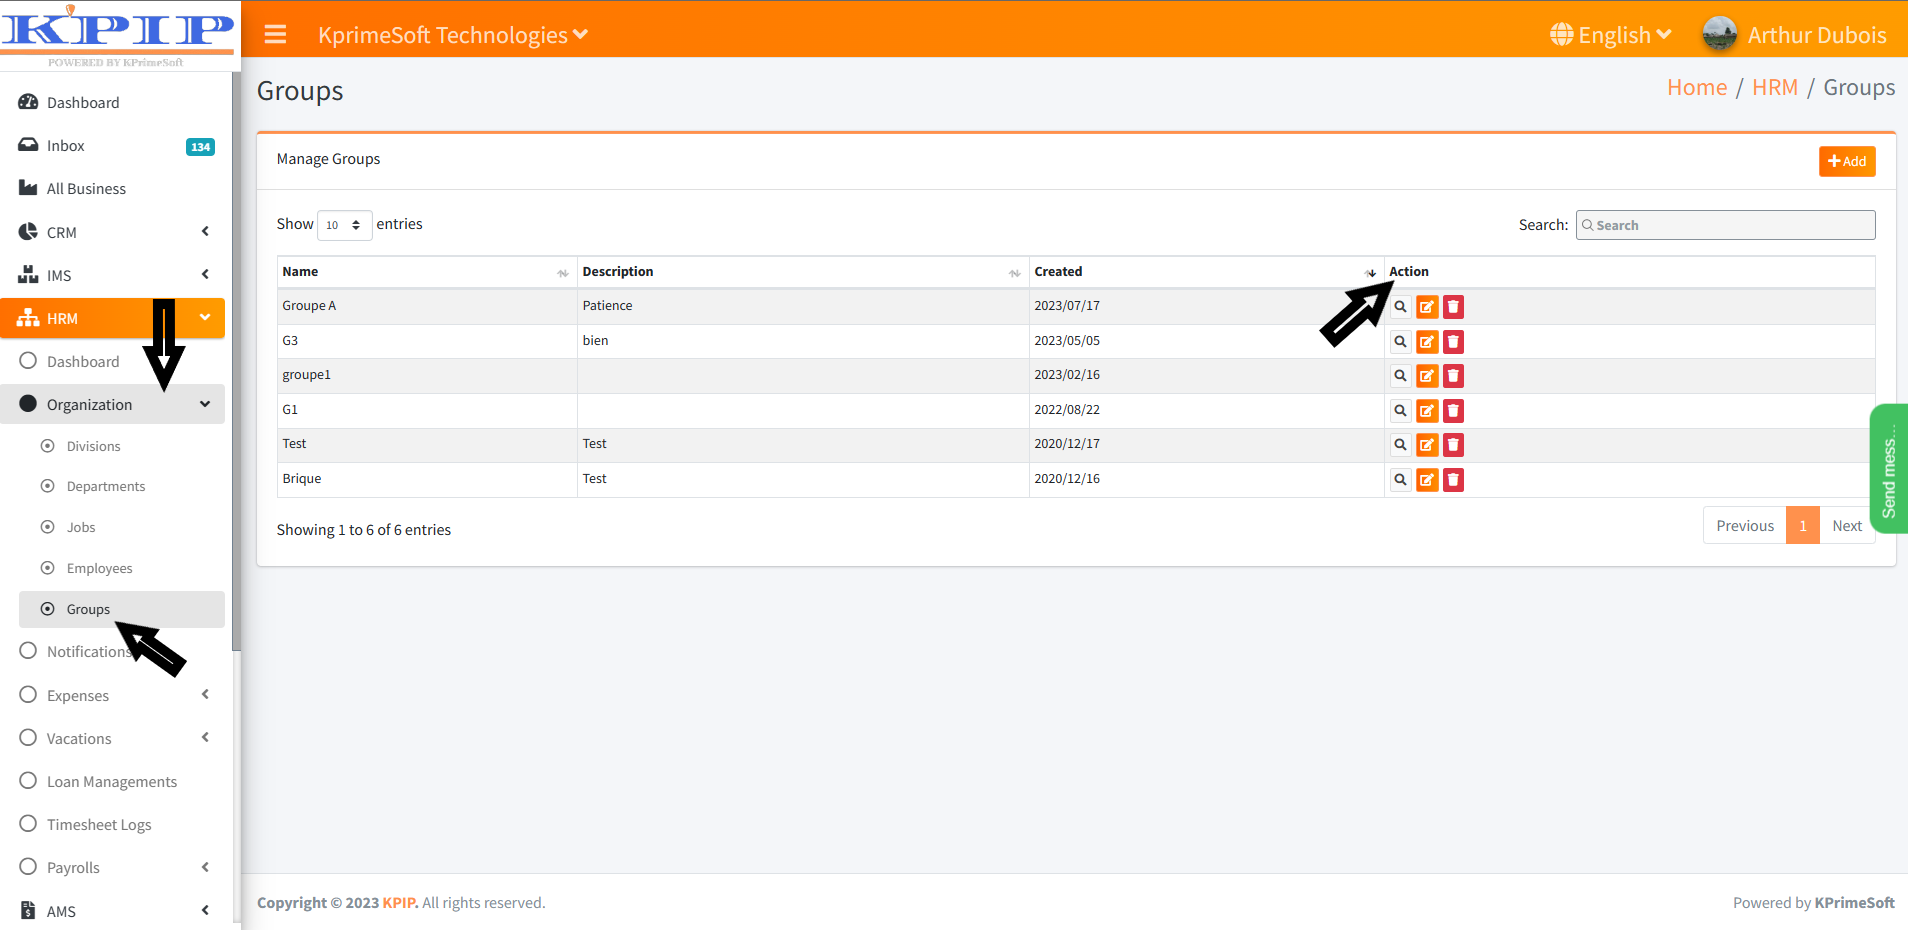
To create a group, click the "Add" button on the new page that appears. Fill out the form for adding a group, and then click the "Save" button to save your changes.
II - NOTIFICATION
This feature enables you to send notifications to the personnel within your company.
Upon selecting the "Notification" feature, a table will be displayed on a new page, presenting information regarding all dispatched emails. In the "Action" section, you are provided with the choice to either view the specifics of an email or deactivate the email dispatch if it has been scheduled.
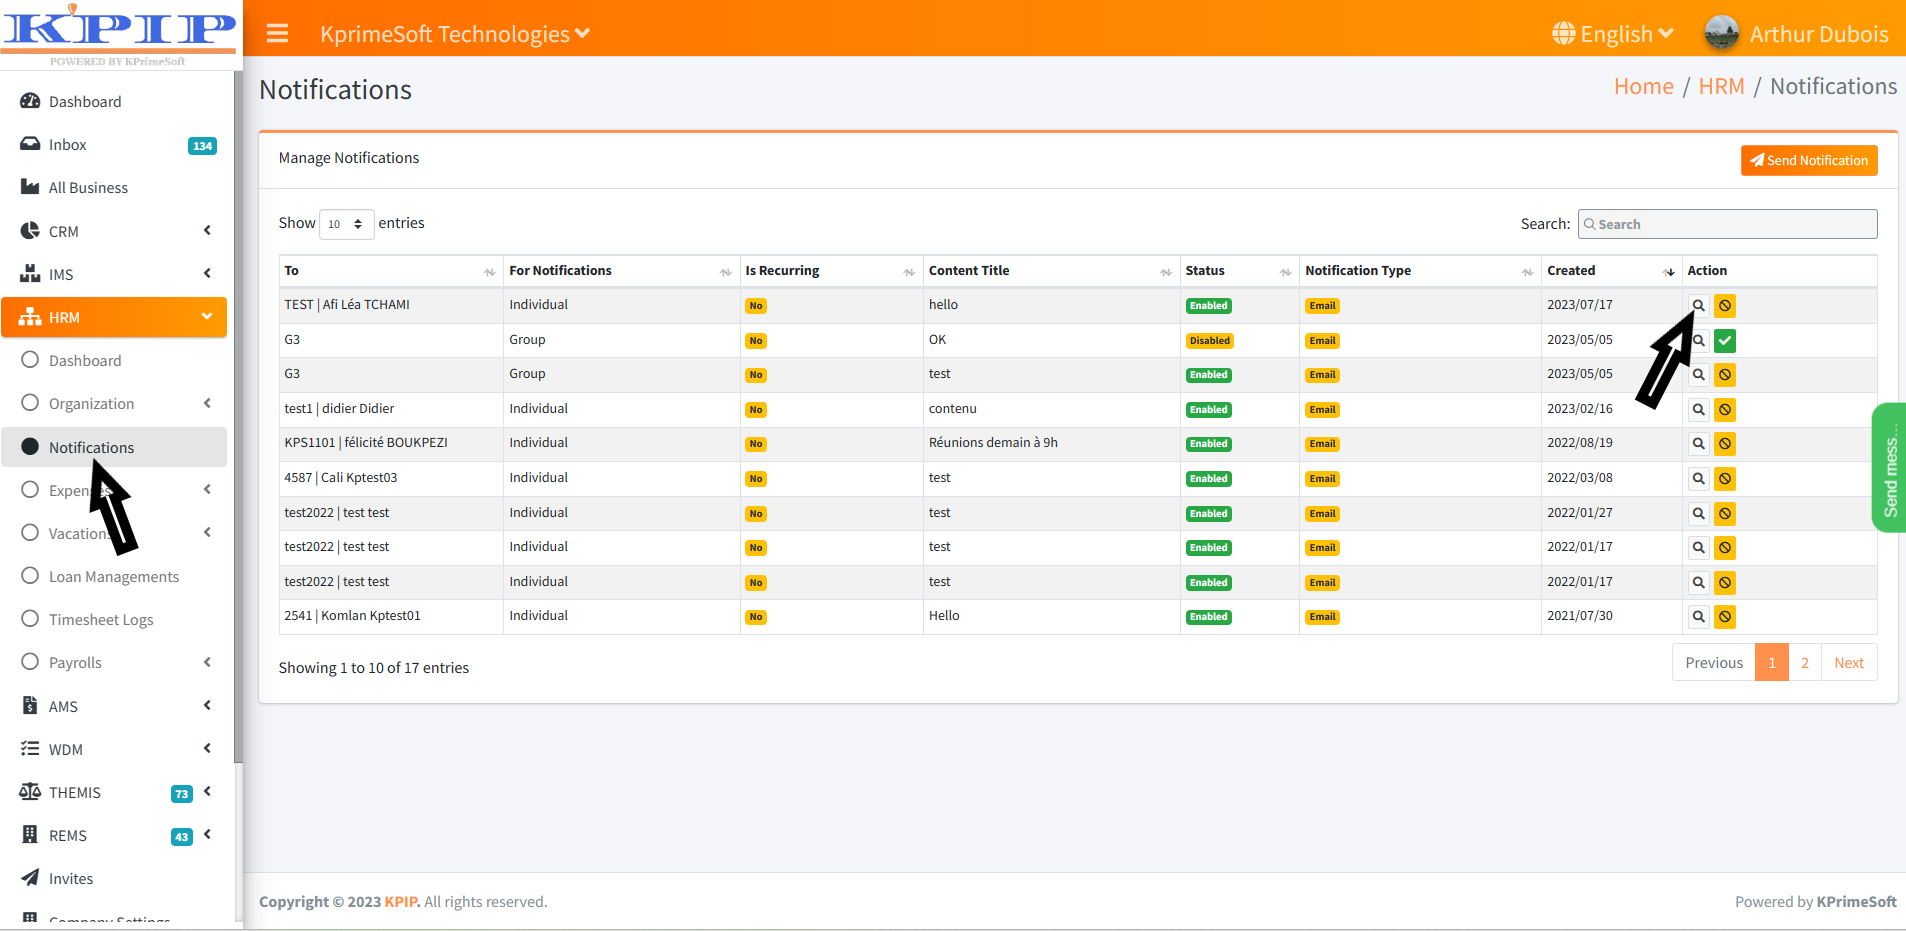
To send an email, click the "Send a notification" button. On the subsequent page that appears, complete the sending form. Click "Preview" to review the integrated data, and then click the "Send a notification" button to initiate sending.

VI - EXPENSES
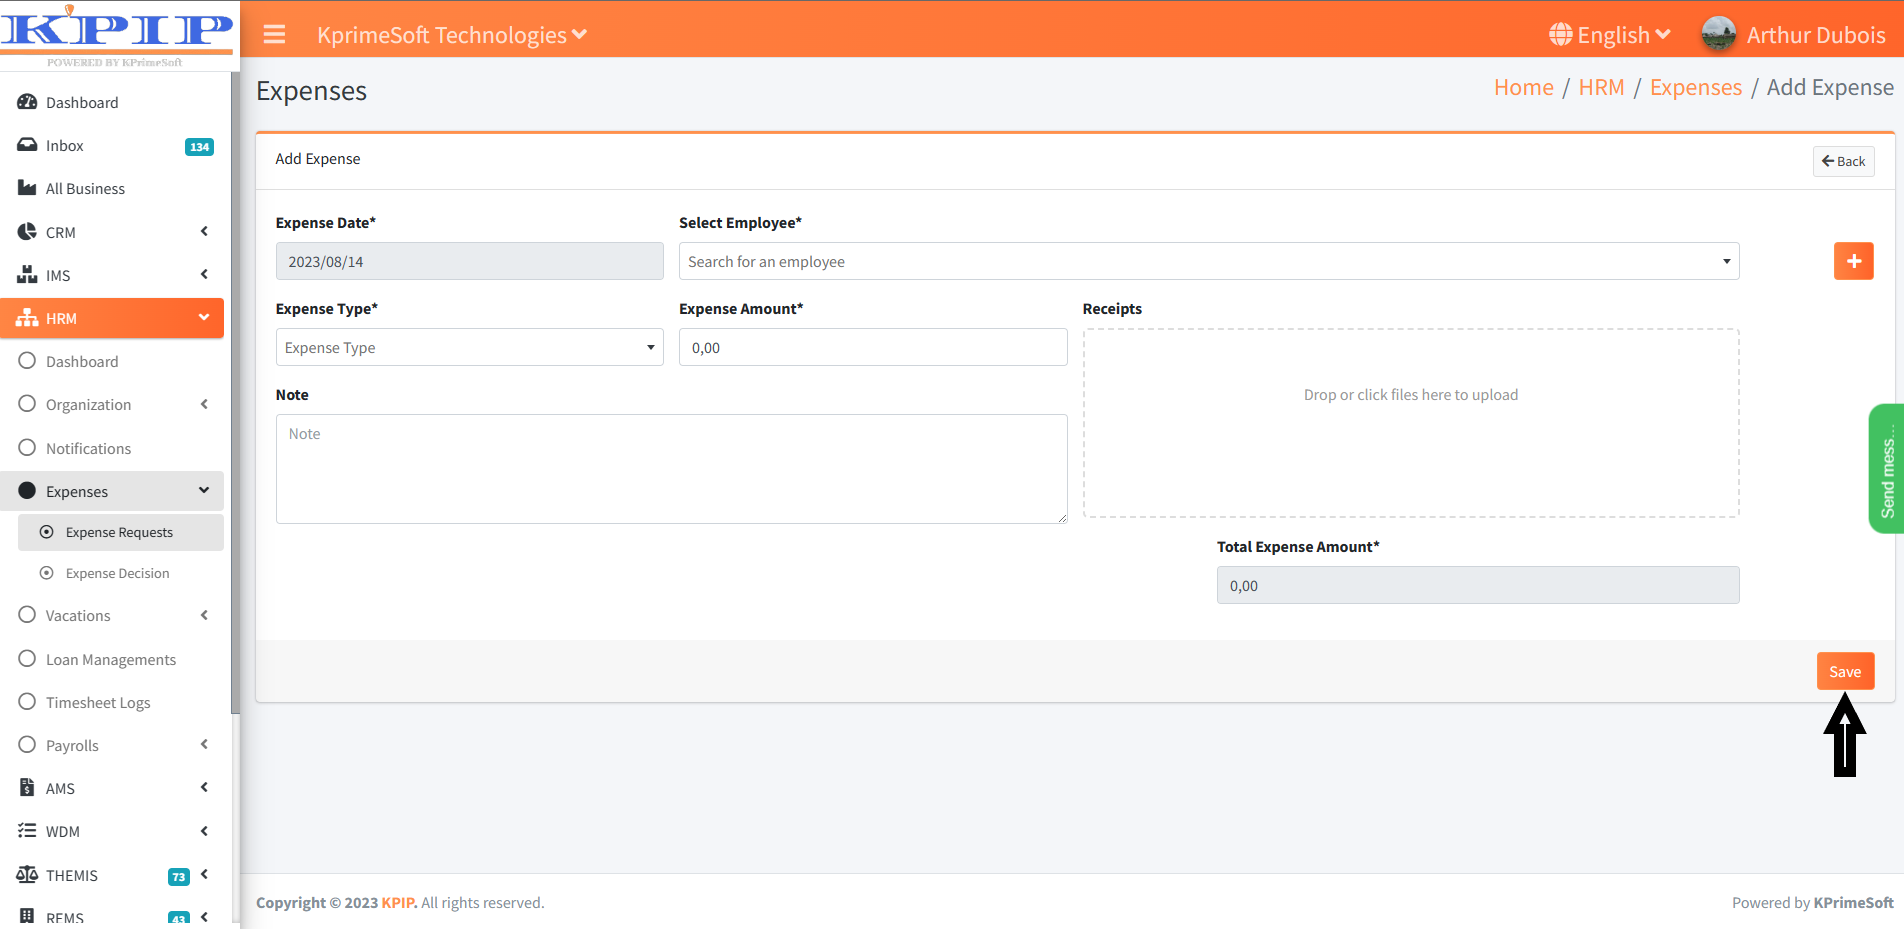
1. EXPENSE REQUESTS
This functionality enables you to submit expense requests to your assigned supervisor.
Upon clicking the "Expense Request" feature, a table will be displayed on a new page, presenting all the submitted expense requests. In the “Decision” section, you can determine whether an expense request is awaiting a decision, approved, or declined by the designated manager. Under the "Action" section, you have the option to view the specifics of an expense request.
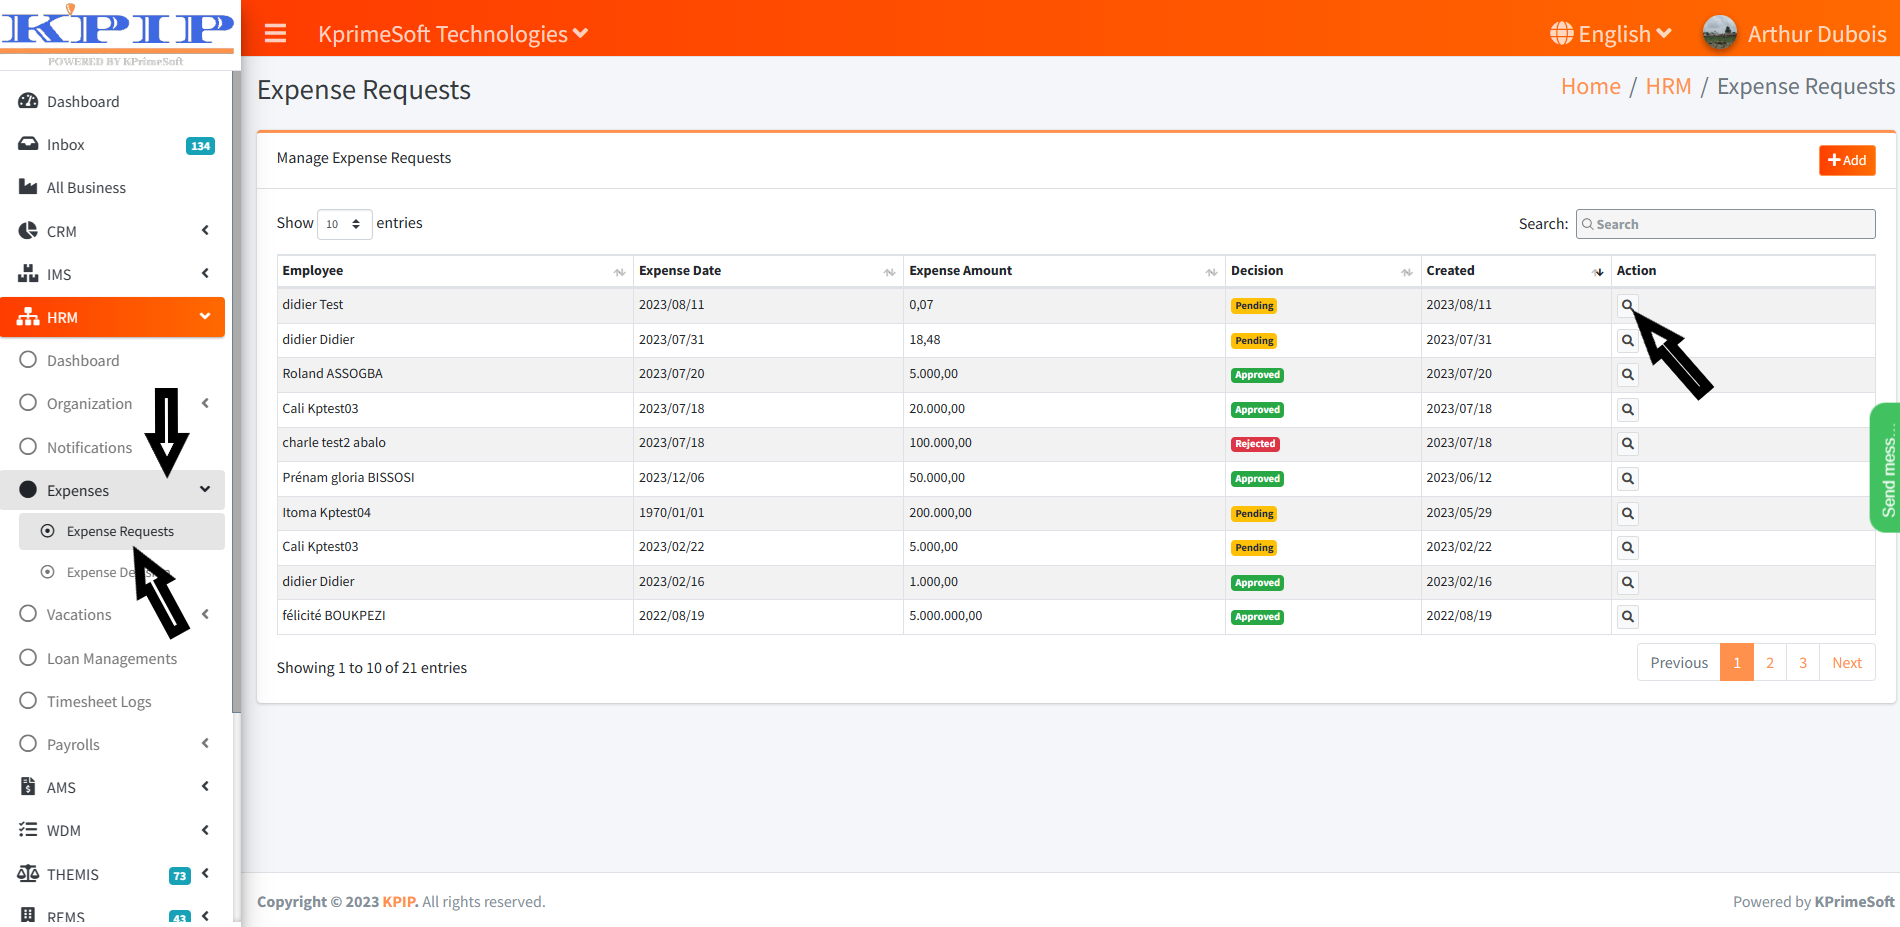
To submit an expense request, click the "Add" button. On the subsequent page, fill out the expense request form, and then click the "Save" button to save your changes.
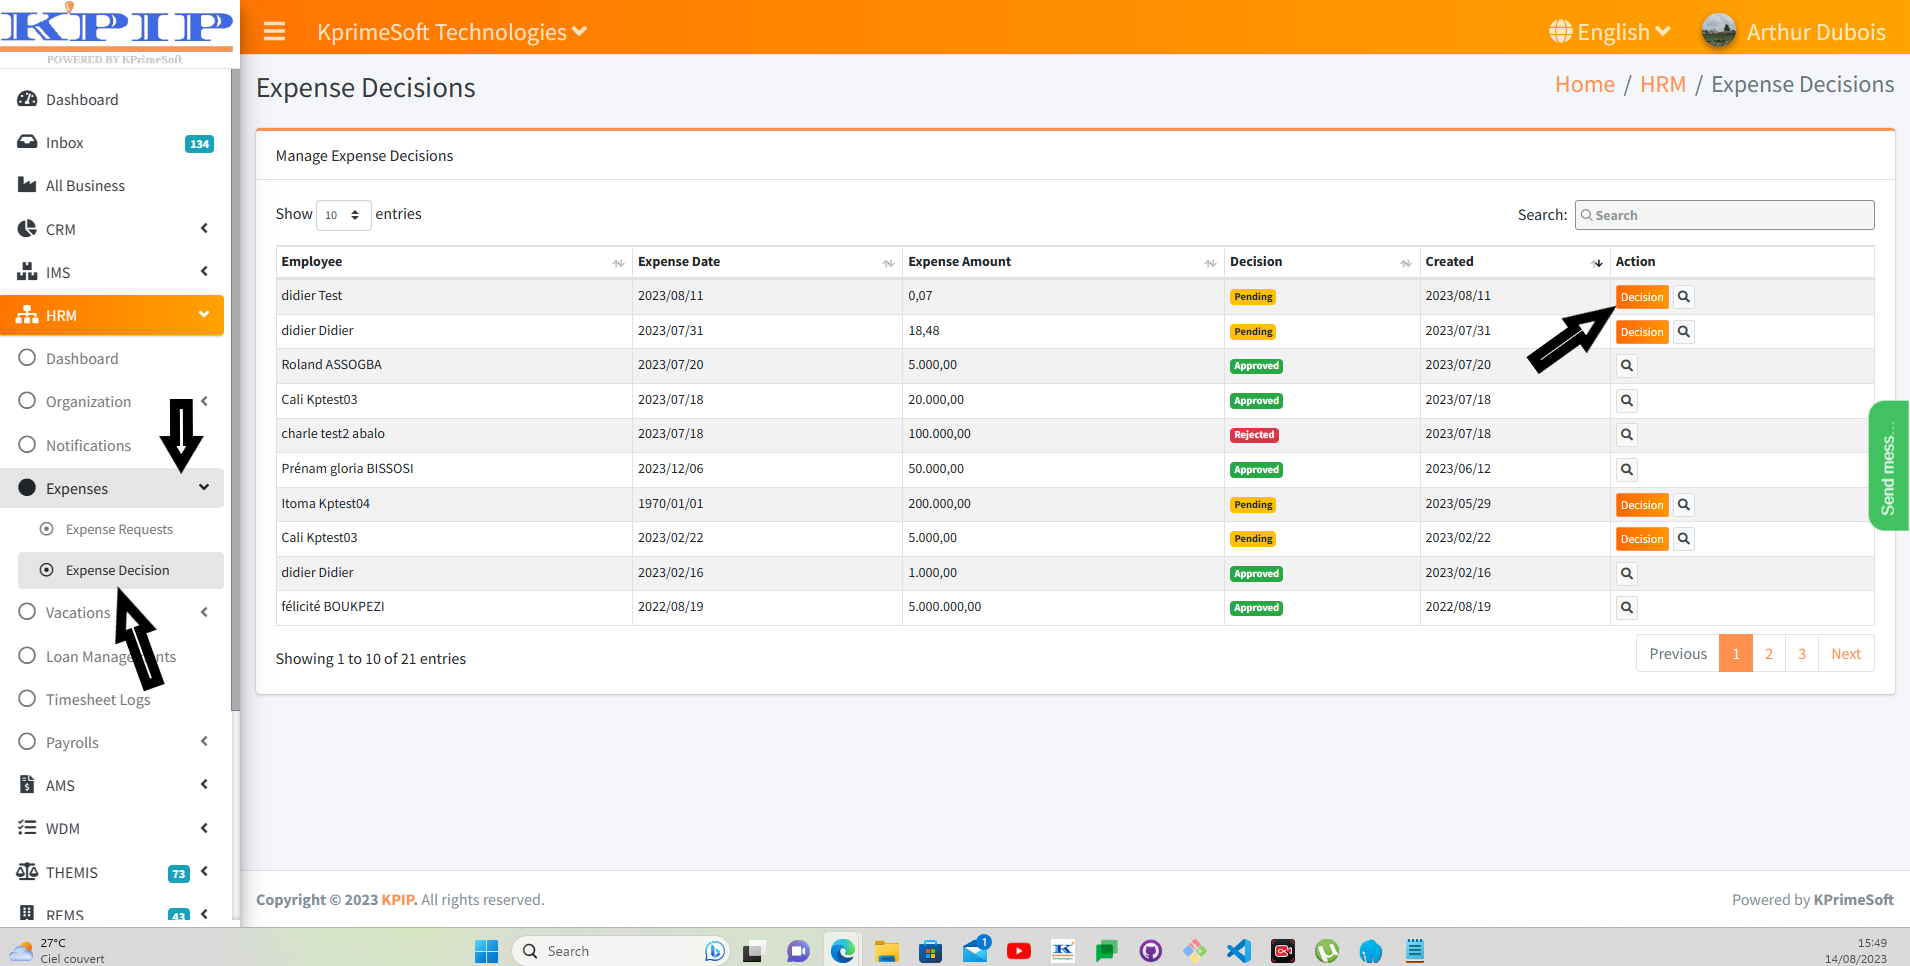
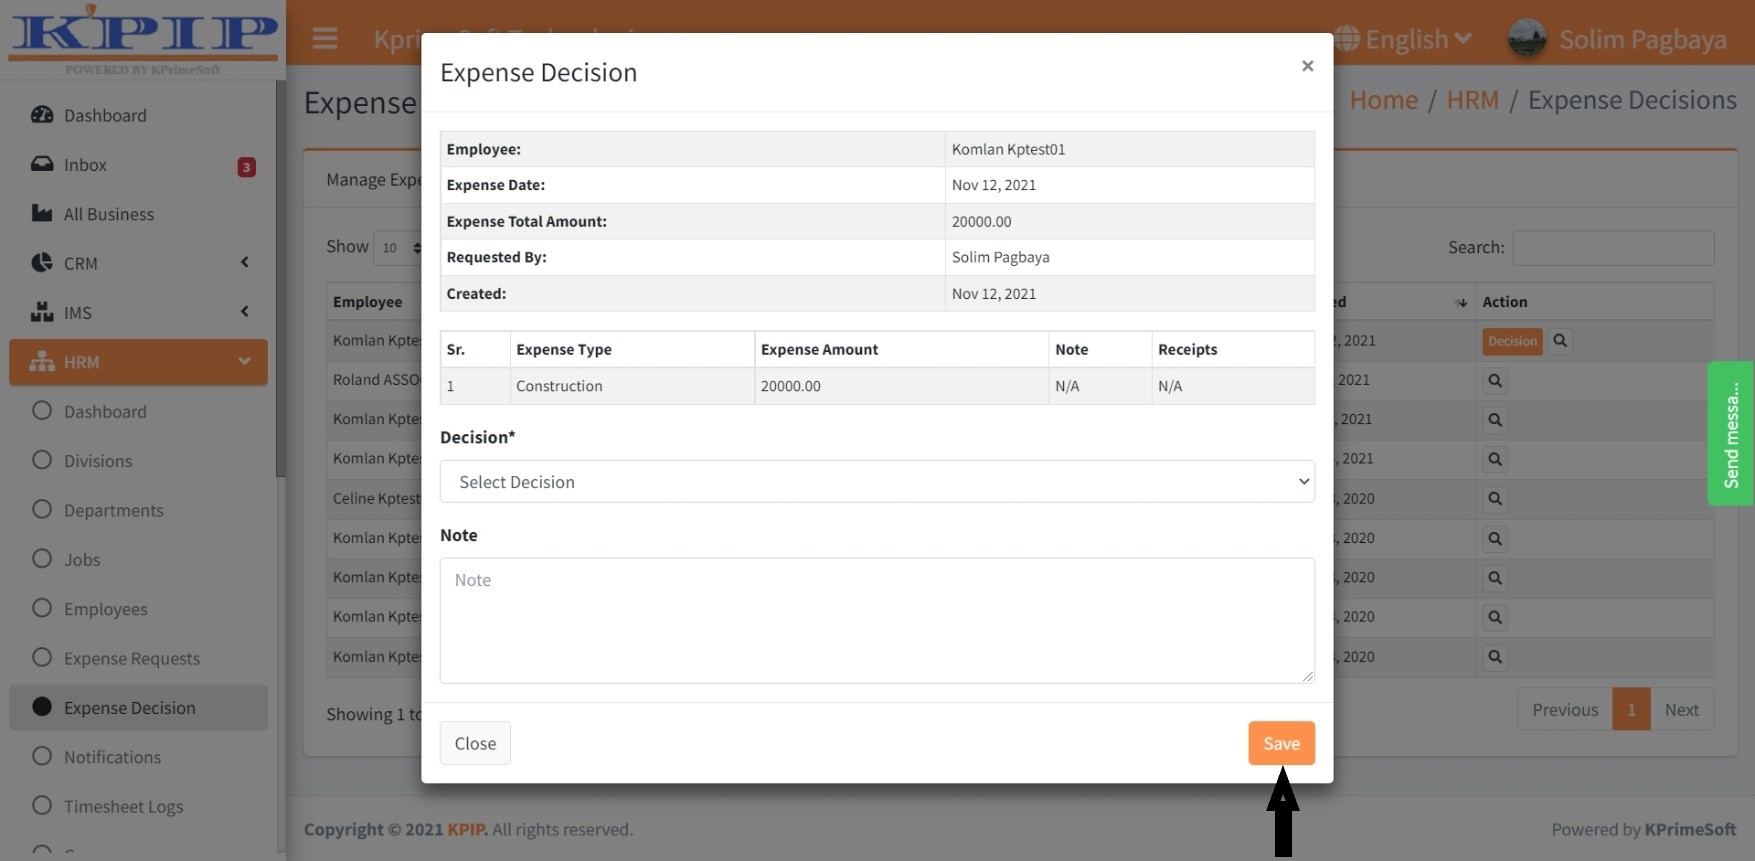
2. EXPENSE DECISIONS
This functionality allows the manager to decide on expense requests.
When you click on the "Expense Decision" feature you will see a table appear on a new page showing all the expense requests submitted. In the "Decision" section you can see if an expense request is still pending a decision or has been approved or rejected by the company manager. In the “Action” part, you have the possibility to decide (approve or reject) the expenditure requests submitted by clicking on the “Decision” button.
IV - VACATIONS
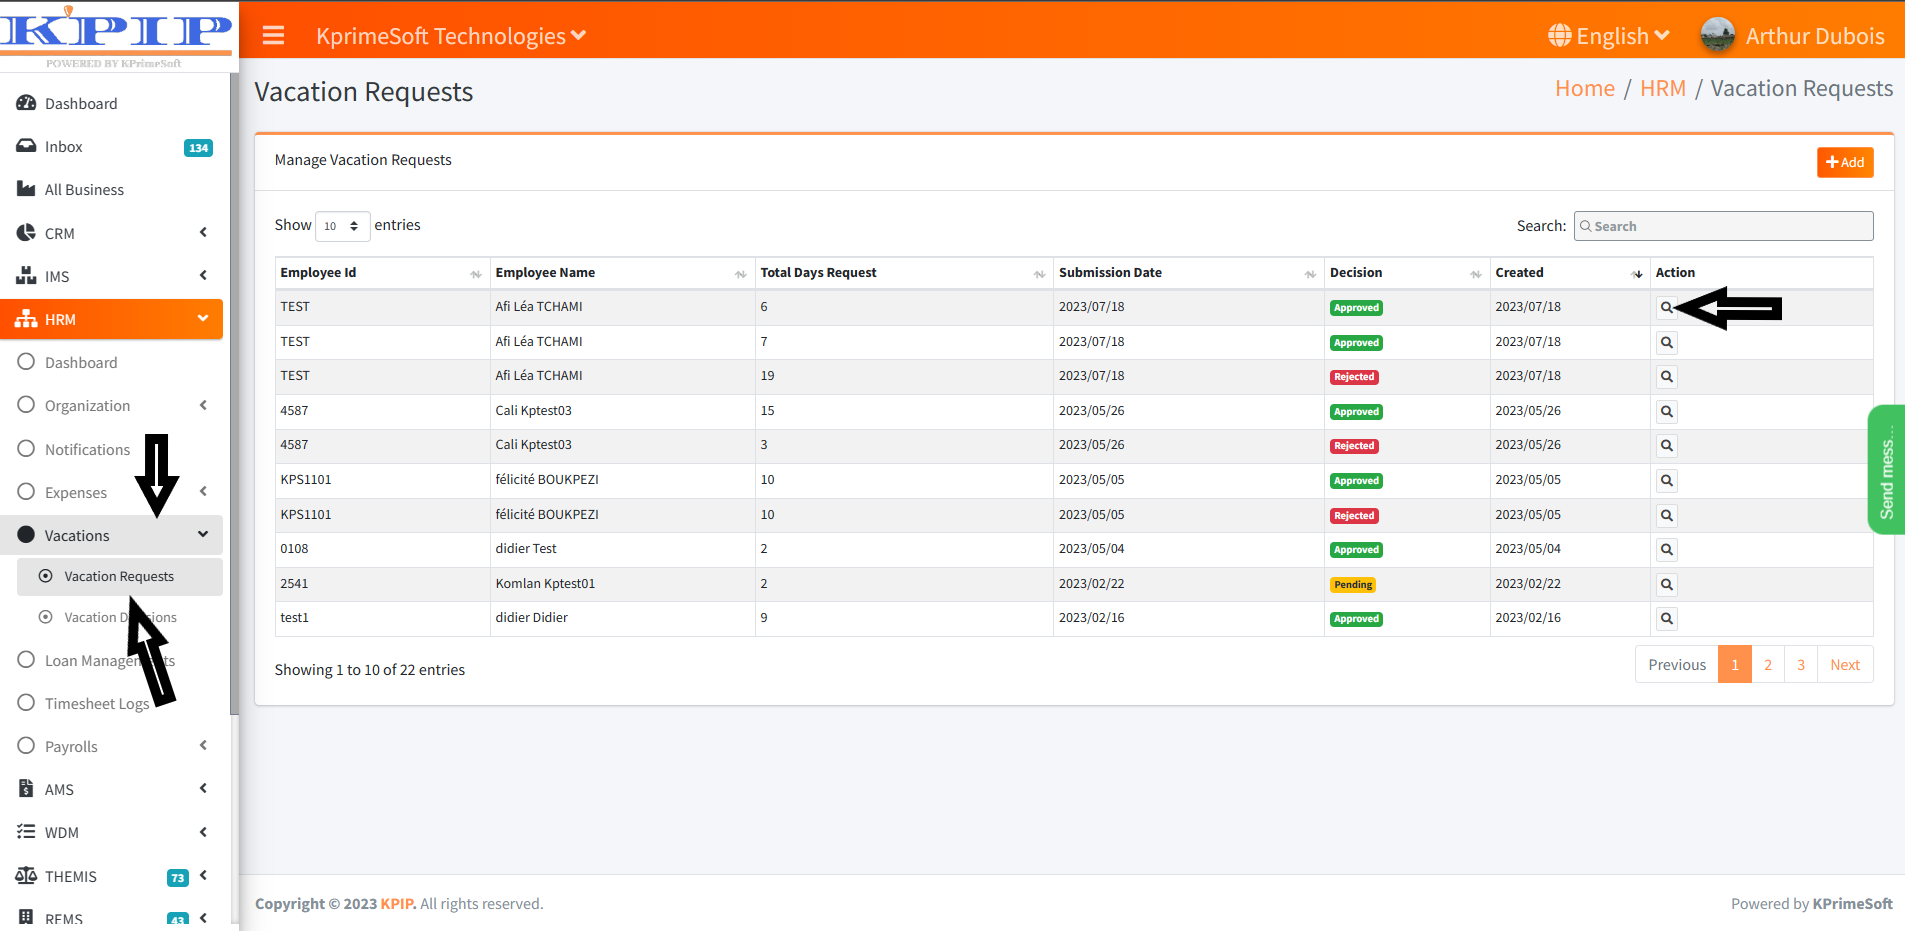
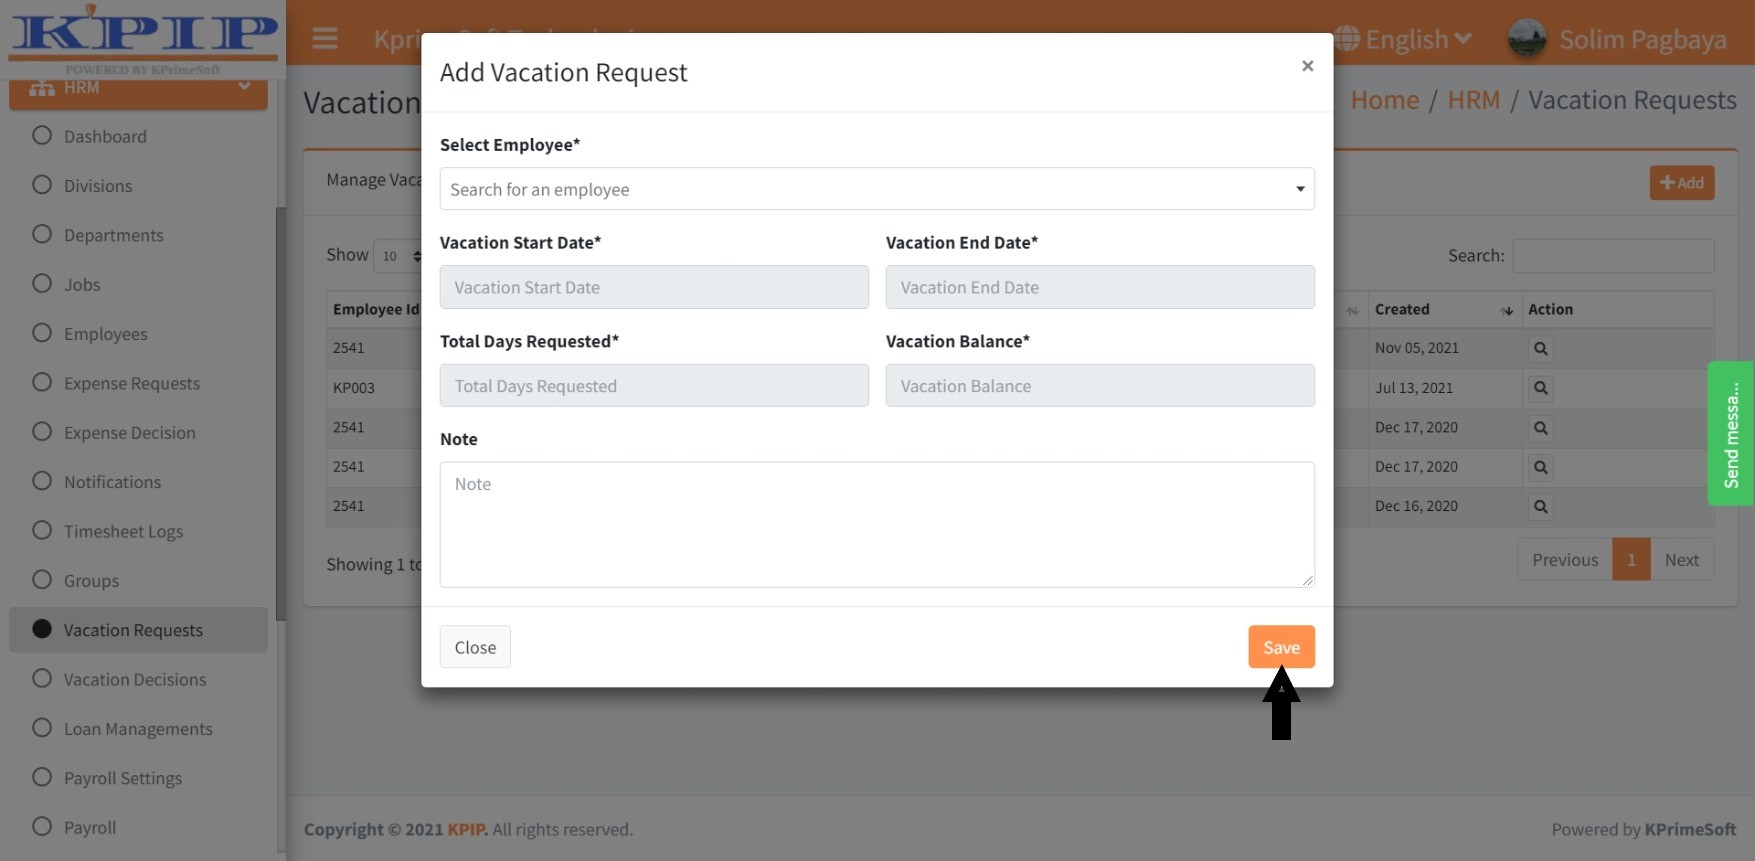
1. VACATION REQUESTS
This feature enables you to submit time off requests within your company.
Upon clicking the "Vacation Requests" option, a table will be displayed on a new page, presenting information regarding a vacation request. Within the "Action" section, you can access the specifics of a leave request.
To submit a vacation request, click the "Add" button. On the new page that appears, fill out the vacation request form, and then click the "Save" button to save your request.
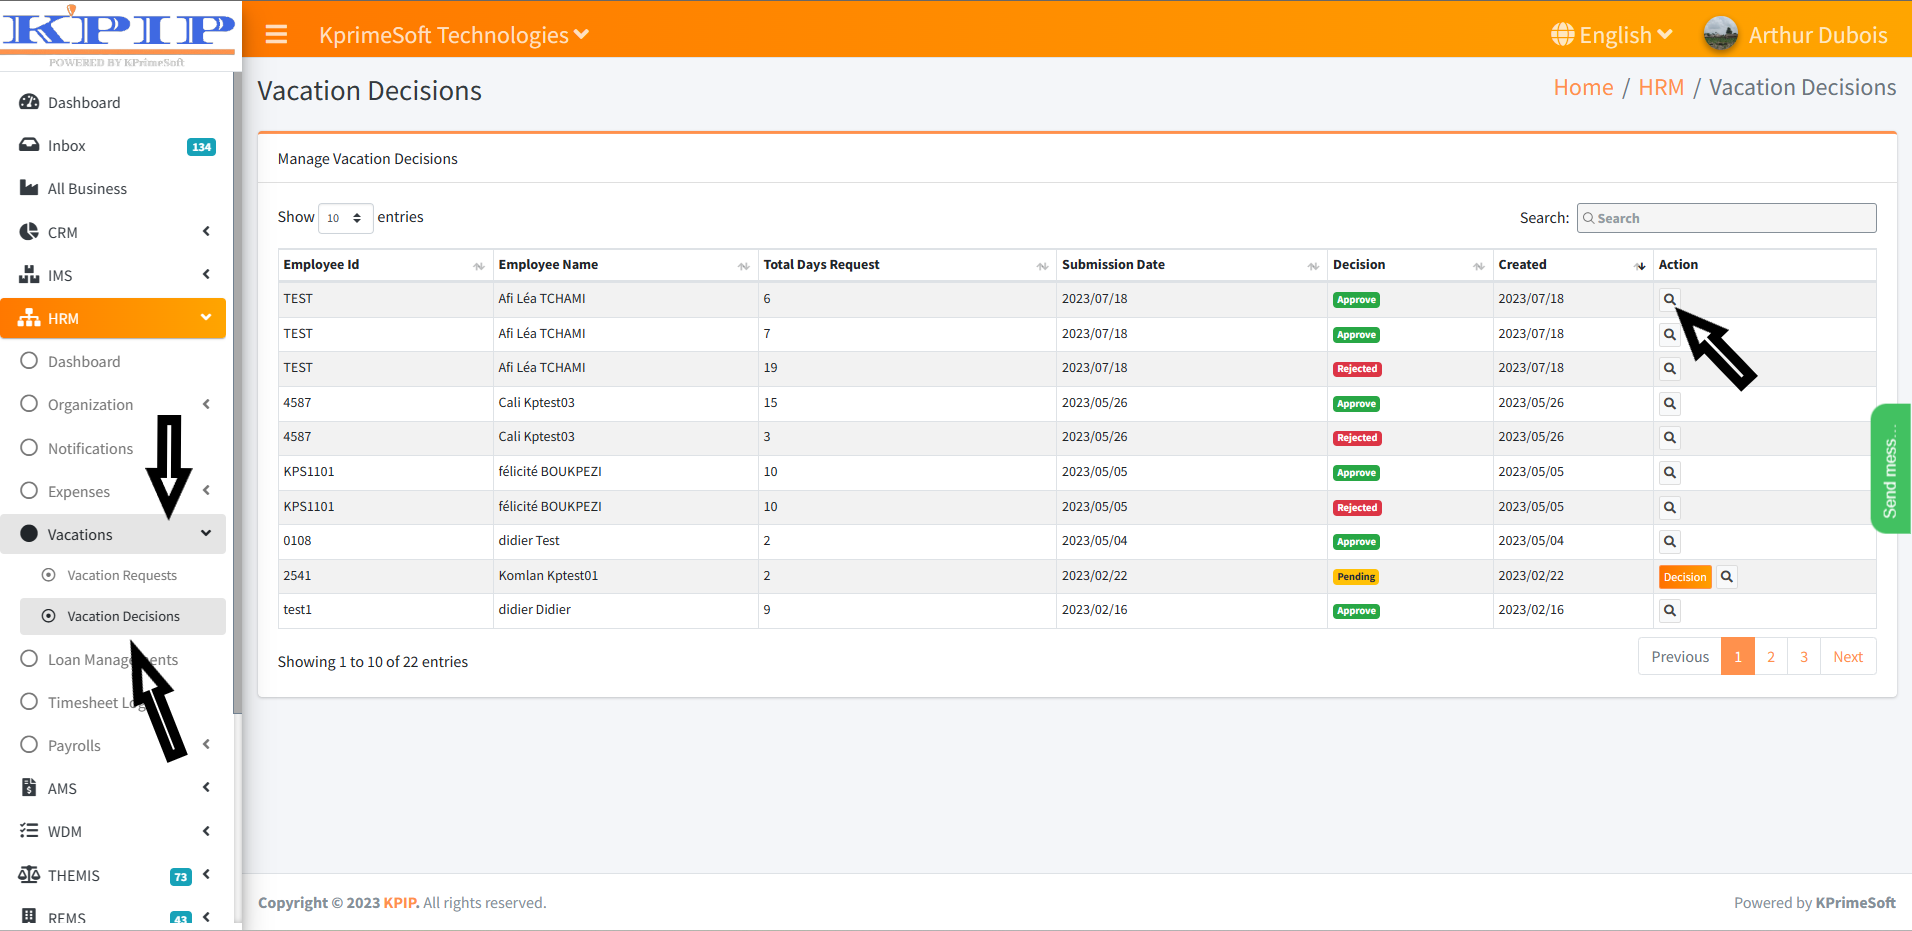
2. VACATION DECISIONS
This functionality empowers you, the manager, to make decisions regarding leave requests.
Upon clicking the "Vacation Decisions" feature, a table will appear on a new page, presenting information pertaining to vacation requests. Within the “Action” section, you can make decisions (approve or reject) on leave requests by clicking the “Decision” button.
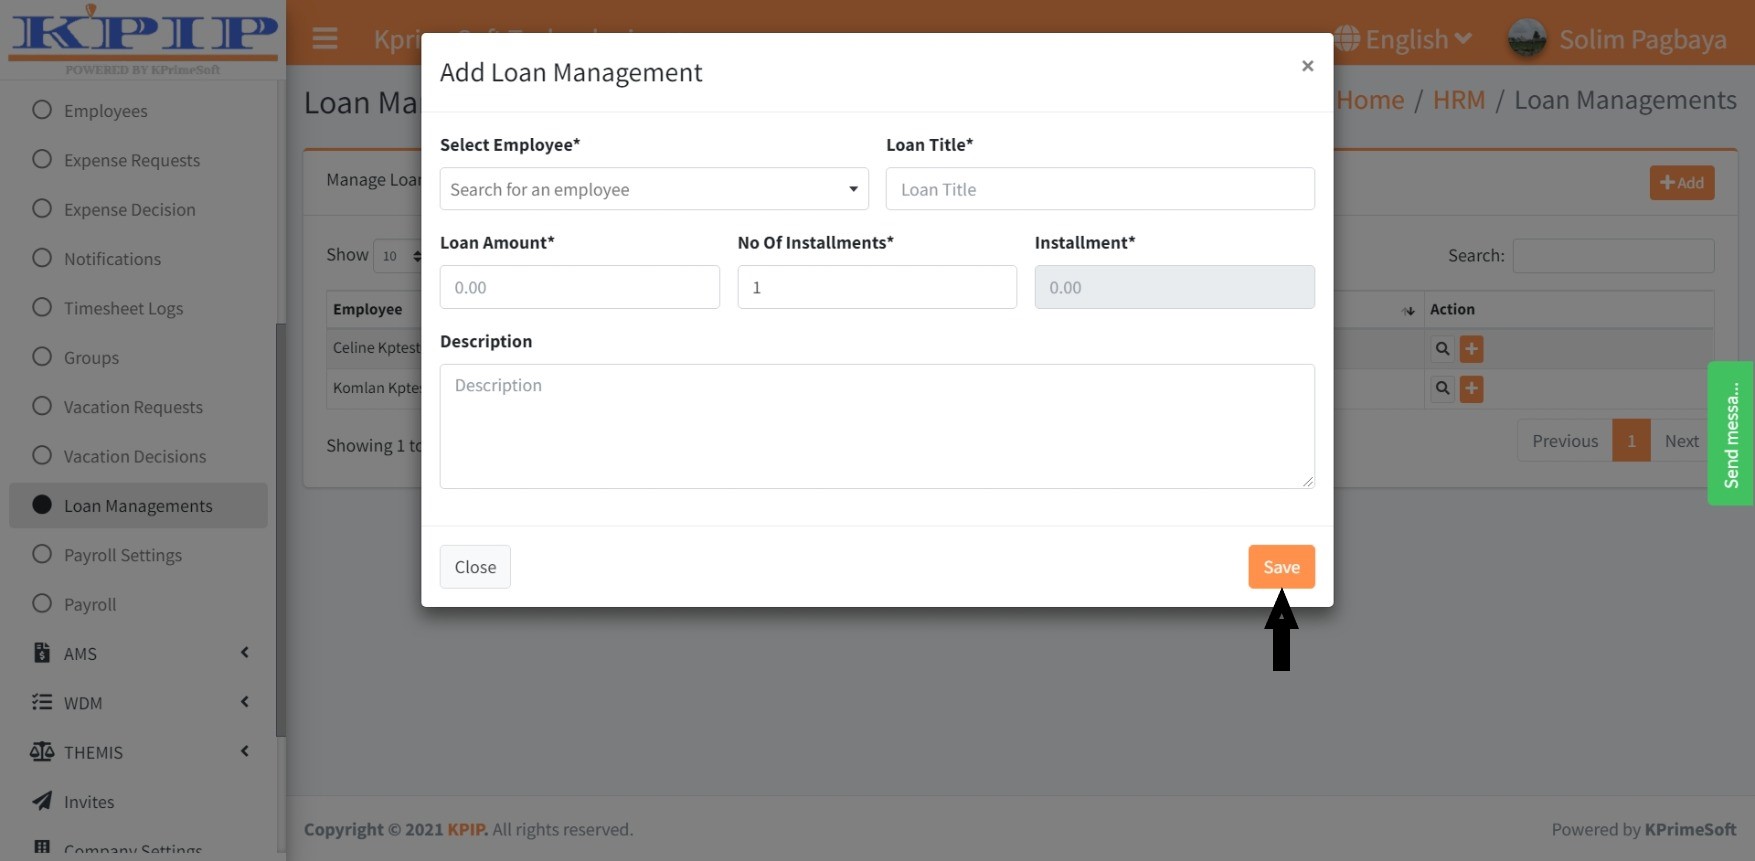
V - LOAN MANAGEMENT
This feature enables you to record and manage loans provided to employees.
Upon clicking the "Loan Management" function, a table will be displayed on a new page, presenting information about the existing loans that have been issued. In the "Action" section, you will have the choice to either view the loan details or add a loan repayment.
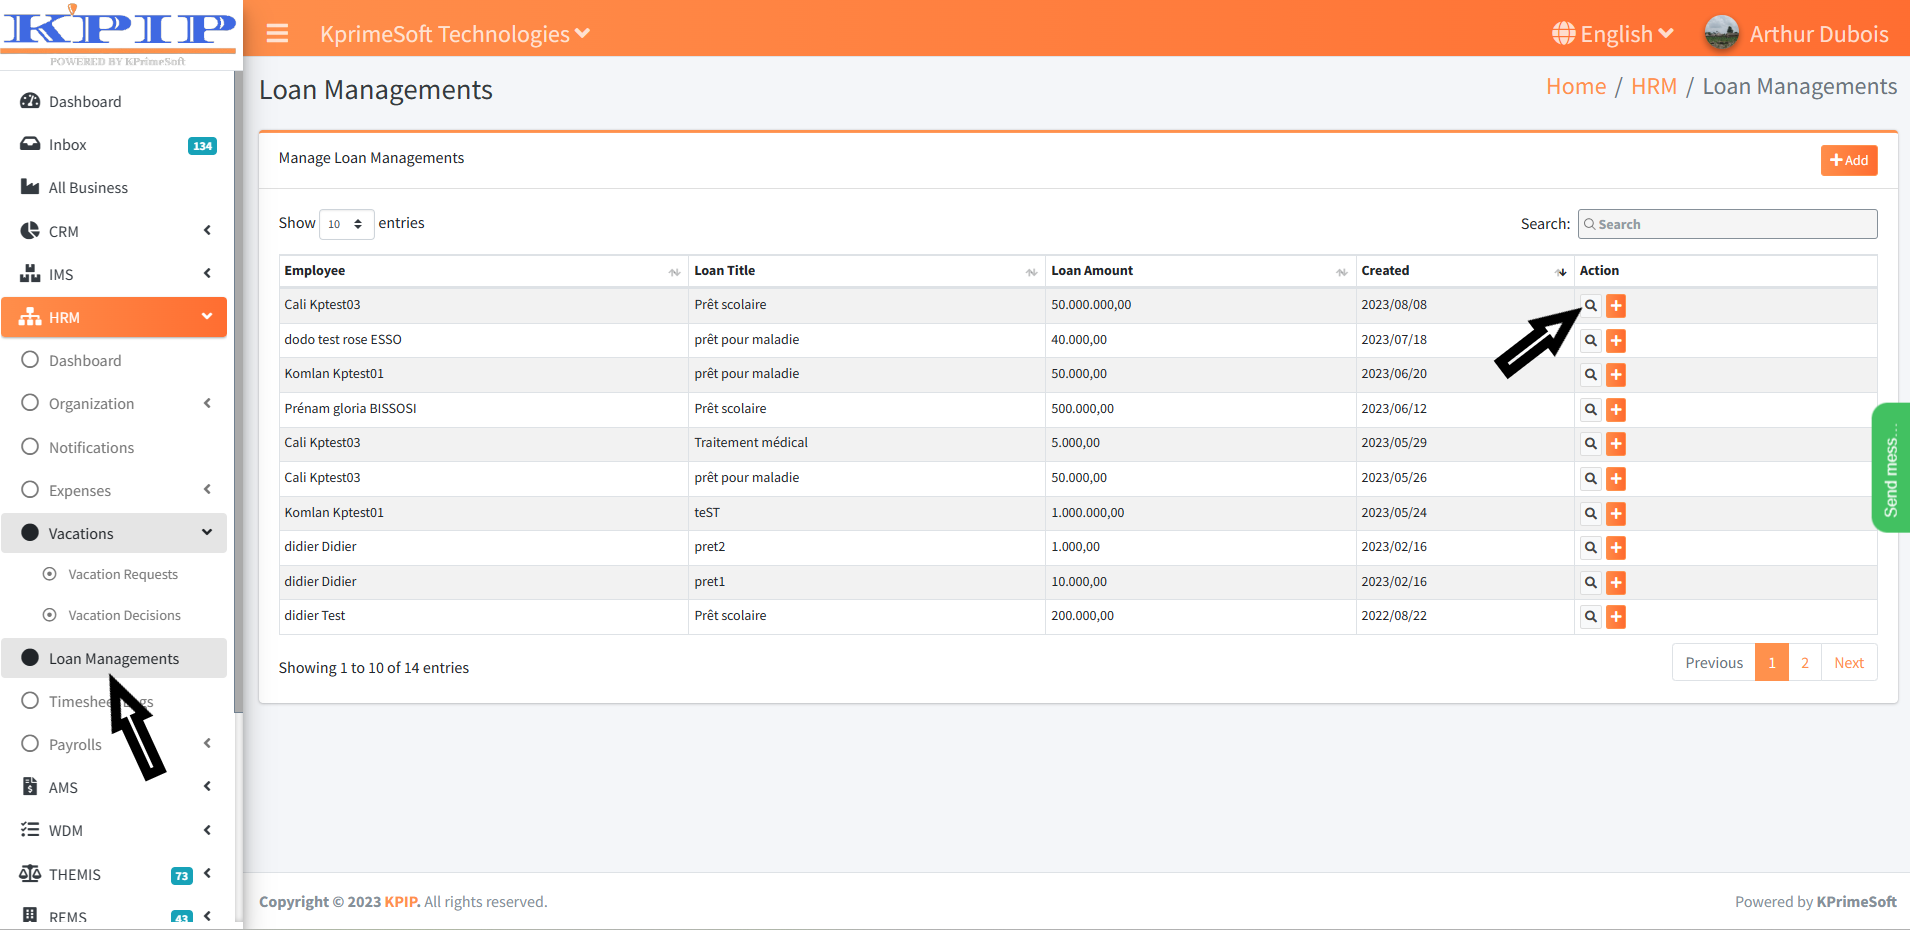
To add a loan, click on the "Add" button. On the new page that appears, fill out the loan management form, and then click on the "Save" button to save your changes.
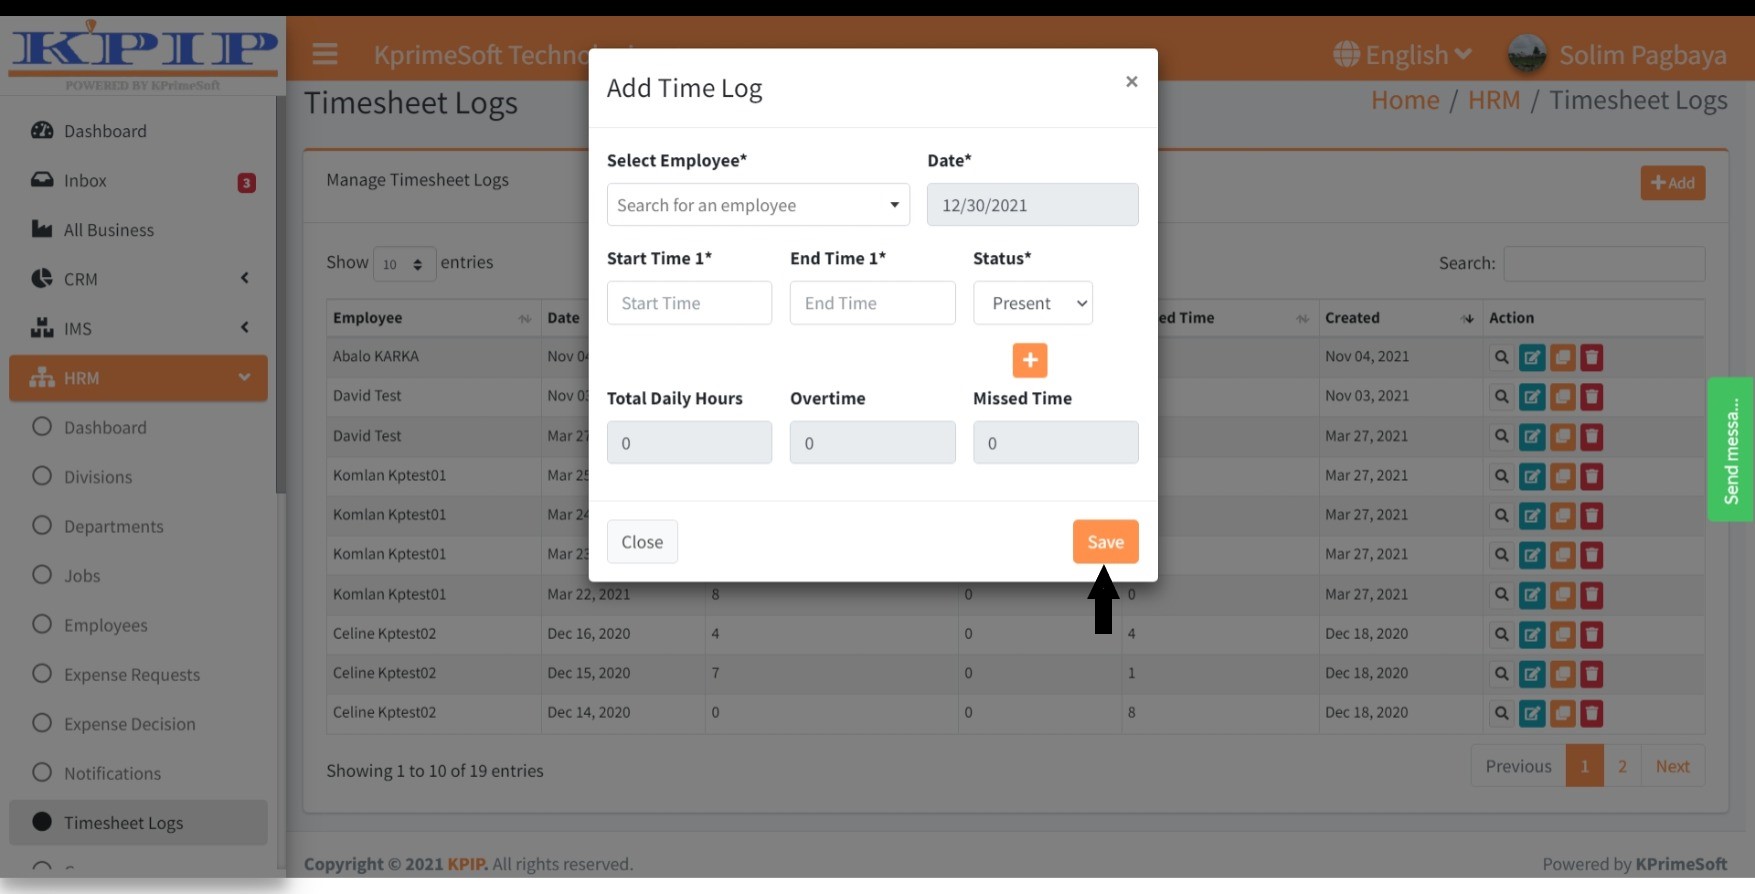
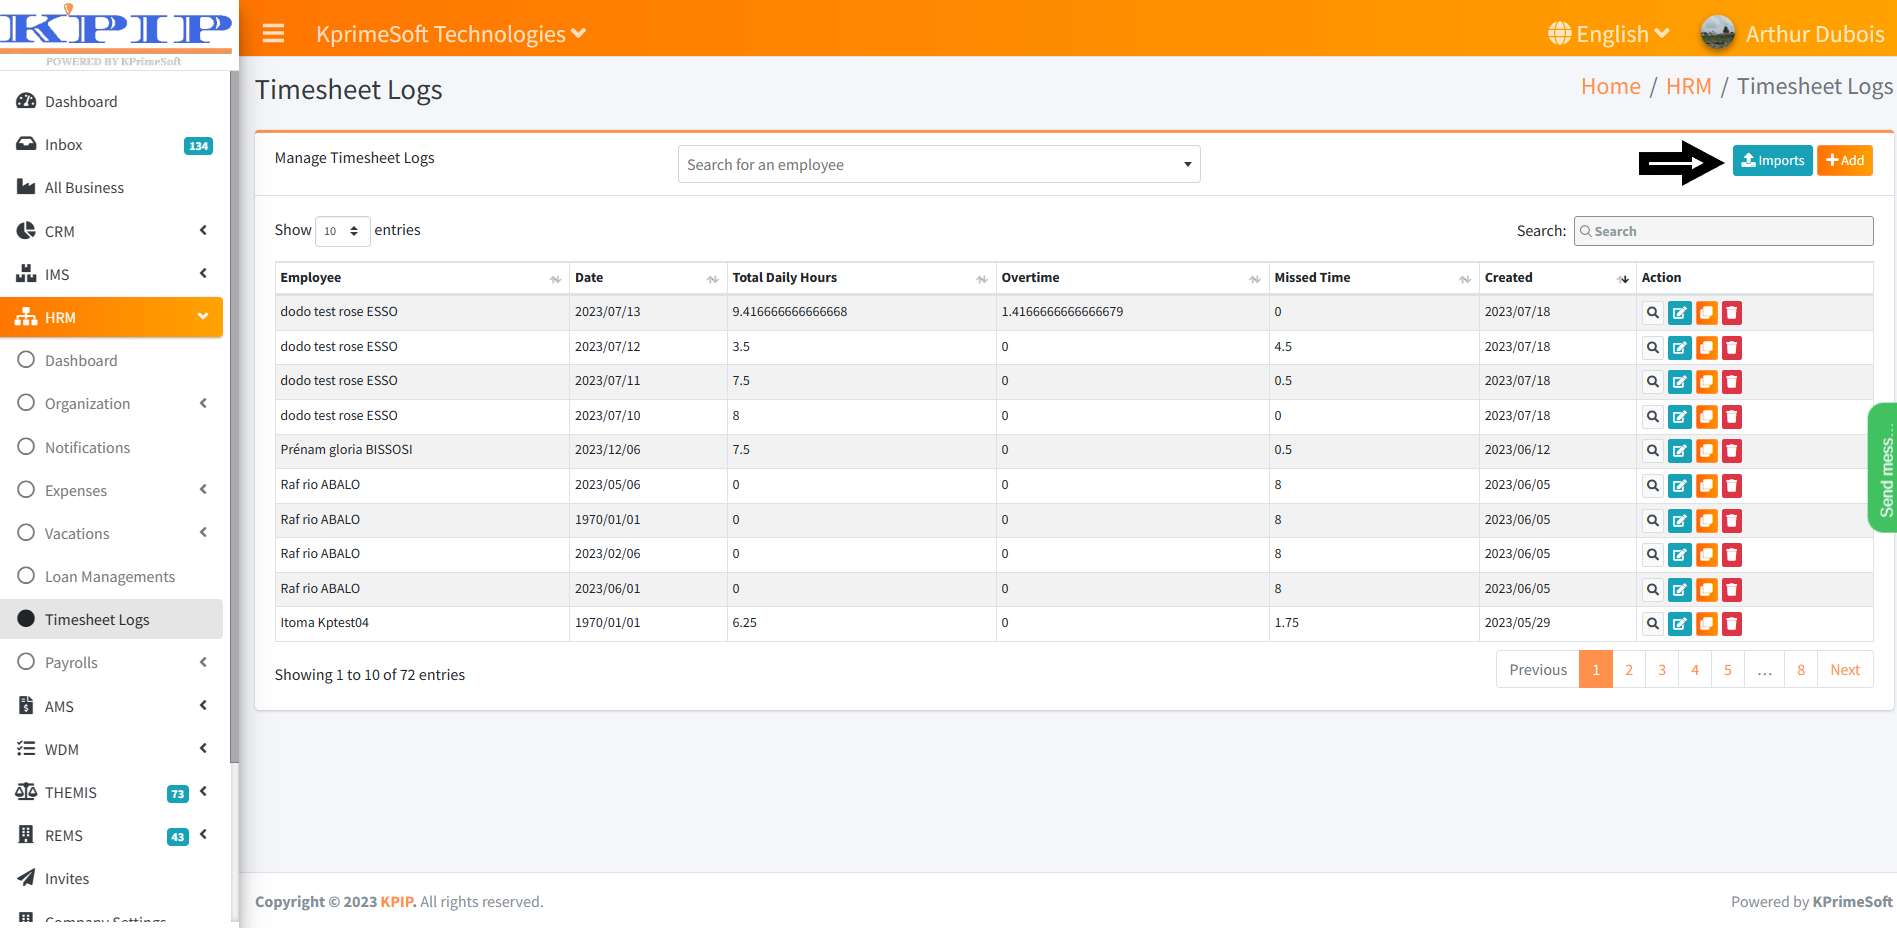
VI - TIMESHEET LOGS
This feature enables you to log staff schedules and working days, streamlining the payroll preparation process.
Upon selecting the "Timesheet Logs" feature, a table will be displayed on a new page, presenting information regarding employee attendance and absence. Within the "Action" segment, you have the option to view an employee's attendance details, edit, duplicate, or delete entries.

To record your presence or absence times, click on the "Add" button. On the subsequent page that appears, complete the schedule form and then click the “Save” button to save your changes.
VII - PAYROLLS
1. PAYROLL SETTINGS
This functionality enables you to integrate all parameters related to wage payments, enabling you to accurately model paystubs.
Upon clicking the "Payroll Settings" feature, a table will appear on a new page, displaying payroll settings that you can customize to align with your business needs. After making any necessary adjustments, click the "Save changes" button.
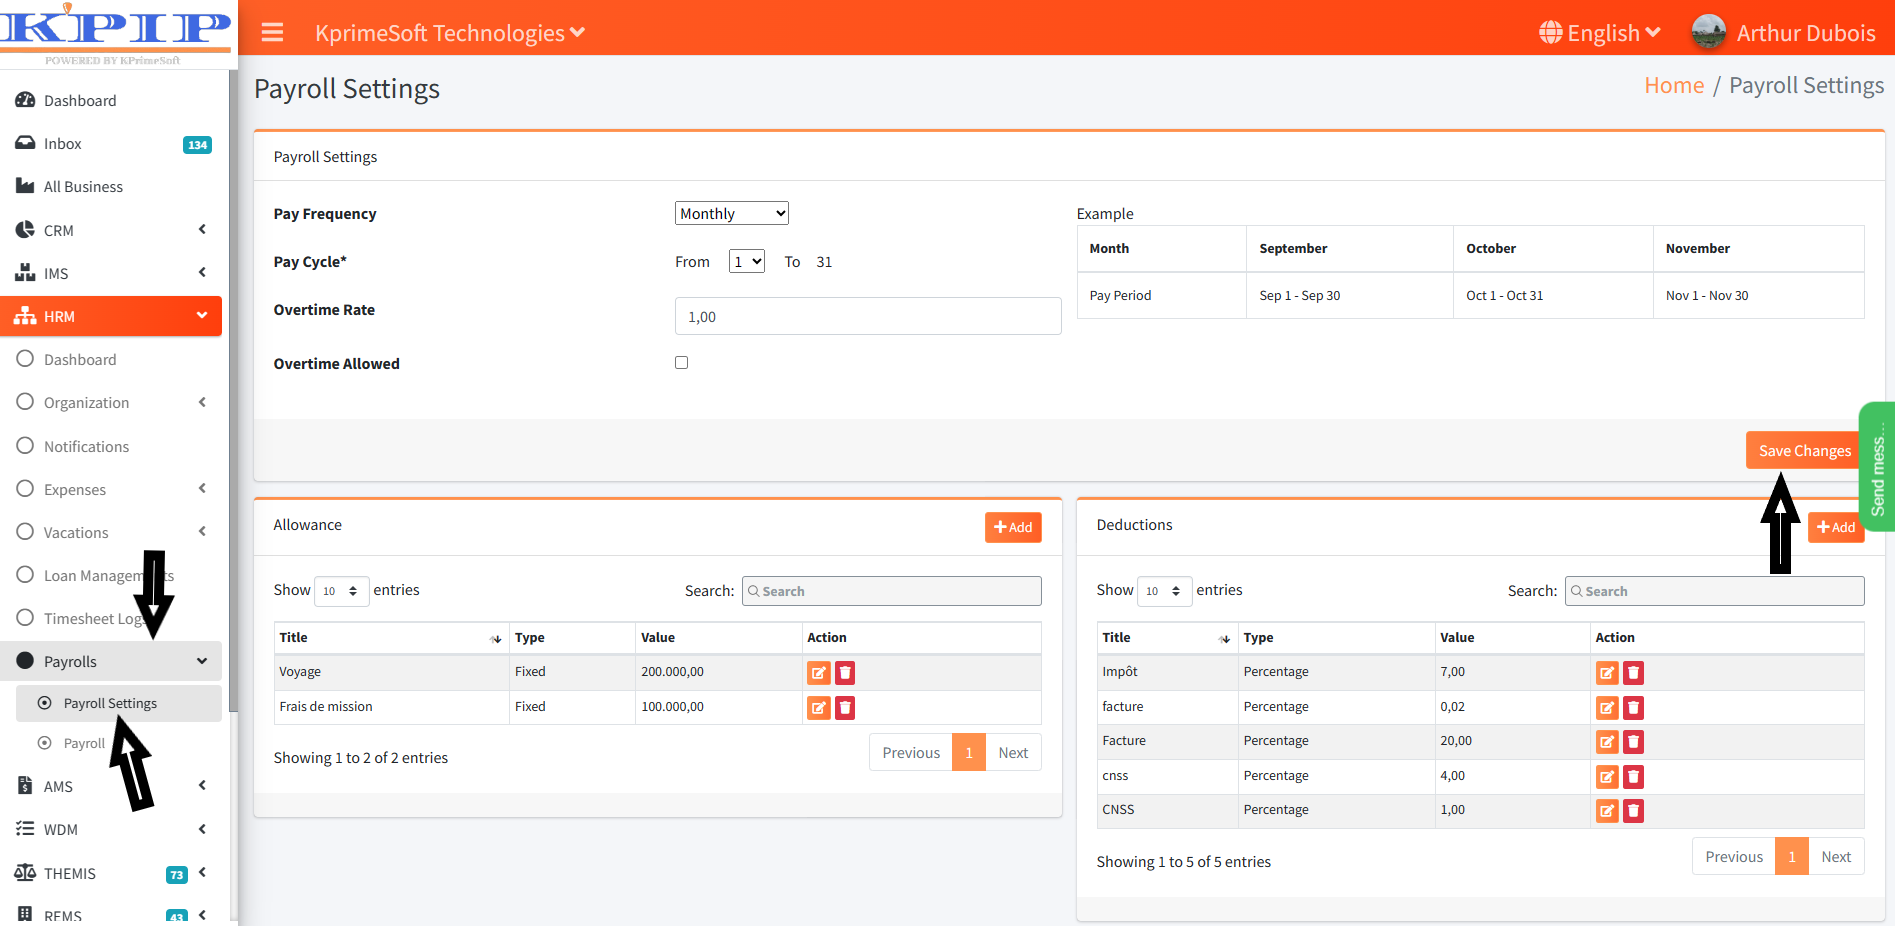
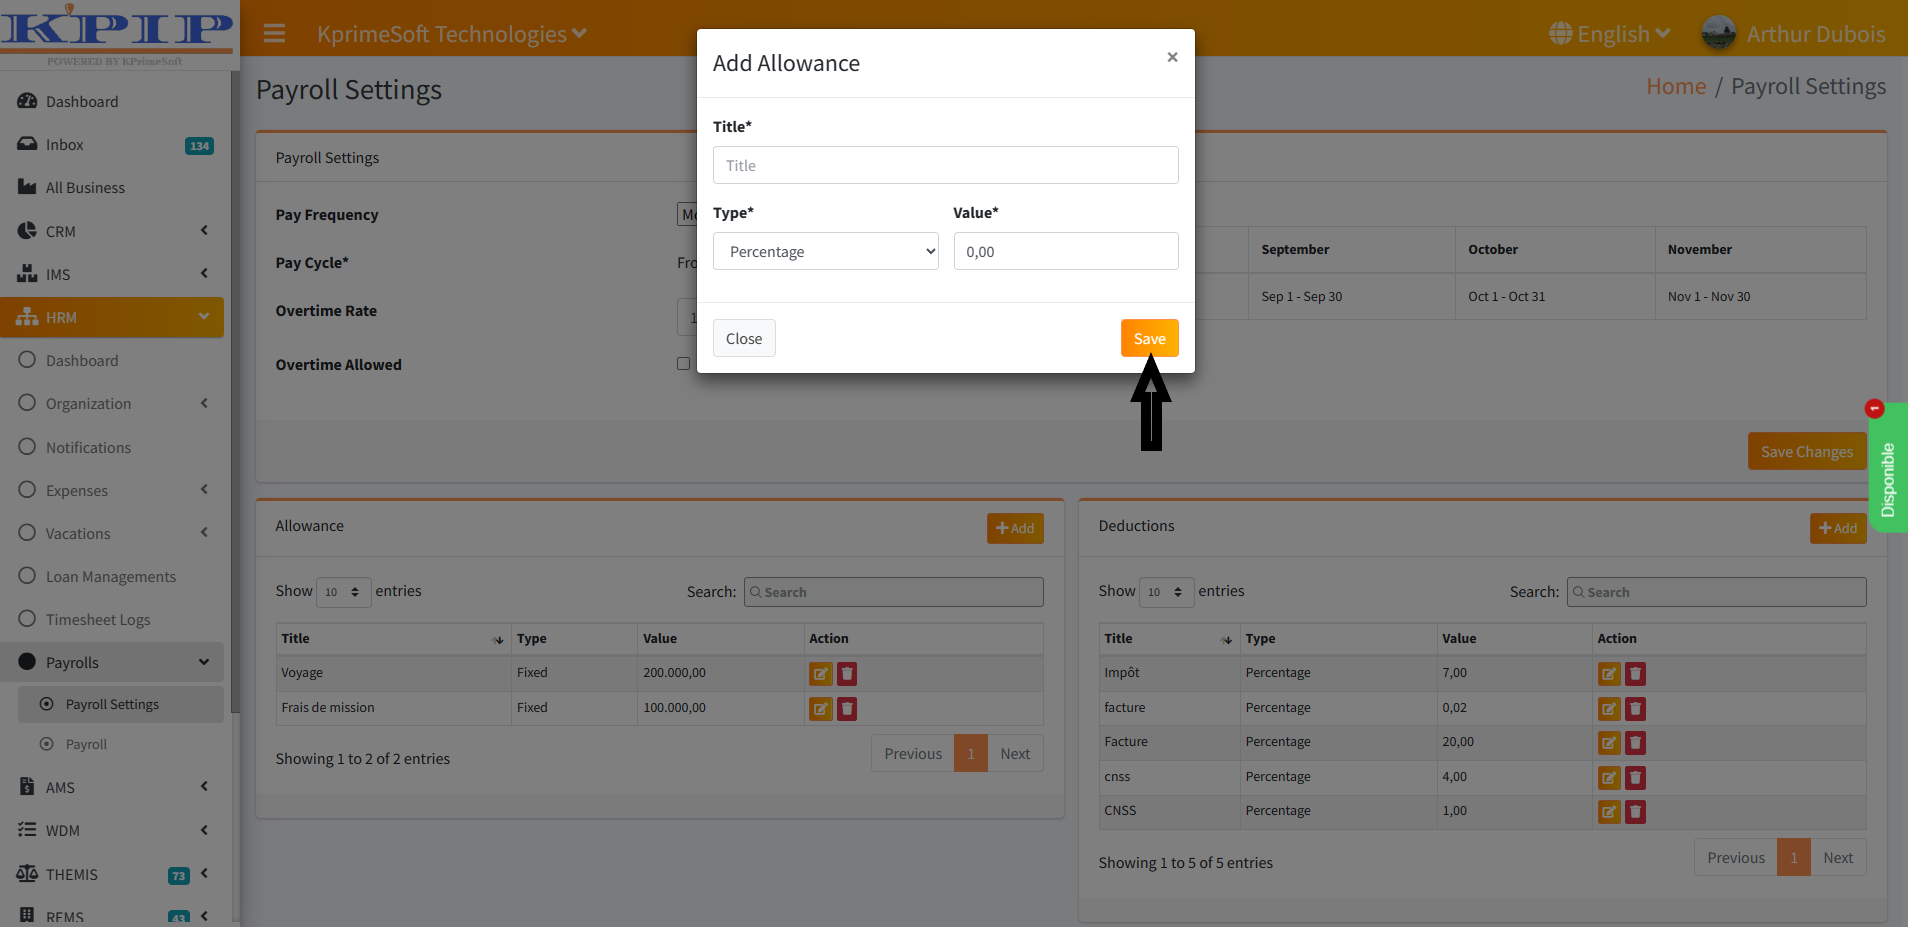
Subsequently, you will encounter the tables of allowances and deductions. To include various types of allowances or deductions for your company, simply click on the "Add" button. Towards the conclusion, there will be a final table where you can incorporate and save your signature. Once done, proceed by clicking the "Save" button.
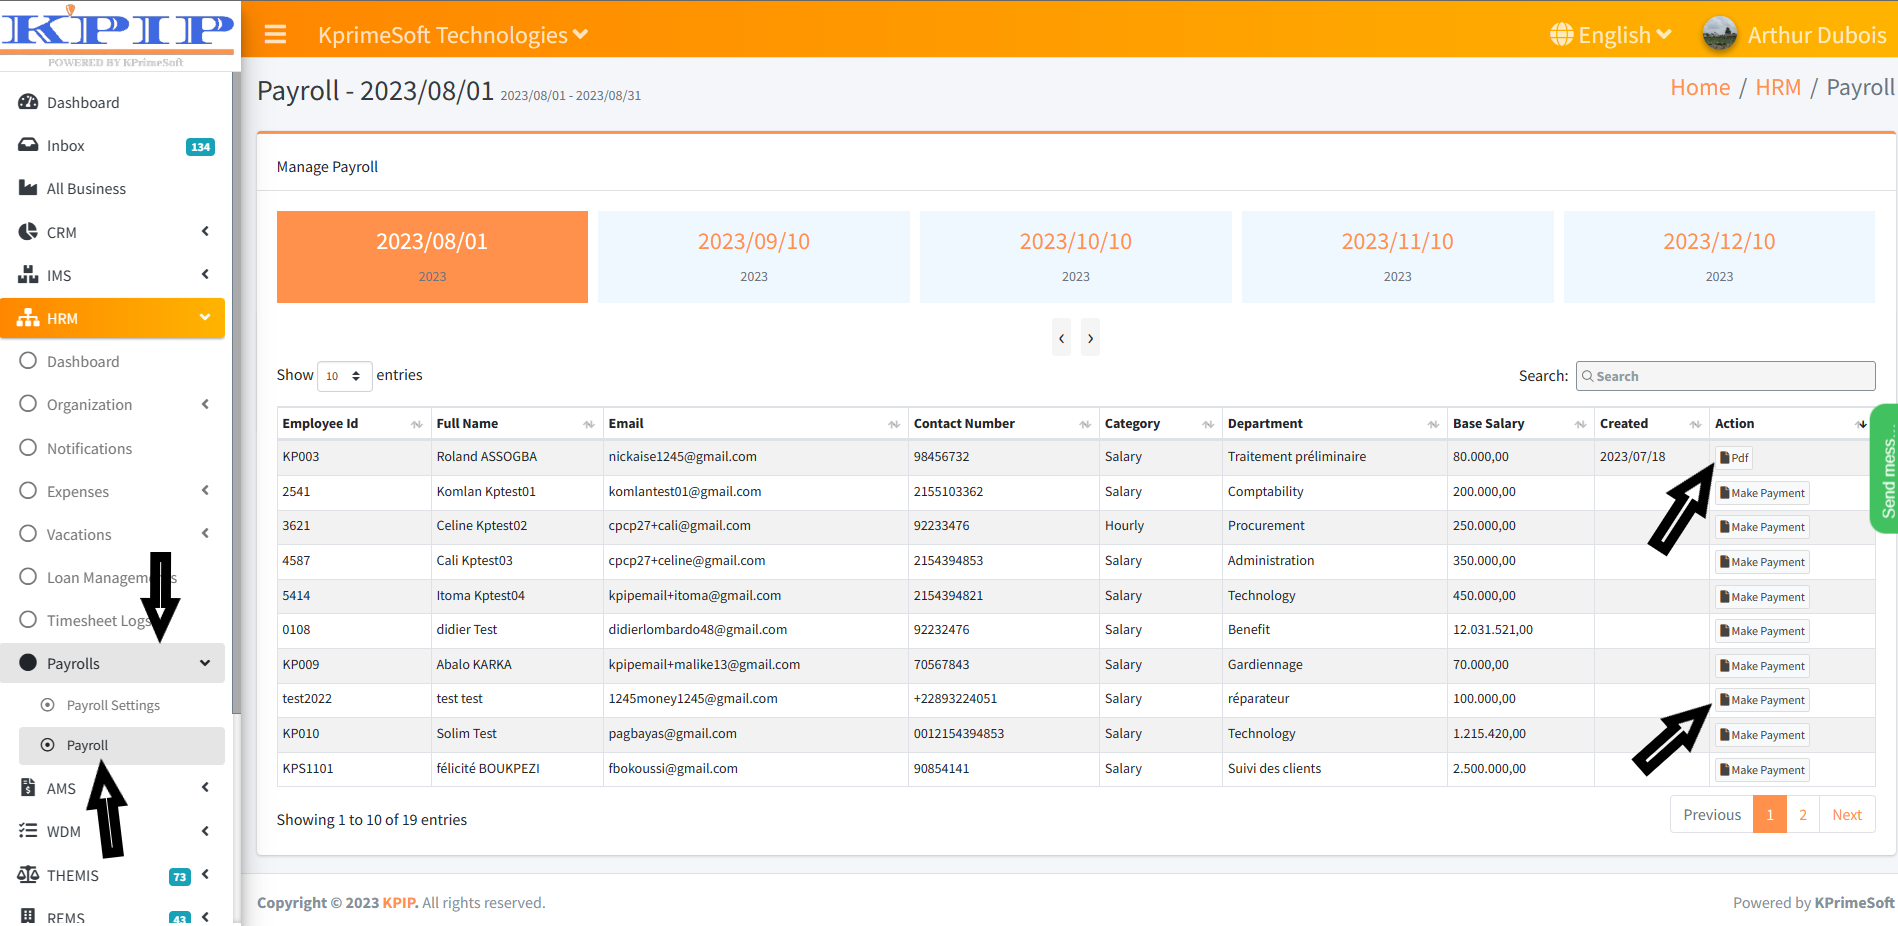
2. PAYROLL
This feature enables you to process salary payments.
Upon selecting the "Payroll feature", a table will be displayed on a new page, listing both completed and pending payments. To initiate a payment, navigate to the "Action" section, and select "Make a payment" On the ensuing page, mark the "Payment made" checkbox, and proceed to click "Save" to confirm.
For generating a payslip, ensure that the payment is processed beforehand. Subsequently, revisit the "Action" section corresponding to the employee for whom the payment was made, and opt for the PDF option to print the payslip.