CRM USER MANUAL
All about CRM documentation

KPrimeSoft Support
Last Update il y a 5 mois
INTRODUCTION
The CRM module is subdivided into three main parts, which include:
- Dashboard
- Client
- Billing
And it appears as the screenshot depicts.

I - DASHBOARD
This functionality enables the user to obtain a comprehensive overview of the organization's significant activities concerning customer relations. Within this space, users have access to various types of diagrams, including those depicting registered customers by month, year, city, country, industry, as well as interactions with customers.

I. CLIENT
This component enables you to save information about your customers, making it convenient to retrieve their details in the future and to organize and group relevant information about them. It consists of several sub-modules, including:
- All Clients
- Clients Interactions
- Notifications
- Groups
- Document Signs
1. ALL CLIENTS
When you click on "All Clients," a new page will appear, displaying a table containing all the customers who have already been registered. The statistics and automatic filtering system are positioned above the data table, providing you with a detailed overview of the statistics and facilitating swift data table filtering. The "Action" section offers the following options:
- View
- Edit
- Delete
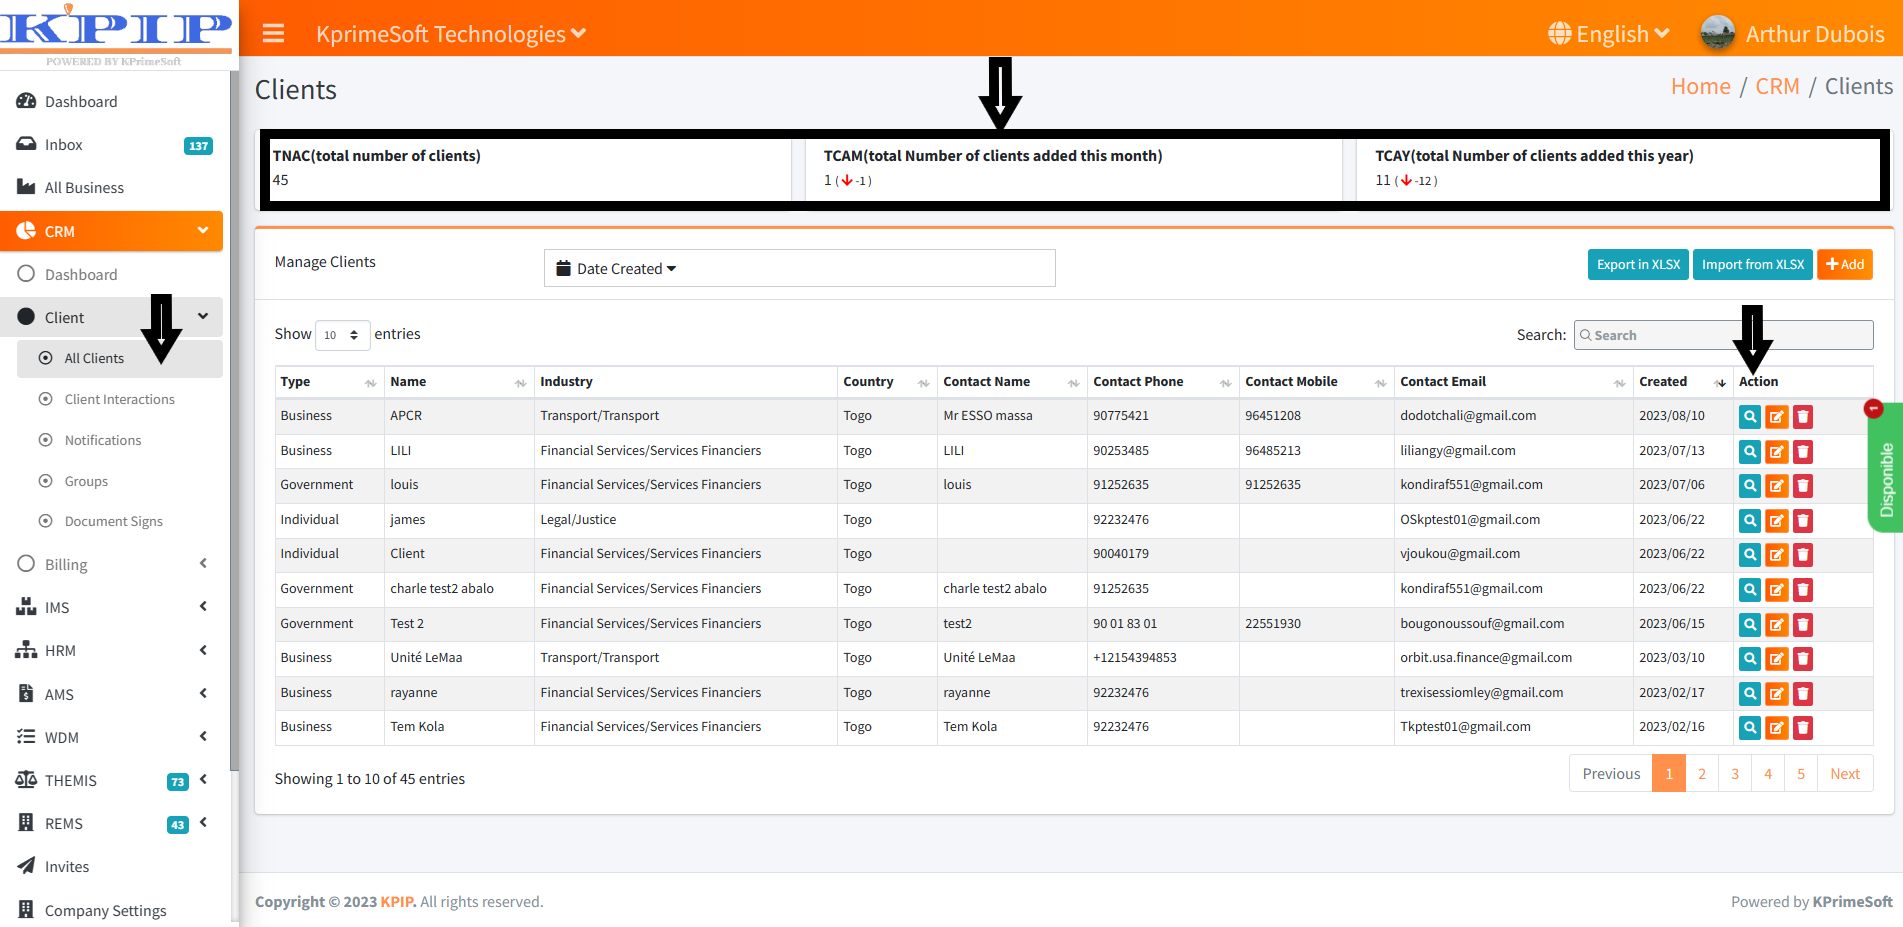
The "Show Entries" option enables you to specify the number of customers you'd like to display per page.
The "Date Created" option permits you to swiftly search for registered customers within a designated time range.
The "Export to Excel" option facilitates the transfer of your customer file from the CRM module to the Excel software on your computer.
The "Import from XLSX" option allows you to bring in your customer file from the Excel software on your computer into the CRM module.
To include a new customer, select the "Add" button. Upon reaching the subsequent page, complete the form and then press the "Save" button to retain the information.

2. CLIENTS INTERACTIONS
This feature enables you to record the discussions you engage in with your customers. It aids your organization in maintaining a history of customer interactions, thereby facilitating the optimization of customer relations.
Upon selecting the "Client Interactions" feature, a table will emerge on a new page, displaying all previously recorded interactions you've had with your customers. In the "Actions" section, you're afforded the opportunity to view interaction details, make edits, create duplicates, or remove entries.
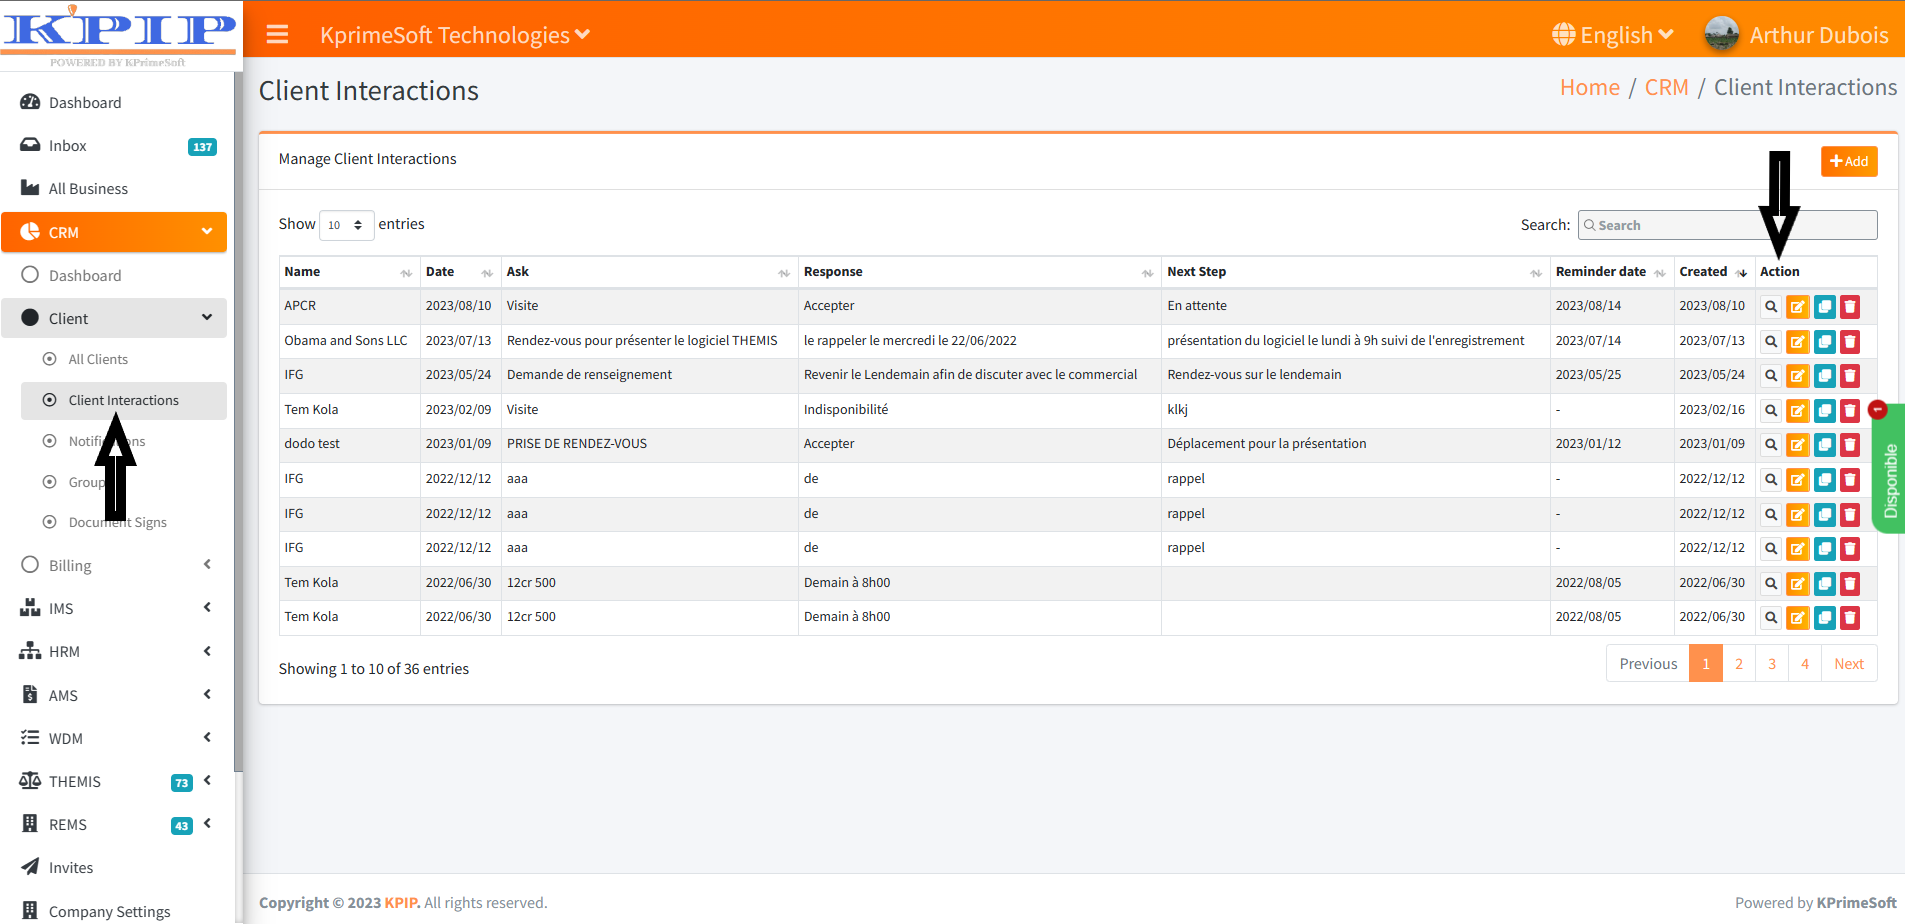
The "Show entries" option enables you to specify the number of interactions you wish to have displayed per page.
The "Search" option allows you to swiftly search for interactions you've had with customers by entering text. Click into the text box and begin typing. The system will present you with various options to choose from.
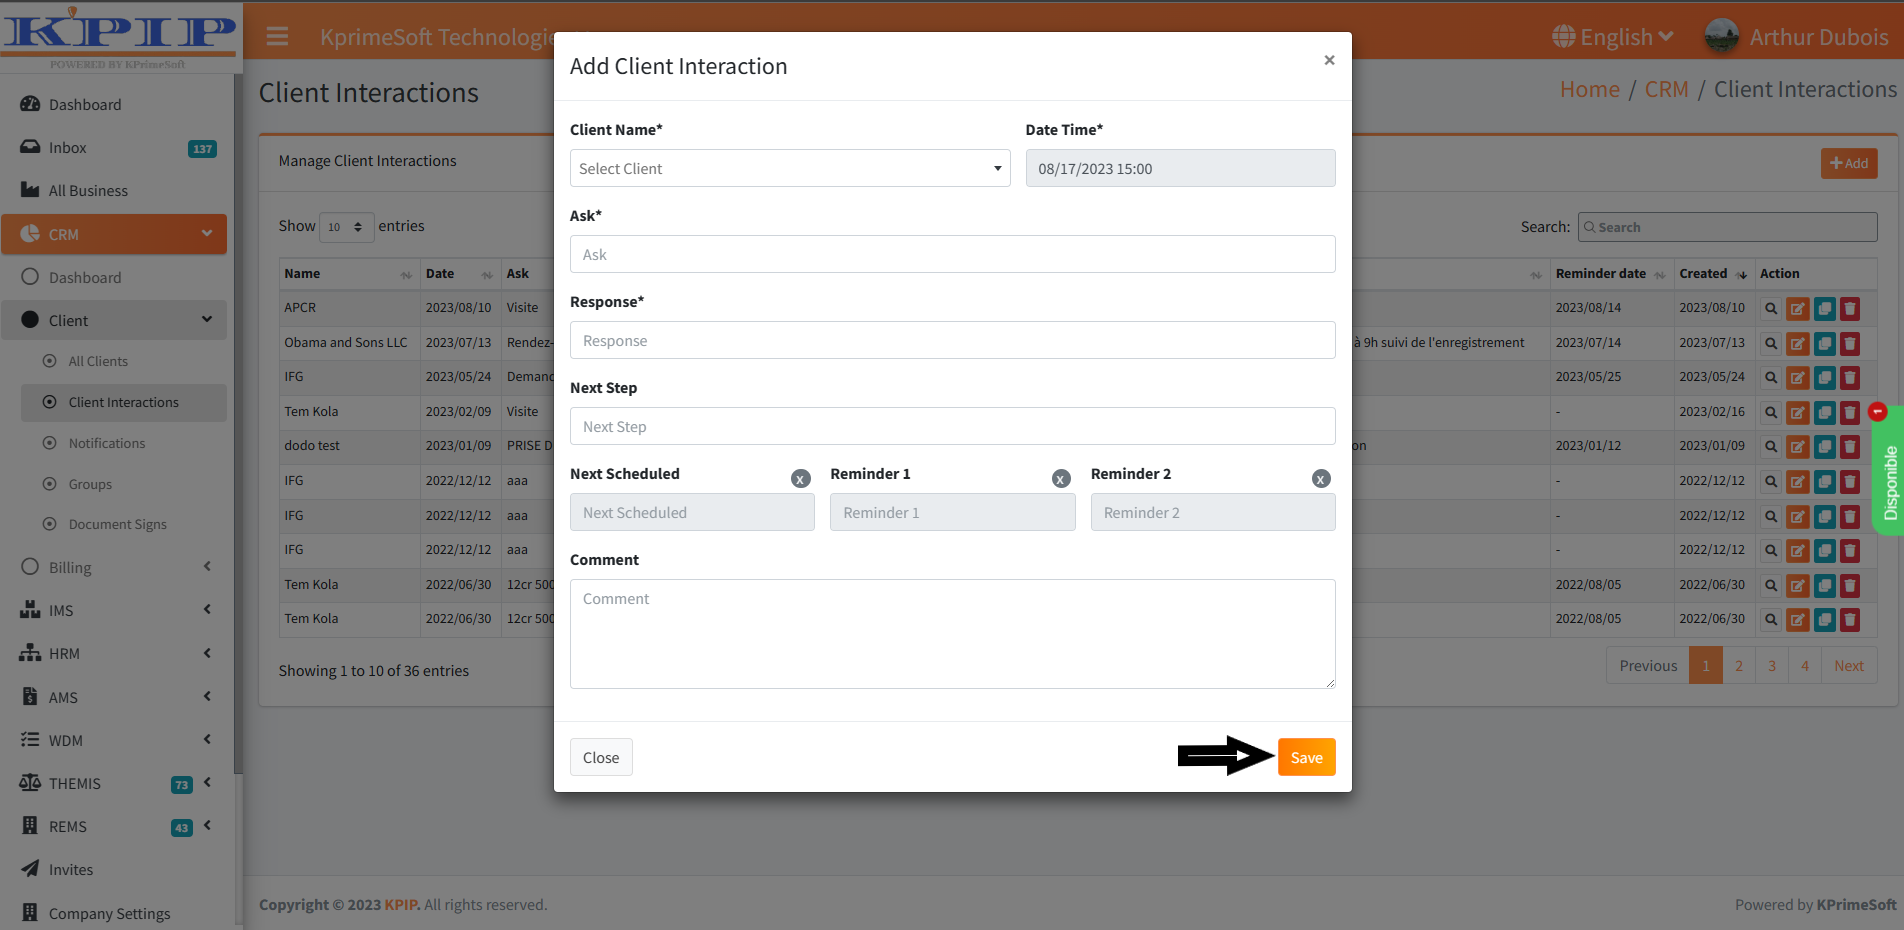
To include a new interaction, click the “Add” button. On the subsequent page, complete the form and then click the “Save” button to save your changes.
3. NOTIFICATIONS
This feature enables you to send emails to both staff and customers within your business.
Upon clicking the "Notifications" feature, a table will be displayed on a new page, presenting information regarding all sent emails. Within the "Action" section, you are provided with the choice to either view the specifics of an email or deactivate its sending, if such programming is in place.

To send an email, click on the “Send a notification” button. On the new page that appears, fill out the sending form and click on “Preview”. You will be able to review the integrated data, and then click on the “Send an email” button to initiate the notification sending process.


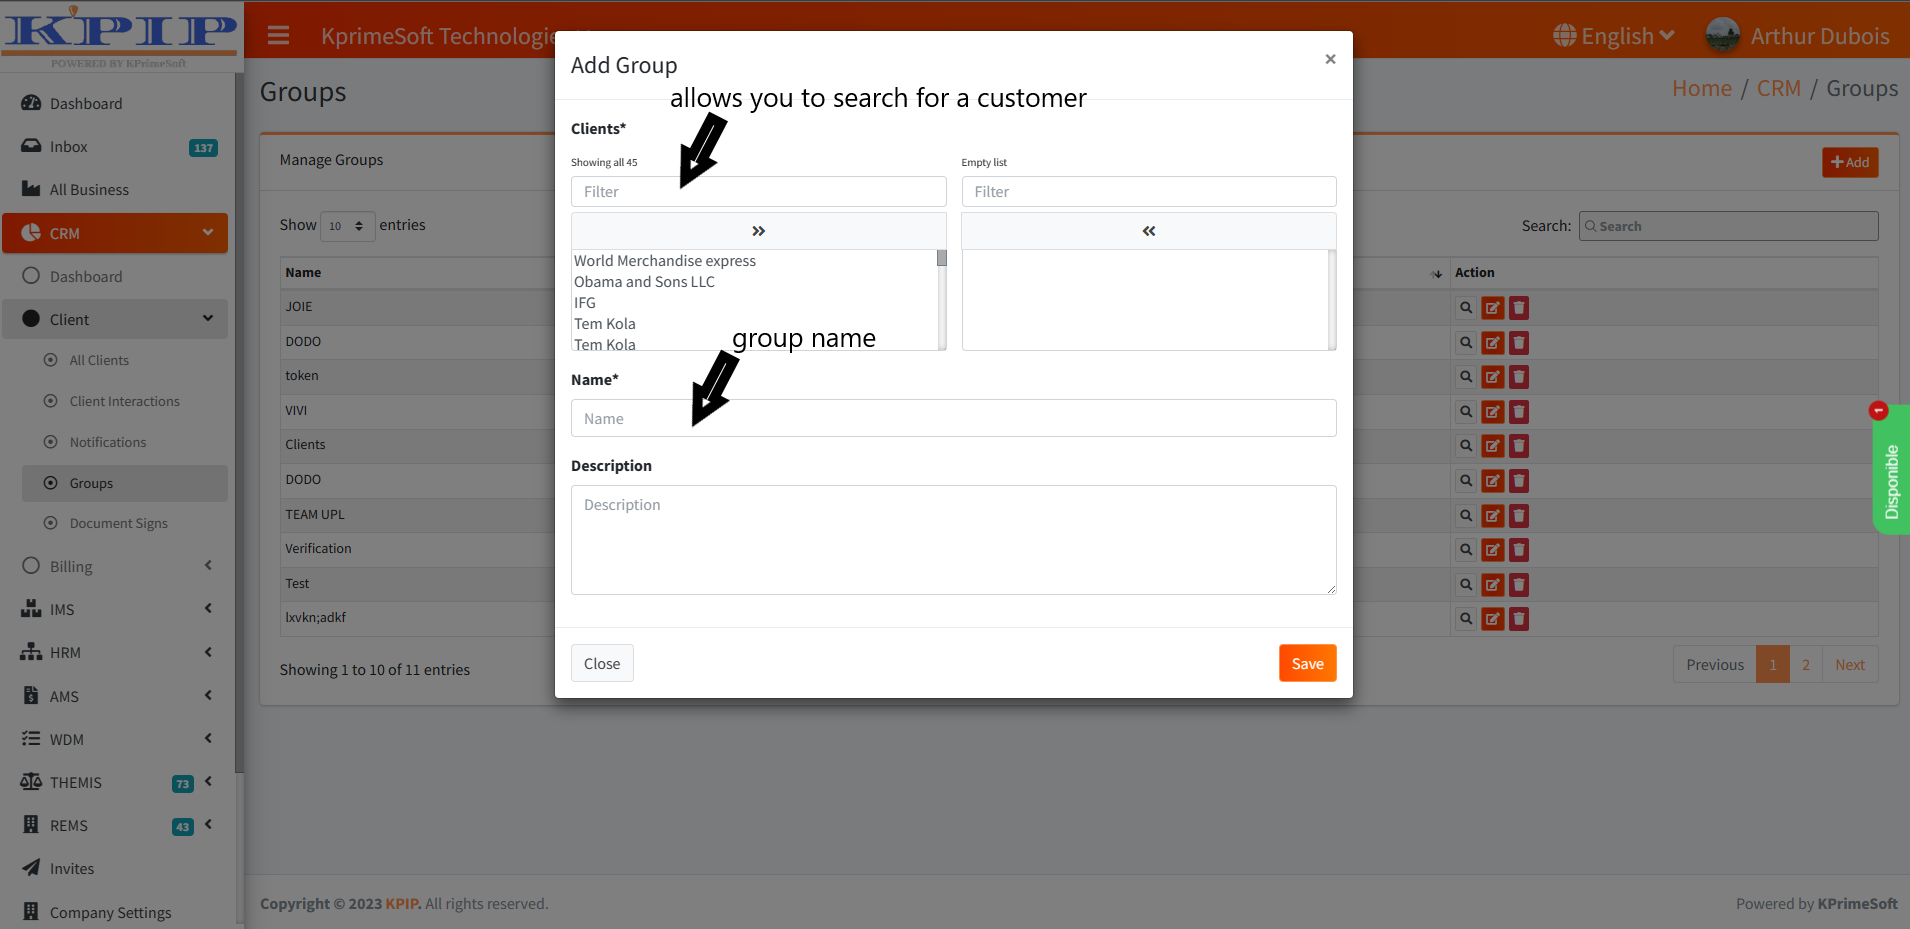
4. GROUPS
This feature enables you to create groups to streamline the process of sending mass notifications.
Upon clicking the "Groups" feature, a table will be displayed on a new page, presenting information regarding the various groups you have established. Within the "Action" section, you have the option to view the details of a group, make edits, or delete it.

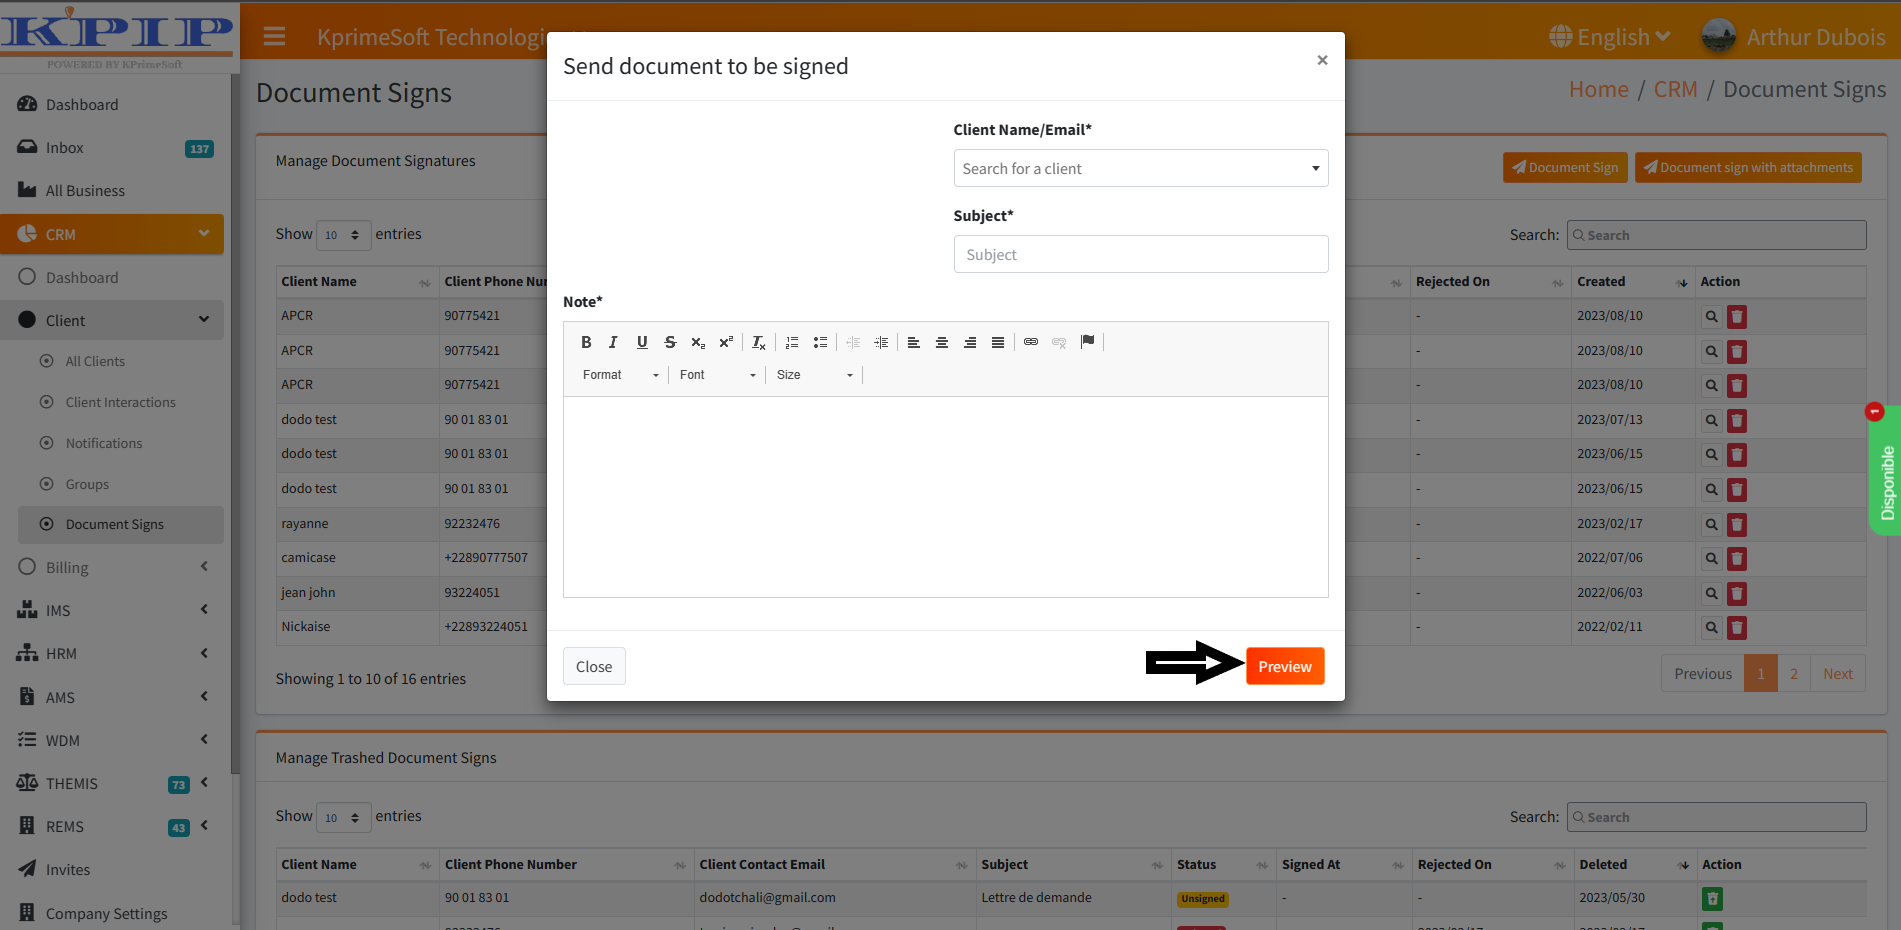
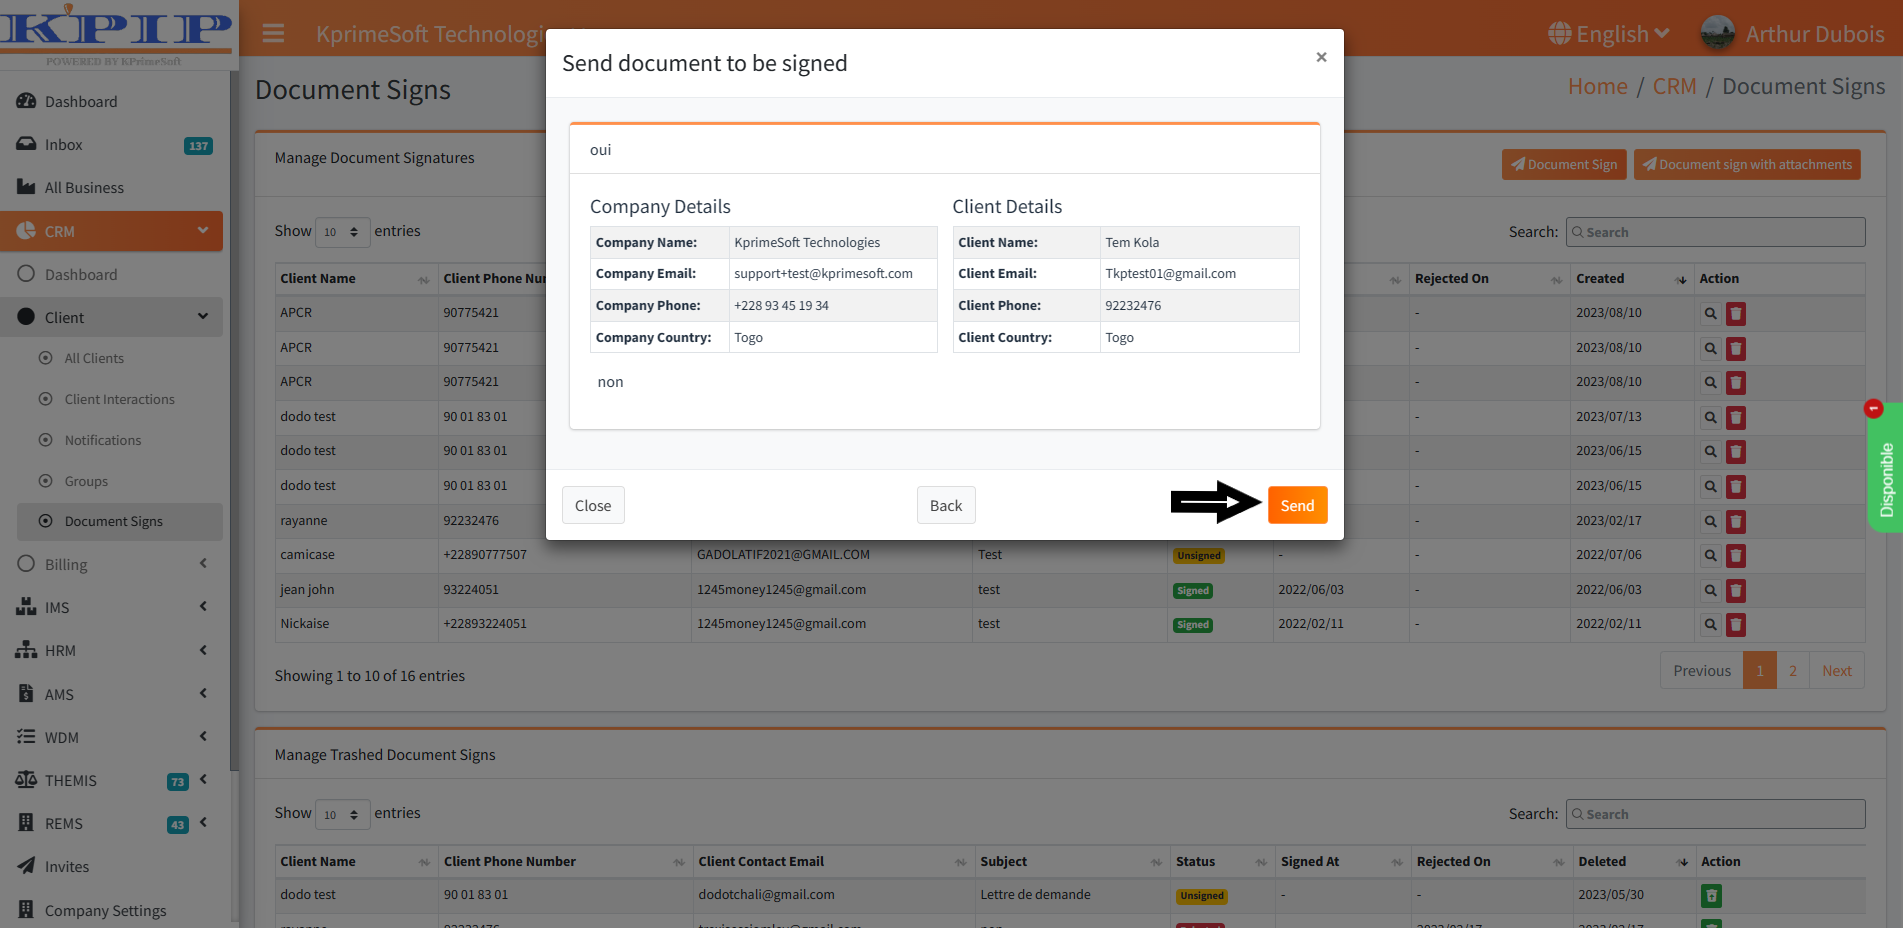
5. SIGN DOCUMENTS
This feature allows you to send documents to clients for signing via email.When you click on the "Documents Signs" option, a new page will open, displaying two tables containing all the documents that have already been signed, those that have not yet been signed, and those that have been deleted. In the "Actions" section, you have the option to view the details of a document, delete it, or restore it in the "Actions" section of the second table.

III - BILLING
This section includes the following sections:
1.Orders
2. Sales
3. Invoices
4. Service category
5. Services
6. Proformas
7. Advance payment
1. ORDERS
This feature allows you to generate customer orders.
When you select the “Orders” function, a table will appear on a new page, listing all the orders you have recorded. Above this table, you will find statistics and an automatic filtering system. This function provides you with accurate statistics and allows you to efficiently filter data according to your preferences.
In the “Actions” section, several options are available to you. You can view the details of an order, create a copy or cancel it if necessary, and also record the return of an order. By accessing the detailed view of an action, you can add a payment, generate a printed version of the order, or convert it to a PDF file.

The "Show entries" option enables you to specify the quantity of orders you wish to be displayed per page.
The "Search" option permits you to swiftly look up the orders you have logged by inputting the customer's name.
To insert an invoice, select the "Add" button. Within the subsequent page, complete the provided form and subsequently press the "Save" button to retain the information.

2. SELL TRANSACTIONS
This feature enables you to log the sales conducted by your company. By selecting the "Sell Transactions" function, a table displaying all previously recorded sales is presented on a new page. Within the "Action" section, you have the option to review the specifics of a sale or initiate its cancellation.

The "Show entries" option allows you to specify the number of sales you would like to see on each page.
The "Transaction date" option enables you to swiftly search for sales that were recorded within a specific time range.
The "Export to EXCEL" feature permits you to export your sales file from the AMS module to your computer's Excel software.
The "Export to PDF" option allows you to export your sales file from the CRM module to a PDF file.
Utilizing the "Search" option, you can rapidly search for a registered sale by entering either the customer's name or the sale number.
To add a new sale, click on the "Add" button. On the ensuing page, complete the form, and then press the "Save" button to save the entered information.


3. INVOICES
This feature allows you to generate invoices for customers. When you click on the "Invoices" option, a new page will open, displaying a table with all the invoices you have already recorded. The system is equipped with statistical features and automatic filtering applied to the data table. In the "Actions" column, you will have the option to download an invoice in PDF format, print it, generate the associated receipt, send it via WhatsApp, record payments, or convert this invoice into a credit note by viewing the invoice details and sending it via email.

The "Show entries" option enables you to specify the number of invoices you wish to display per page.
The "Search" option allows you to swiftly locate a previously saved invoice by entering text. Click into the text box and begin typing. The system will present you with various options to select from.
You can view the accounting entries.

4. SERVICE CATEGORIES
This feature allows you to register the various categories of services you offer.When you click on the “Service Categories” option, a new table will appear on a dedicated page. This table will display information about the different service categories you offer. In the “Action” column, you will be able to edit or delete a service category.
The “Display Entries” option allows you to set the number of service categories you want to display per page.
The “Search” option allows you to quickly find the service categories you have saved by entering the name of the category.
To add a new service category, click on the “Add” button. On the new page that appears, complete the form, then click on the “Save” button to save.

5. SERVICES
This feature enables you to list the various services you provide.
Upon selecting the "Services" option, a table will emerge on a fresh page, presenting details about the diverse range of services you make available. Within the "Action" section, you are presented with the choice to either modify or remove a particular service.

The "Show entries" option enables you to specify the desired number of service deliveries you wish to have displayed per page.
The "Search" feature allows you to swiftly find the services you have registered by entering the service name.
To include a new service, click the "Add" button. On the subsequently displayed page, complete the provided form, and then press the "Save" button to retain the information.

6. PROFORMAS
This feature enables you to create and send pro forma invoices to clients.
Upon selecting the "Proformas" feature, a table will be displayed on a new page, showcasing all the previously saved pro forma invoices. Under the "Action" column, you have the option to view the details of a pro forma, make modifications if necessary, and then dispatch it via email.

The "Show entries" option enables you to specify the number of invoices you wish to display per page.
The "Search" option, on the other hand, provides a quick way to find pro formas you've created for a specific client. Simply enter the client's name to initiate the search.
To add a proforma, locate and click the "Add" button. This action will take you to a new page where you can complete the necessary form fields. On the new page that appears, fill out the form, click the "Preview" button, and then click the "Save" button to save your changes.


This feature allows you to record a payment made by the customer before the product is delivered or the service is provided. It allows the company to obtain cash in advance and secure its sales.
When you click on the “Advance payment” option, a page will open displaying a table with all the records already made. To add a new payment, click on “Add.”
In the “Actions” column, you will be able to view the details of the recorded payment.

