DETAILED MANUAL OF THE PROFORMAS FUNCTION

KPrimeSoft Support
Last Update 2 года назад
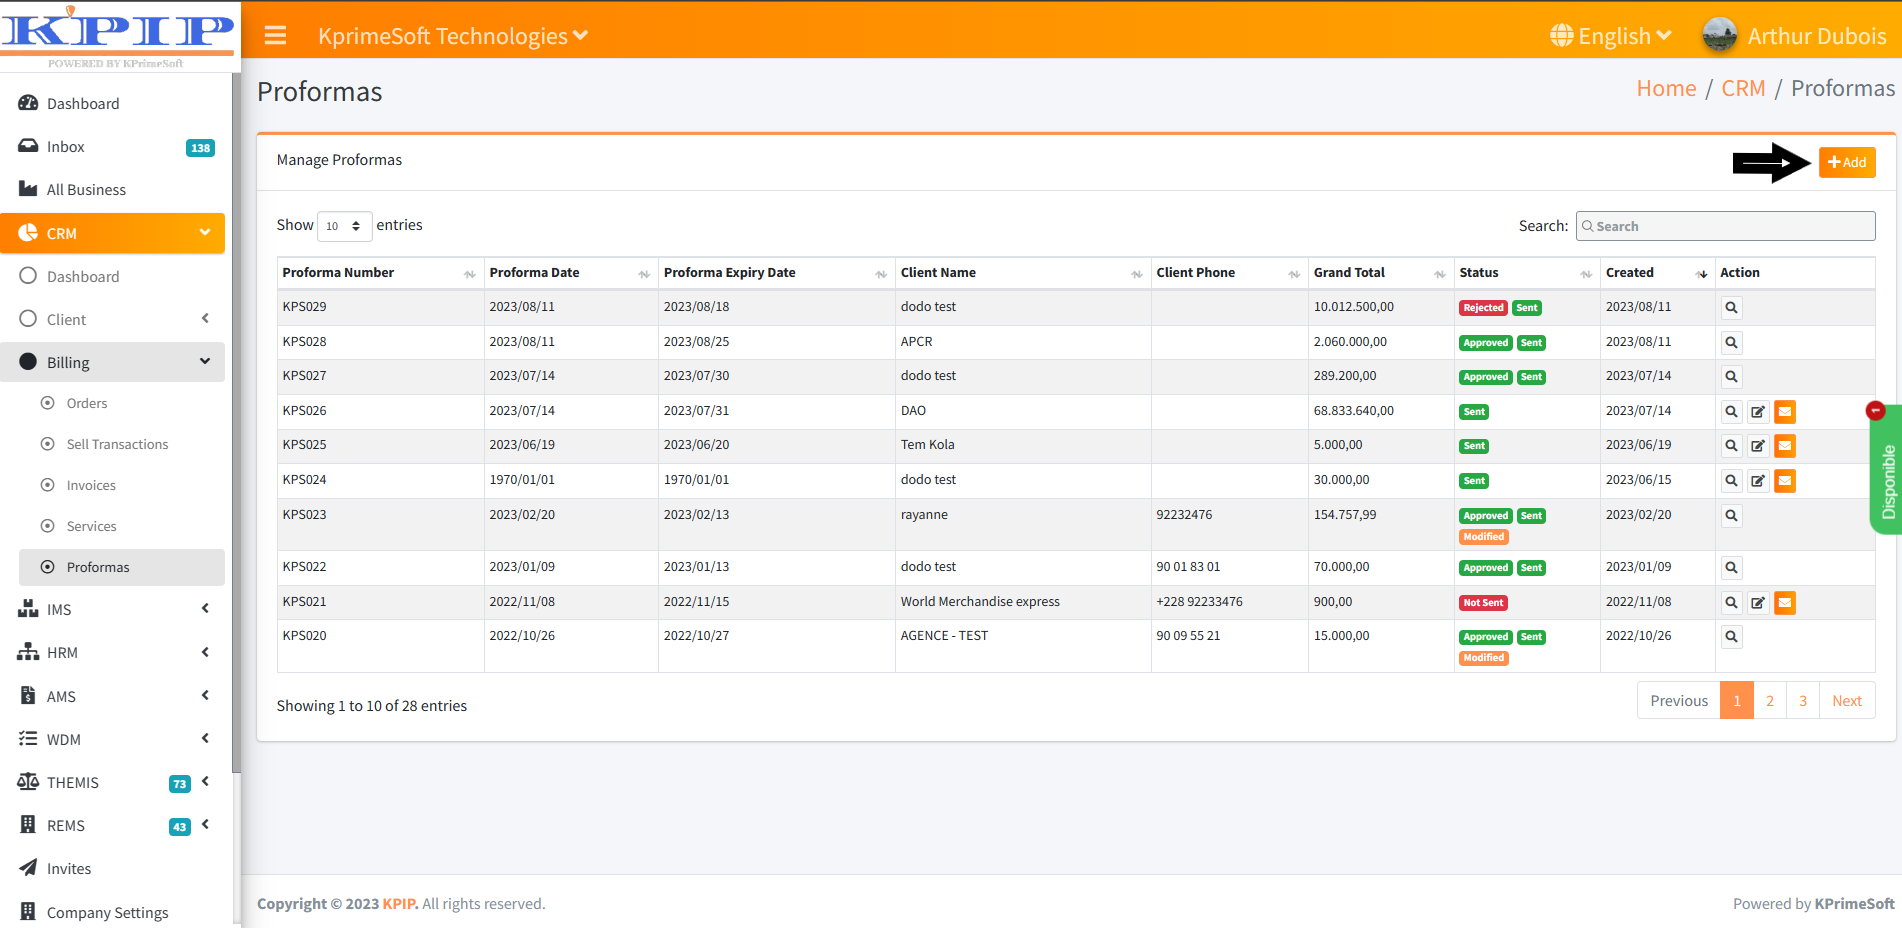
This section provides the option to create Proformas and review existing ones. This page offers access to the following features:
- A summary table.
- A search bar.
- An add button.
- An action button.
Please refer to the attached screenshot for reference.

1. THE SUMMARY TABLE
The table provides a visual summary of the proformas that have already been created, offering access to the following information:
- Proforma number.
- Proforma creation date.
- Proforma expiration date.
- Recipient and their contact details.
- Total amount of the proforma.
- Proforma status.

2. THE SEARCH BAR
The search bar enables us to search for a proforma that has already been created in our database.
3.THE ADD BUTTON
The purpose of the Add button is to generate a proforma. When you click the Add button, a form is created to generate the proforma. Please refer to the attached screenshot for clarification.
N.B: The fields marked with an asterisk (*) must be completed to validate the creation of the proformas.
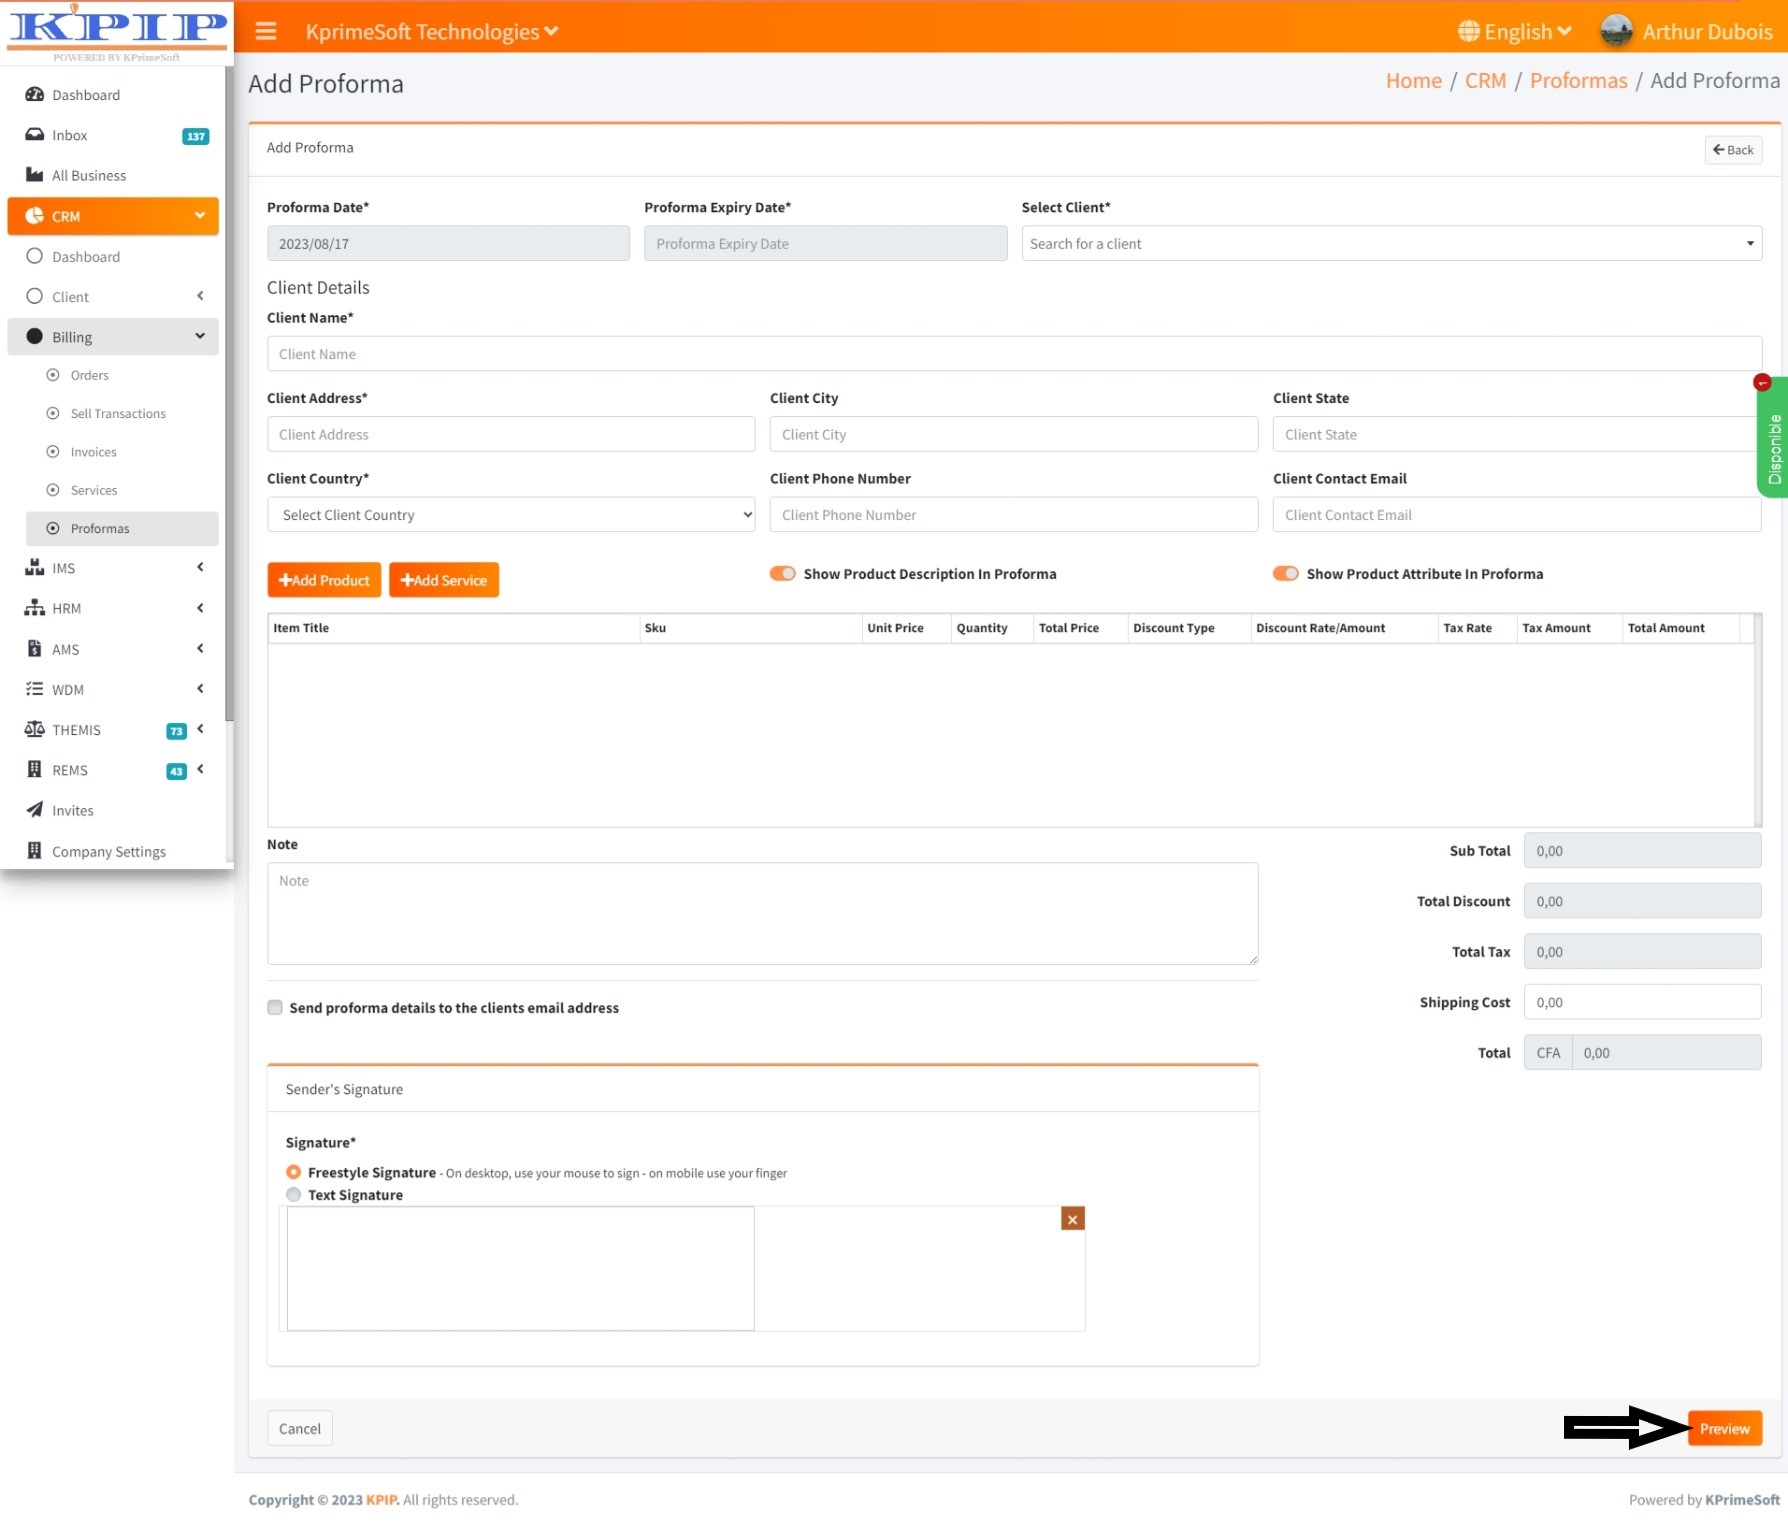
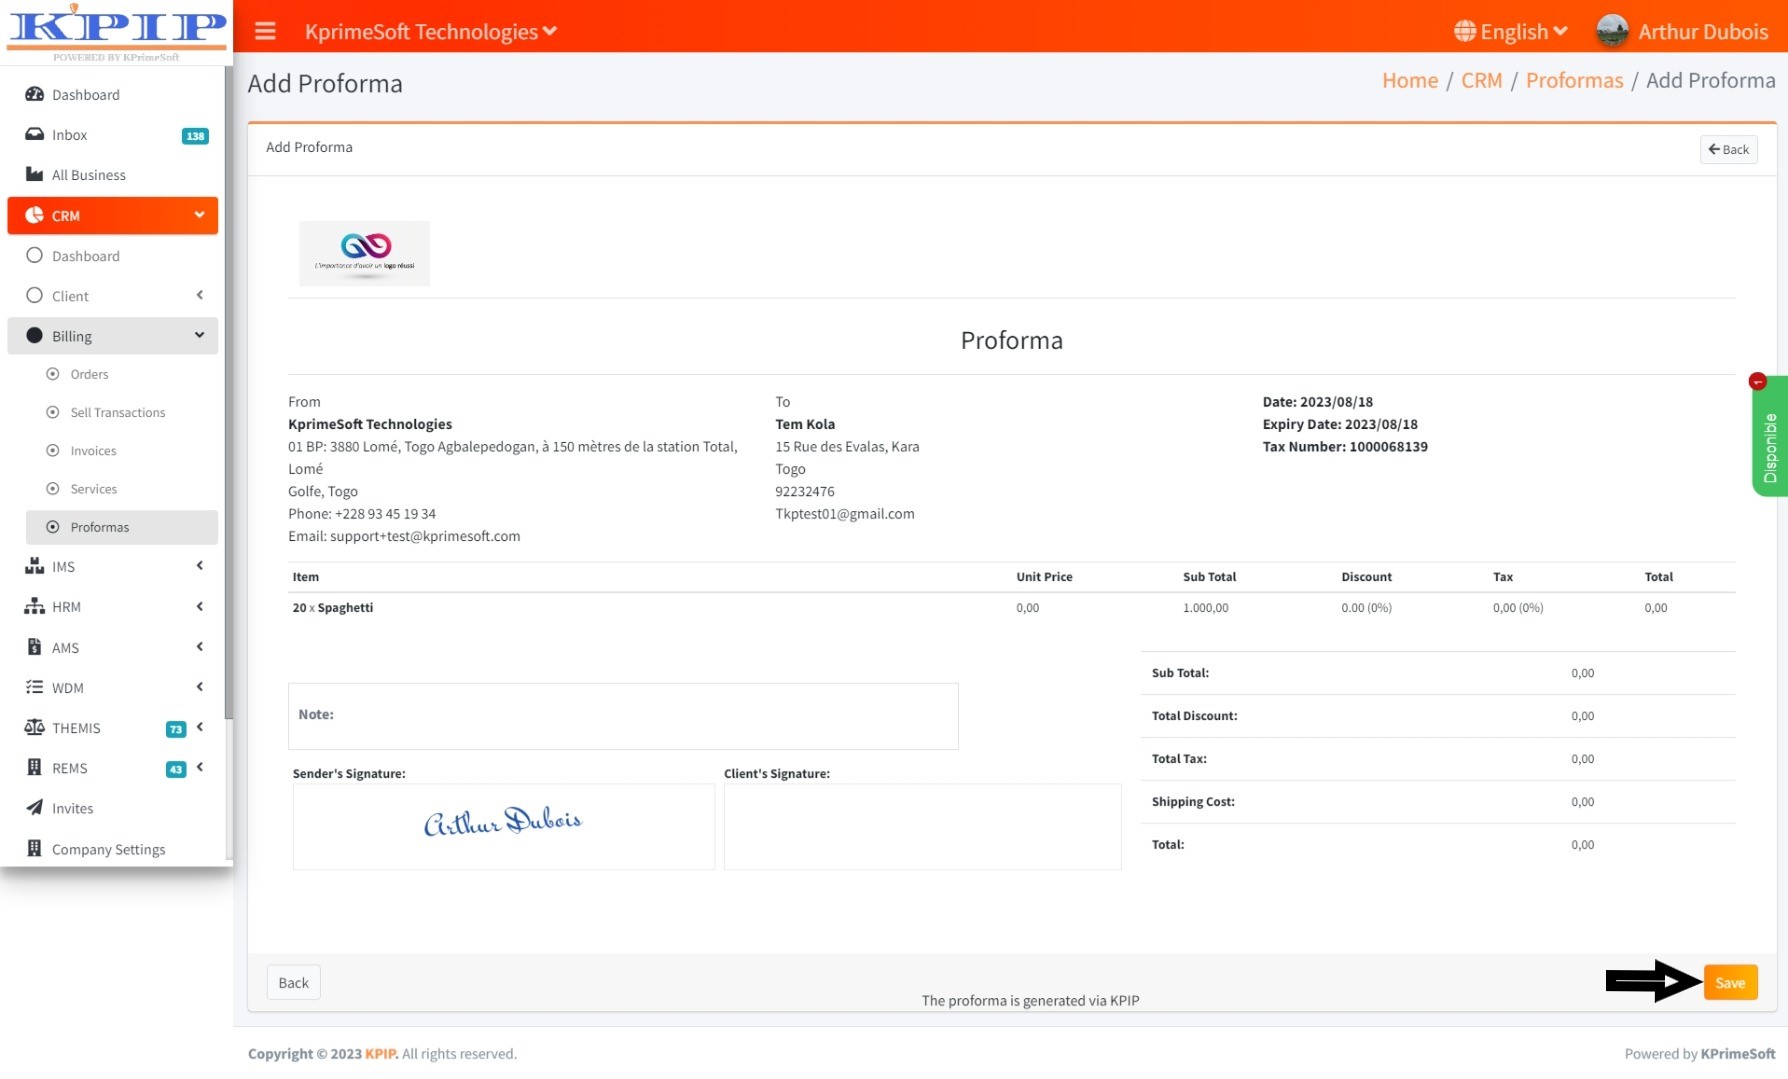
Once the form is completed, it must be submitted by clicking the "Save" button. Follow the screenshots for more information.
While creating the proforma, you have the option to check the box "send the proforma details to the client's email address" while confirming the creation of the proforma.
4. THE ACTION PART
The "Action" section enables us to execute three distinct actions:
- View
This step facilitates a detailed visualization of the proforma.
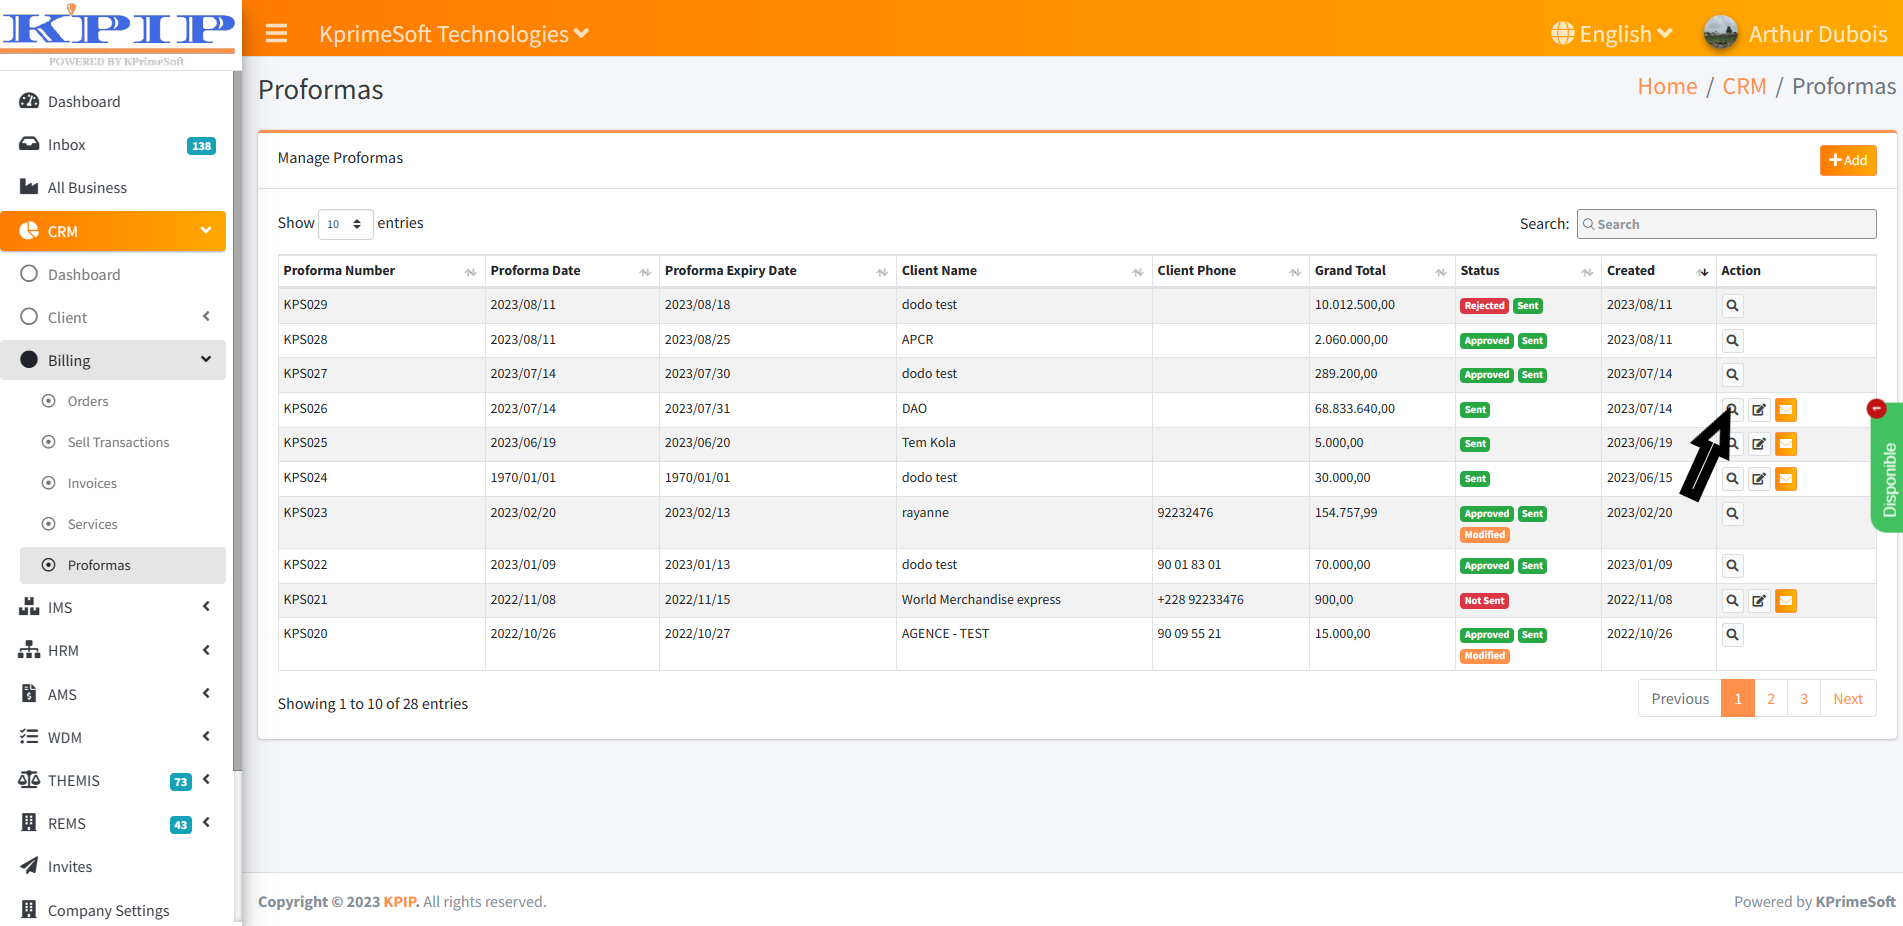
- Edit
This action assists in making changes to the proforma.
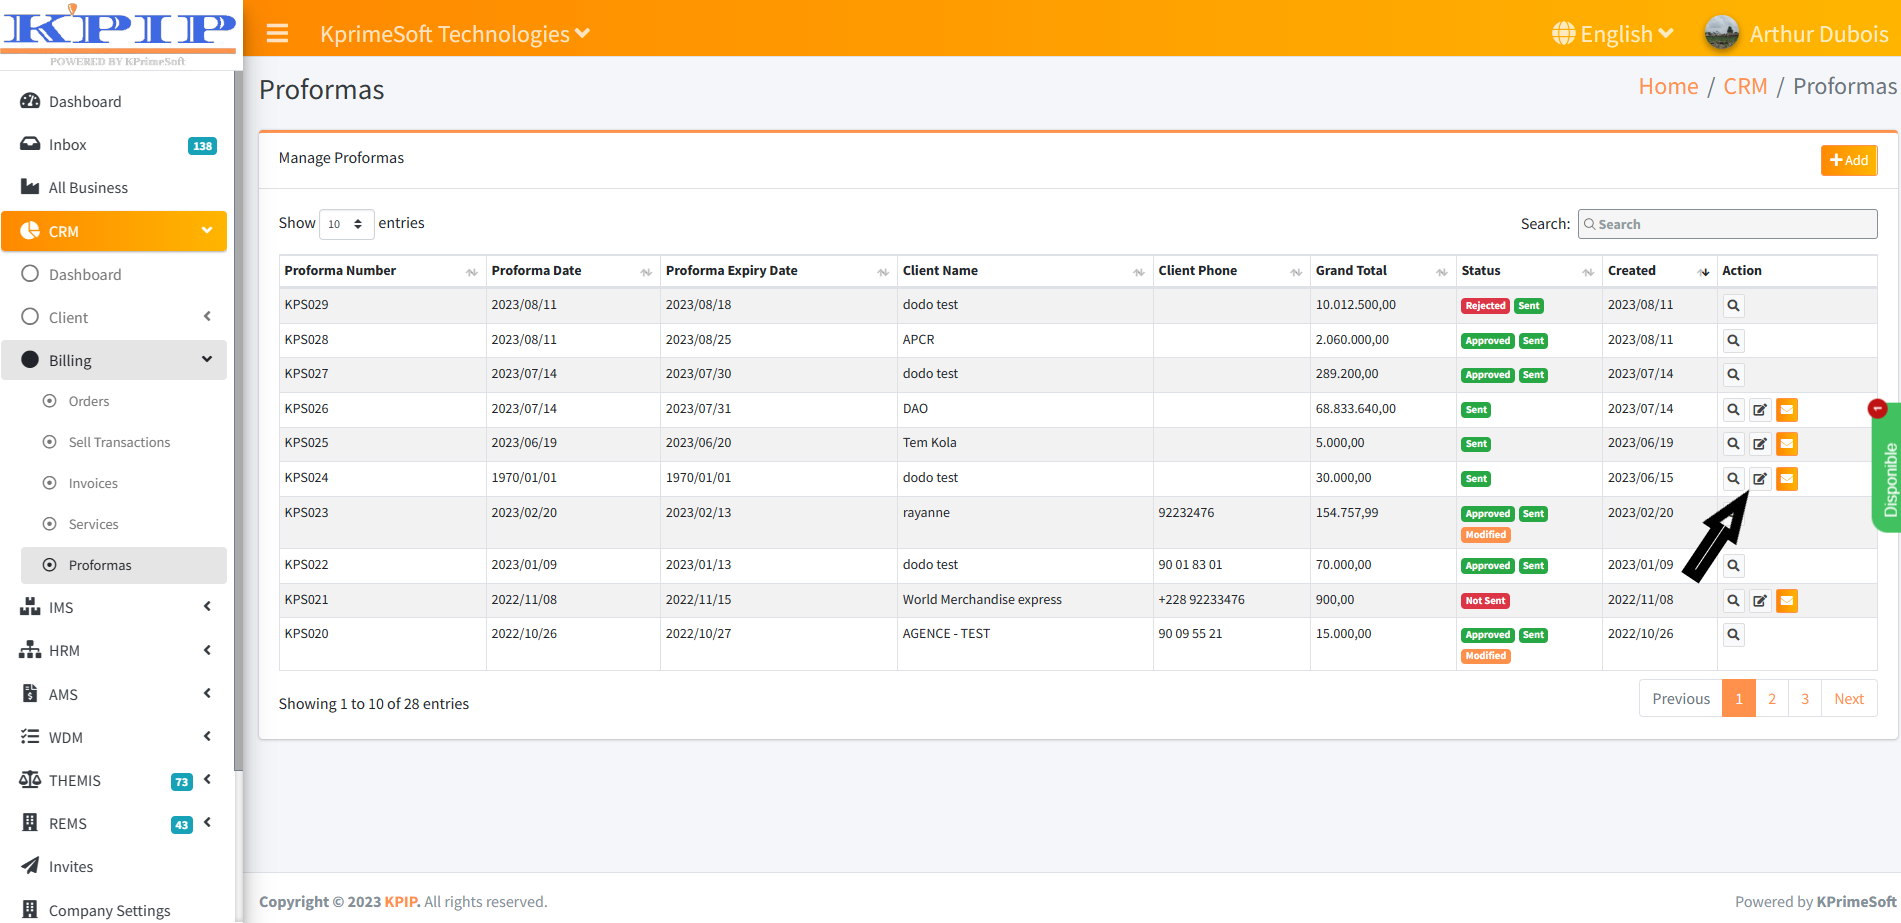
- Send the proforma by email
The proforma can be sent via email to a recipient client.
